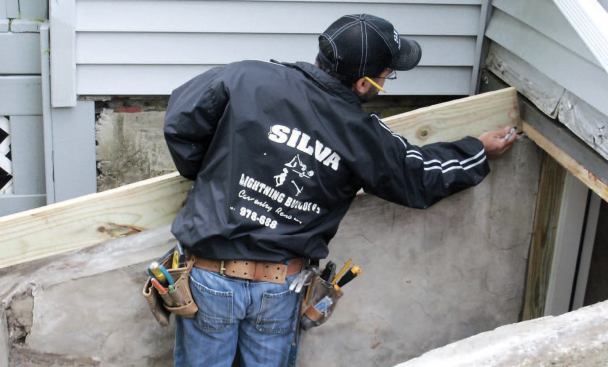
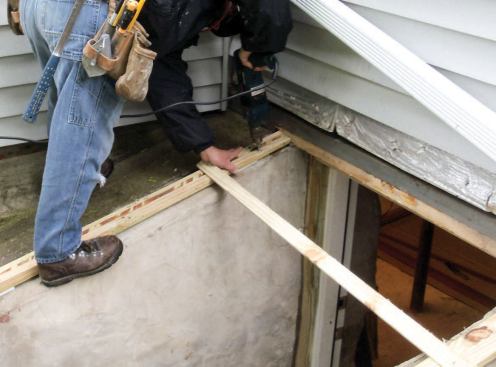
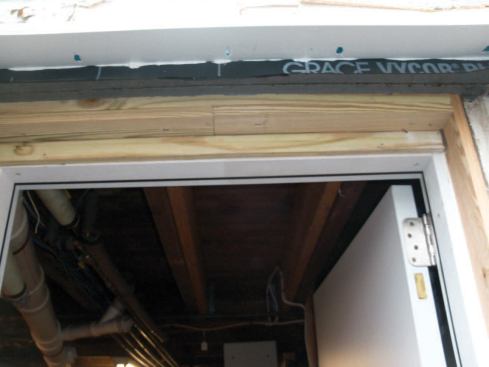
Existing Conditions: I occasionally get asked to replace baseme…
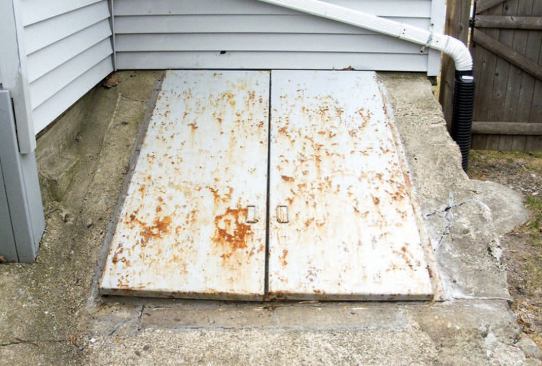
Existing Conditions: I occasionally get asked to replace basement access doors. Usually the doors are in pretty bad shape, and more often than not, the bulkhead itself is in need of repair. On the job shown here, for example, the concrete and stone base was beginning to crumble, and the top surface was cracked and uneven (B). When I first looked at the job, the gutter downspout terminated between the house and the bulkhead, to the left of the doors; it had been dumping water in the corner for years, saturating the masonry. By the time I returned to start work, the homeowner had taken care of this, directing the downspout to the right of the bulkhead and away from the house.
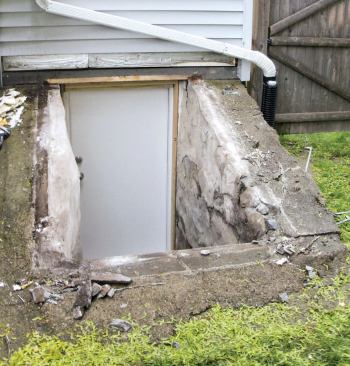
With conditions like these, I can't just pull off the old doors …
With conditions like these, I can't just pull off the old doors and install new ones. I want a flat, watertight surface to work from, so I make a base from pressure-treated lumber and trim it with cellular PVC. This gives me a secure attachment point and raises the unit a few inches off the concrete, which helps prevent rust and gives better protection against water intrusion.
Layout: I typically install Gordon Cellar Doors (gordoncellardoo…
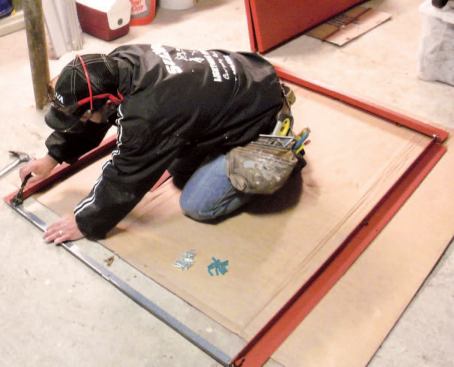
Layout: I typically install Gordon Cellar Doors (gordoncellardoor.com). The first thing I do is spread out the parts in a well-lit area to make sure every piece is accounted for. (If anything's missing, I don't start the job until I have it.) Then I preassemble the steel base so that I have the exact measurements I need for my pressure-treated frame.
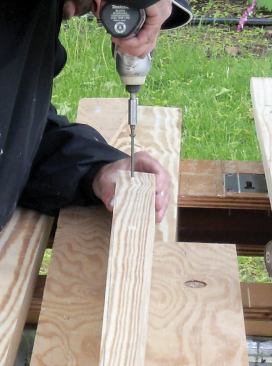
Sides: To avoid having to remove more than one course of the hou…
Sides: To avoid having to remove more than one course of the house's vinyl siding, I kept the wood base as low as possible at the top, marking the height on a treated 2×6.
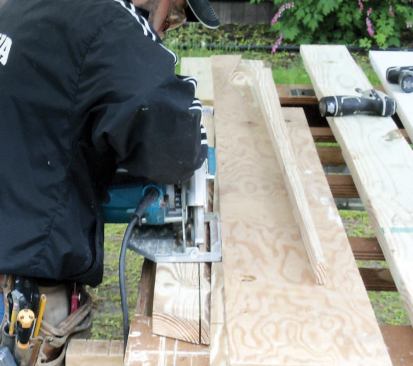
Sides: I cut the tapered side pieces using a plywood rip guide.
Sides: After checking the fit on the bulkhead, I glued together …
Sides: After checking the fit on the bulkhead, I glued together two of these tapered pieces to make each 3-inch-wide side piece.
Sides: Gluing together side piece.
Sides: For exterior woodwork, I use a DAP exterior adhesive and …
Sides: For exterior woodwork, I use a DAP exterior adhesive and coated deck screws, which have more holding power than nails and don't split the wood when installed.
Existing Conditions
I occasionally get asked to replace basement access doors. Usually the doors are in pretty bad shape, and more often than not, the bulkhead itself is in need of repair. On the job shown here, for example, the concrete and stone base was beginning to crumble, and the top surface was cracked and uneven. When I first looked at the job, the gutter downspout terminated between the house and the bulkhead, to the left of the doors; it had been dumping water in the corner for years, saturating the masonry. By the time I returned to start work, the homeowner had taken care of this, directing the downspout to the right of the bulkhead and away from the house.
With conditions like these, I can’t just pull off the old doors and install new ones. I want a flat, watertight surface to work from, so I make a base from pressure-treated lumber and trim it with cellular PVC. This gives me a secure attachment point and raises the unit a few inches off the concrete, which helps prevent rust and gives better protection against water intrusion.
A Solid Base of Pressure-Treated Wood
Layout
I typically install Gordon Cellar Doors (gordoncellardoor.com). The first thing I do is spread out the parts in a well-lit area to make sure every piece is accounted for. (If anything’s missing, I don’t start the job until I have it.) Then I preassemble the steel base so that I have the exact measurements I need for my pressure-treated frame (A).
Sides
To avoid having to remove more than one course of the house’s vinyl siding, I kept the wood base as low as possible at the top, marking the height on a treated 2×6, then cutting the tapered side pieces using a plywood rip guide. After checking the fit on the bulkhead, I glued together two of these tapered pieces to make each 3-inch-wide side piece. For exterior woodwork, I use a DAP exterior adhesive and coated deck screws, which have more holding power than nails and don’t split the wood when installed.
1
of 8
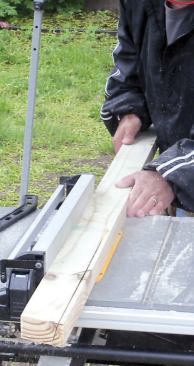
Bottom: I ripped the bottom pieces to match the angle of the sid…
Bottom: I ripped the bottom pieces to match the angle of the sides, again using two pieces to get a wider frame.
Bottom: I glued and screwed them together, as I did with the sid…
Bottom: I glued and screwed them together, as I did with the sides.
Bottom: I cut the laminated piece to length.
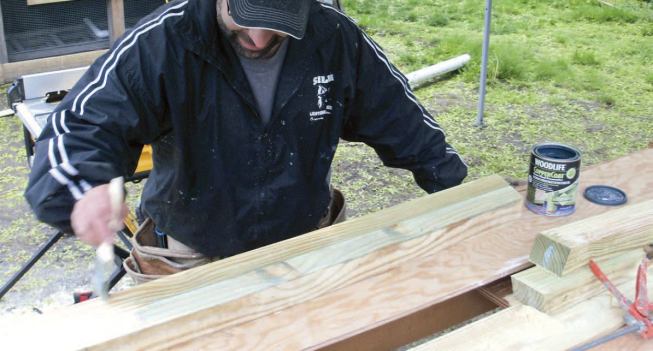
Bottom: I applied Woodlife Coppercoat preservative to all the pi…
Bottom: I applied Woodlife Coppercoat preservative to all the pieces to help prevent the wood from rotting, and the frame was ready to assemble.
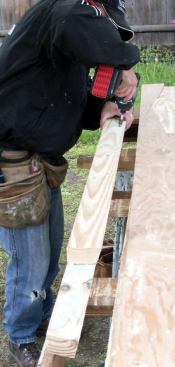
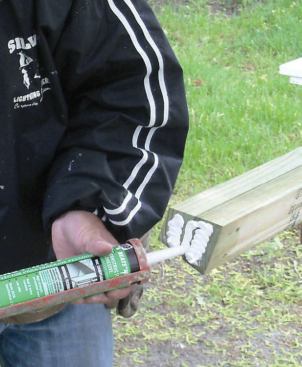
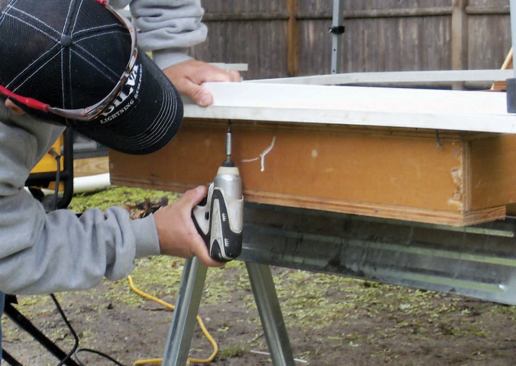
Assembly: I predrilled holes for long timber screws, then applie…
Assembly: I predrilled holes for long timber screws, then applied adhesive.
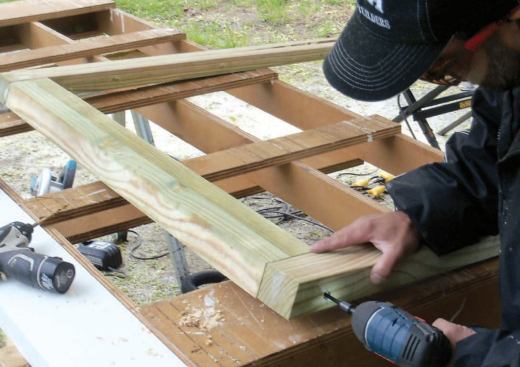
Assembly: I screwed the tapered sides to the bottom piece.
Assembly: A cleat tacked across the sides kept the frame from ra…
Assembly: A cleat tacked across the sides kept the frame from racking as I positioned it.
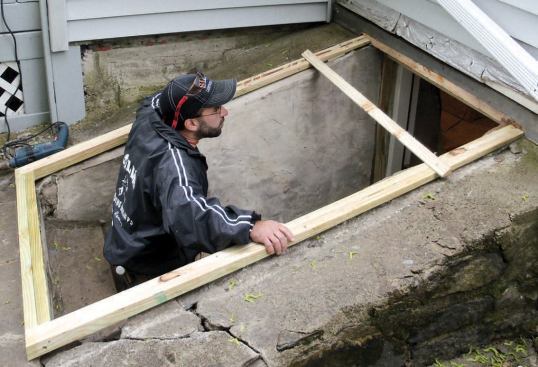
Assembly: After shimming the bottom with strips of PVC so that i…
Assembly: After shimming the bottom with strips of PVC so that it rested flat, I predrilled holes through the wood into the concrete and secured the frame with Tapcon screws. Given the poor condition of the concrete, this seemed safer than using powder-actuated fasteners.
Bottom
I ripped the bottom pieces to match the angle of the sides, again using two pieces to get a wider frame. I glued and screwed them together, as I did with the sides, then cut the laminated piece to length. I applied Woodlife Coppercoat preservative to all the pieces to help prevent the wood from rotting, and the frame was ready to assemble.
Assembly
I predrilled holes for long timber screws, then applied adhesive and screwed the tapered sides to the bottom piece. A cleat tacked across the sides kept the frame from racking as I positioned it. After shimming the bottom with strips of PVC so that it rested flat, I predrilled holes through the wood into the concrete and secured the frame with Tapcon screws. Given the poor condition of the concrete, this seemed safer than using powder-actuated fasteners.
Rotproof PVC Cap
1
of 6
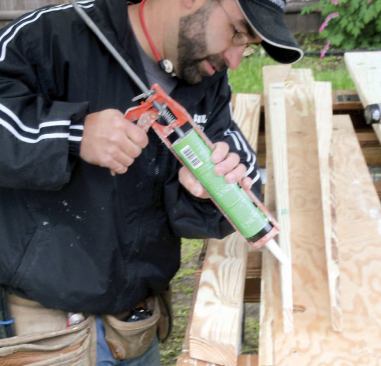
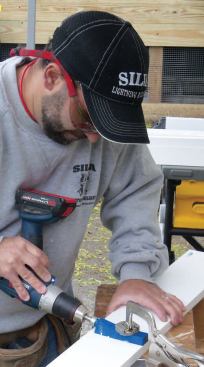
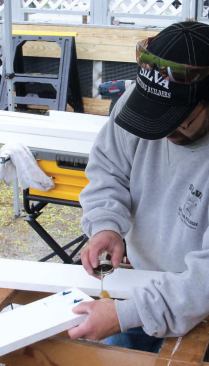
Assembling the Cap: These days I always use cellular PVC for ext…
Assembling the Cap: These days I always use cellular PVC for exterior trim projects — primarily Kleer (kleerlumber.com), as that's the brand my lumberyard stocks. I always use pocket screws as well as PVC glue for fast, strong joints. I mount a Kreg bench clamp to my portable worktable and use a Kreg Mini jig to drill the holes.
Assembling the Cap: I made the cap out of 3/4-inch stock and app…
Assembling the Cap: I made the cap out of 3/4-inch stock and applied glue.
Assembling the Cap: I screwed the top together.
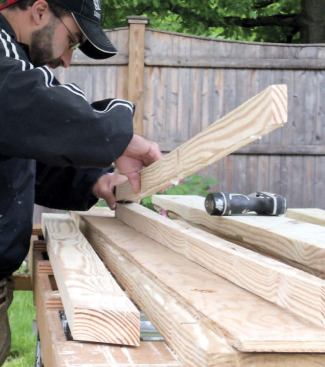
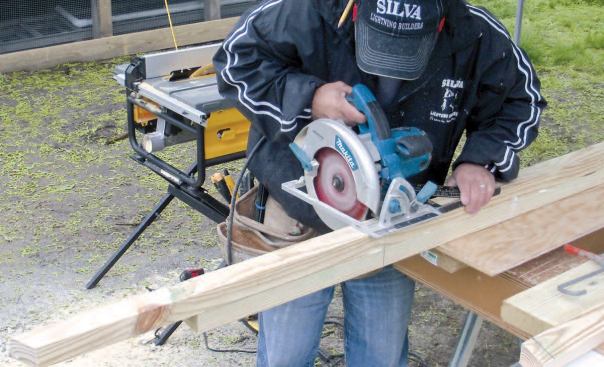
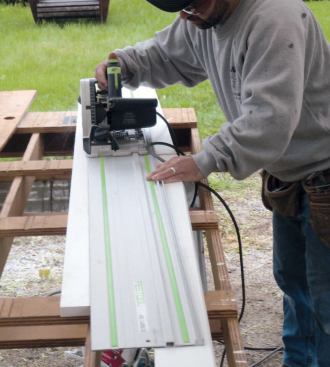
Assembling the Cap: To add a tapered vertical skirt to match the…
Assembling the Cap: To add a tapered vertical skirt to match the pressure-treated wood frame, I cut tapered sides with my track saw.
Assembling the Cap: I applied glue to the tapered sides pieces.
Assembling the Cap: I screwed the tapered side pieces to the top…
Assembling the Cap: I screwed the tapered side pieces to the top.
Assembling the Cap
These days I always use cellular PVC for exterior trim projects – primarily Kleer (kleerlumber.com), as that’s the brand my lumberyard stocks. I always use pocket screws as well as PVC glue for fast, strong joints. I mount a Kreg bench clamp to my portable worktable and use a Kreg Mini jig to drill the holes. I made the cap out of 3/4-inch stock, gluing and screwing the top together, then adding a tapered vertical skirt underneath to match the tapered pressure-treated wood frame. I cut the tapered sides with my track saw, then glued and screwed them to the top.
1
of 8
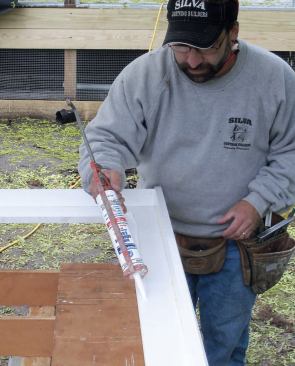
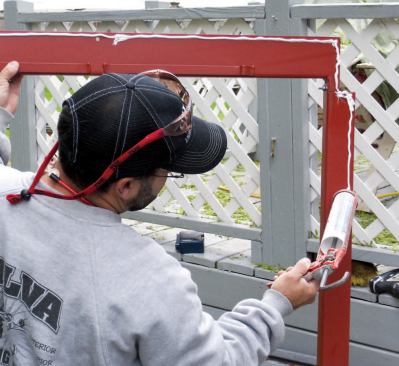
Attaching the Cap: After testing the fit, I applied thick beads …
Attaching the Cap: After testing the fit, I applied thick beads of Phenoseal adhesive caulk to the PVC cap.
Attaching the Cap: I applied glue to the wood frame.
Attaching the Cap: I positioned the cap, squared it up, and prep…
Attaching the Cap: I positioned the cap, squared it up, and prepared to screw it to the frame.
Attaching the Cap: Prepositioning the screws in their holes make…
Attaching the Cap: Prepositioning the screws in their holes makes the installation go fast. When screwing through PVC this way, I always predrill tapered countersunk holes, then glue in plugs that I cut on site from scrap PVC. The plug-cutter and countersinks I use are made by Fuller (wlfuller.com). I trim the tops of the plugs off with my Tajima 18-point flush-cutting saw, sand the surface, and end up with a perfectly concealed screw.
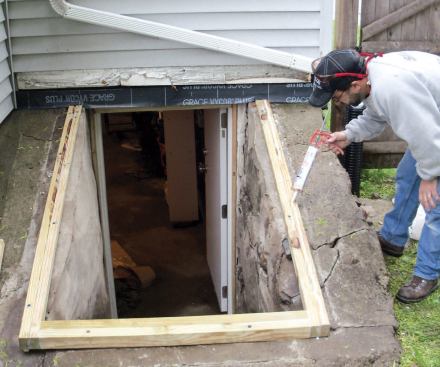
Attaching the Cap: I frequently see rot around the sill on unfla…
Attaching the Cap: I frequently see rot around the sill on unflashed bulkhead doors; applying a rubber flashing under the existing housewrap before installing the unit is critical. Before sliding the cap into place, I always apply a thick bead of Phenoseal to the top edge of the cap where it meets the house, then secure it with pocket screws against the membrane, leaving a watertight joint.
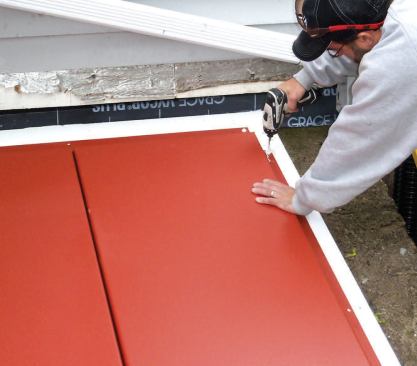
Installing the Access Cover: Before installing the door unit, I …
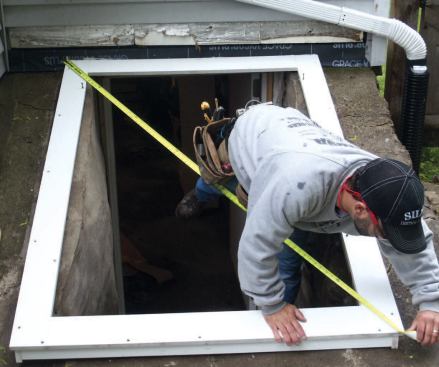
Installing the Access Cover: Before installing the door unit, I always do a dry fit, just in case. There were no problems with this one, so after running a thick bead of caulking along the sides and top of the metal frame, I set it in place. I don't caulk the bottom in case any water needs to drain out. When you adjust these units for square, it's important to have both doors on so that you end up with an equal space between them.
Installing the Access Cover: After getting the unit in position,…
Installing the Access Cover: After getting the unit in position, I predrilled holes into the cap, then followed with stainless steel screws. I've found that other kinds of screws always rust, leaving stains on the metal and concrete. Next I cleaned off the caulk squeeze-out between the metal unit and the cap, then added a strip of 3/4-inch PVC across the top, against the wall. I installed an aluminum cap flashing over the PVC strip, sealing it to the rubber membrane on the wall before reinstalling the vinyl siding.
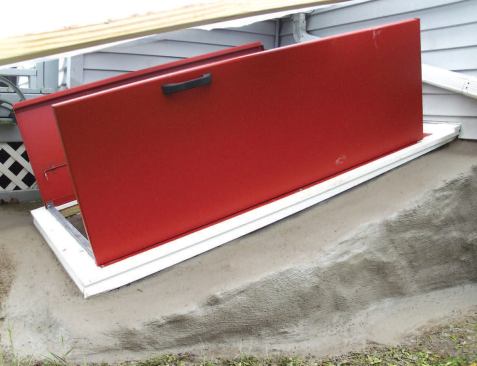
Installing the Access Cover: Finally, I parged the existing curb…
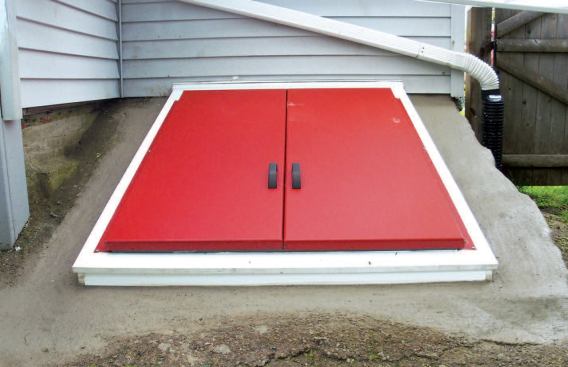
Installing the Access Cover: Finally, I parged the existing curb. First I removed loose mortar and repacked the larger gaps, then I brushed on Weldbond (weldbond.com), a bonding agent that seals the porous concrete and helps the new mortar adhere. I immediately followed with the new mortar. To close up the gaps between the curb and the PVC trim, I used a tube of Quikrete mortar caulk; I applied this to both the inside and the outside of the frame and cap. This project took me about two days, including the time to remortar the curb. Depending on the amount of extra repair work involved, bulkhead replacements typically sell for $1,500 to $2,500.
Attaching the Cap
After testing the fit, I applied thick beads of Phenoseal adhesive caulk to both the PVC cap and the wood frame. I positioned the cap, squared it up, and screwed it to the frame. Prepositioning the screws in their holes makes the installation go fast.
When screwing through PVC this way, I always predrill tapered countersunk holes, then glue in plugs that I cut on site from scrap PVC. The plug-cutter and countersinks I use are made by Fuller (wlfuller.com). I trim the tops of the plugs off with my Tajima 18-point flush-cutting saw, sand the surface, and end up with a perfectly concealed screw.
I frequently see rot around the sill on unflashed bulkhead doors; applying a rubber flashing under the existing housewrap before installing the unit is critical. Before sliding the cap into place, I always apply a thick bead of Phenoseal to the top edge of the cap where it meets the house, then secure it with pocket screws against the membrane, leaving a watertight joint.
Installing the Access Cover
Before installing the door unit, I always do a dry fit, just in case. There were no problems with this one, so after running a thick bead of caulking along the sides and top of the metal frame, I set it in place. I don’t caulk the bottom in case any water needs to drain out.
When you adjust these units for square, it’s important to have both doors on so that you end up with an equal space between them. After getting the unit in position, I predrilled holes into the cap, then followed with stainless steel screws. I’ve found that other kinds of screws always rust, leaving stains on the metal and concrete.
Next I cleaned off the caulk squeeze-out between the metal unit and the cap, then added a strip of 3/4-inch PVC across the top, against the wall. I installed an aluminum cap flashing over the PVC strip, sealing it to the rubber membrane on the wall before reinstalling the vinyl siding.
Finally, I parged the existing curb. First I removed loose mortar and repacked the larger gaps, then I brushed on Weldbond (weldbond.com), a bonding agent that seals the porous concrete and helps the new mortar adhere. I immediately followed with the new mortar. To close up the gaps between the curb and the PVC trim, I used a tube of Quikrete mortar caulk; I applied this to both the inside and the outside of the frame and cap.
This project took me about two days, including the time to remortar the curb. Depending on the amount of extra repair work involved, bulkhead replacements typically sell for $1,500 to $2,500.
Emanuel Silva owns Silva Lightning Builders in North Andover, Mass.