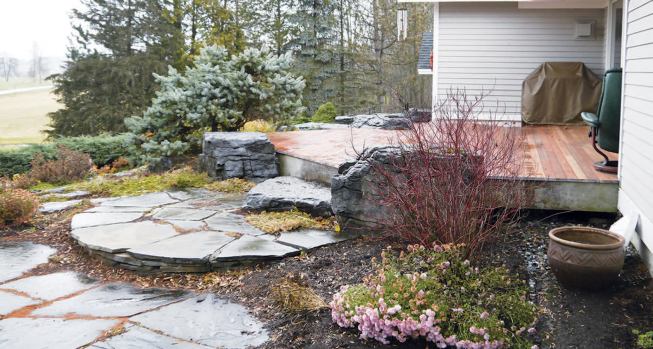
The original worn-out red meranti decking on this three-level de…
Last fall a homeowner asked me to prepare a quote for replacing some worn-out decking. The 15-year-old deck faced west and was exposed both to full sun and to heavy squalls that blow off Lake Champlain in this northwest corner of Vermont. The owners opted for the same wood species – 5/4×4 red meranti – but they wanted to preserve the natural finish more carefully this time around. They also wanted to avoid the nail pops that were common on the original deck. I did some hasty research on finishes and fasteners; my own concern was how to complete the job before serious winter weather set in.
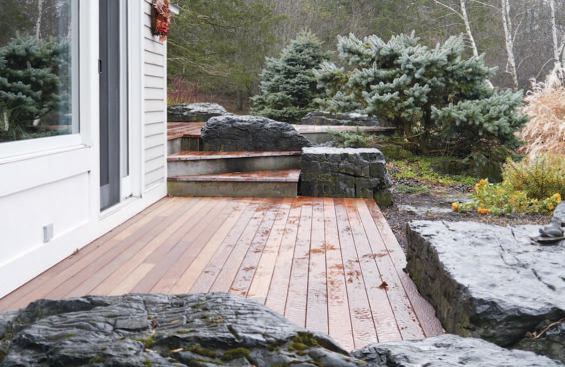
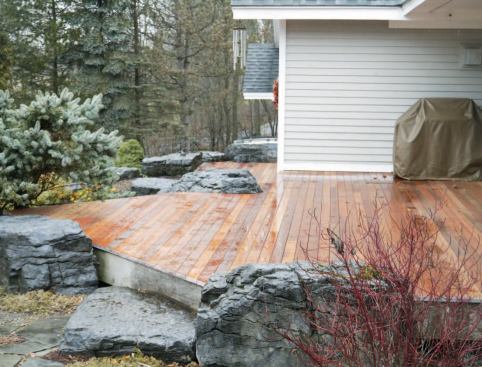
I divided the job into several tasks, some of which I assumed would require a helper. I figured the job would take a total of 120 man-hours. The 600-square-foot deck had three levels, and there were several rock outcroppings I would have to work around. The five-sided upper level had runs of 23 feet, and the lumberyard could supply lengths up to 19 feet, so I calculated material accordingly.
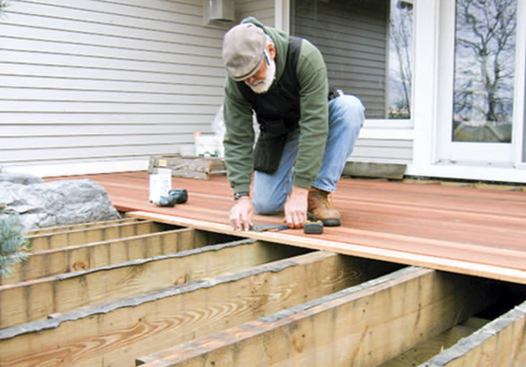
I looked at two fastening options: face-screwing with stainless steel trim screws, and hidden fasteners. Blind fasteners are aesthetically sleek, but they have drawbacks. Some require you to make grooves in each deck board; some screw diagonally into one edge of the decking, which seems to create potential for uplift on the unfastened side (this was confirmed by feedback from my local lumberyard). Some clips are plastic and might flex under pressure; others are stainless but costly. Some of the systems require fastening from underneath, which was not an option in this case because the joists are close to the ground. Still others require a bead of construction adhesive between the decking and joist to eliminate squeaks, which could be messy and would certainly add labor. With all of the hidden fastener systems I looked at, the decking would have to be spaced further apart than the 1/8-inch gap recommended by most wood decking manufacturers.
So I decided that trim screws were the best option, and estimated accordingly. I figured if they should work loose in the future, they could easily be retightened.
Story Poles Speed Production
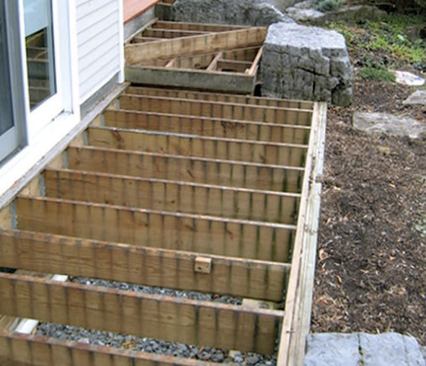
After winning the job, I revisited my plan. The deck had been built by a skilled local contractor; I had assumed the framing and layout would be good and wasn’t disappointed when I removed the old decking (see slide show). Many of the joists were fairly close to the ground – less than 24 inches above grade. I could see it would be unwieldy to straddle the joists and move around. Also, the rock outcroppings prevented me from setting up a cut station close by. The deck is nearly 60 feet long, and the only staging area for materials was another 20 feet beyond. I wasn’t looking forward to lugging the boards to the site, then moving them back and forth several more times for cutting and fitting.
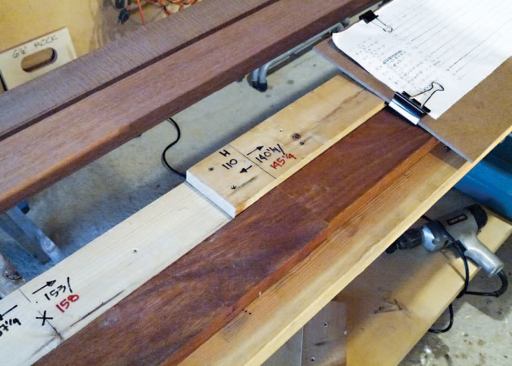
I wanted an approach that would reduce material handling, spare my knees, and save time. So I decided to create story poles for each of the three landings. The story poles would locate fastener pilot holes and determine cut lengths for each course. I would rough-cut the deck boards in my shop and predrill them, then take them to the site for final cutting and installation. I realized I’d have to be very careful with my story poles or I’d blow the potential labor savings. But the approach also meant that I wouldn’t have to hire a helper.
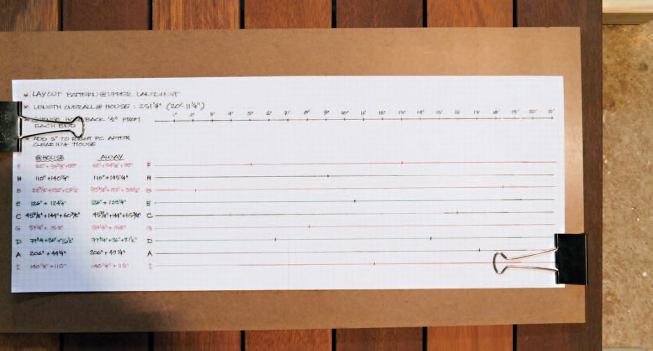
To make the story poles, I spliced 1x4s together to get the overall length for each landing. I laid each story pole across the framing and marked the centers of the joists at the first course, then checked the layout against the last course to make sure there was no drifting. I created a layout pattern that would offset the joints a minimum of 32 inches between courses; the pattern repeated every five or six courses.
Prefinishing
I encouraged the homeowners to protect the decking by having all the surfaces prestained before installation; I did this staining before any cutting. I considered several stain products, paying close attention – since red meranti is a hardwood – to each finish’s ability to be absorbed by the wood rather than just coating the top. We also wanted a product that would enhance the natural color of the wood. There are several products that claim compatibility with hardwoods, but on close reading of the preparation instructions and after talks with customer service reps, I realized that some of the claims are misleading and that the labor involved to make the product work would substantially increase the cost.
Although Mesmer’s (messmers.com) had the best customer support – and surface prep for its deck stain was easy – the instructions also indicated that we needed to wait six to eight weeks before application. It didn’t seem prudent to let the new deck suffer through a Vermont winter without any protective treatment, and neither the owners nor I wanted to split the job into two phases. So instead, I chose Ipe Oil (ipeoil.com). To make sure I got good penetration, I wanted to address mill glaze, which is a serious deterrent to absorption. Since I had over 2,000 lineal feet of decking to treat, I had it delivered to a local millwork shop, where they ran the boards good side up through a wide belt sander fitted with a new 120-grit belt – only an hour and a half of shop time.
The finish brushes on easily; excess is wiped off after 20 to 30 minutes. I set the decking on 8-foot-long sawhorses and could easily handle 25 boards at a time, sealing both faces and edges. (On site, I treated all cut ends with Bodyguard End Seal; bodyguardwood.com).
I also used this step of the process to remove culls and separate the boards by length.
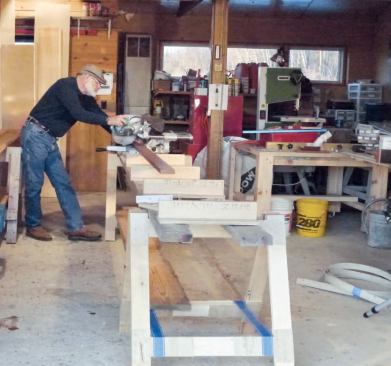
Cutting and Drilling
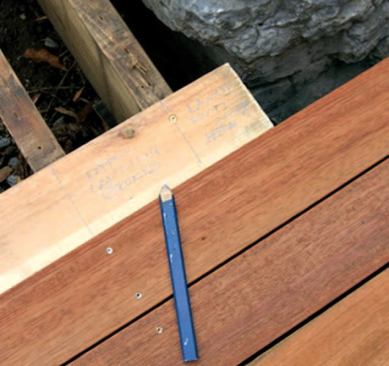
I set up two work areas in the shop. One, a 24-foot-long 2×12 on sawhorses, became my layout table. I fastened each story pole to the 2×12, then transferred the various course lengths to the decking, following a color-coded chart I created. Parallel to this stood my cutting station. I back-cut butting deck boards with a 2-degree angle, to help shed water and create a tight joint.
After cutting, I moved the boards back to the layout table and drilled pilot holes using a jig and a Smart-Bit countersink bit (starbornindustries.com). The Smart-Bit was sized for #7 stainless steel trim screws, and came with three pilot drill bits and a hex wrench for changing them out. Knowing that these tempered bits can snap easily if flexed, I had ordered extras but didn’t need them.
While they were still on the layout table, I flipped over the boards for each course and marked them with a letter corresponding to my layout chart. I then bundled the two or three pieces making up the individual courses using 6-inch stretch wrap and delivered them to the site, where I stacked them in order for the section I was working on.


