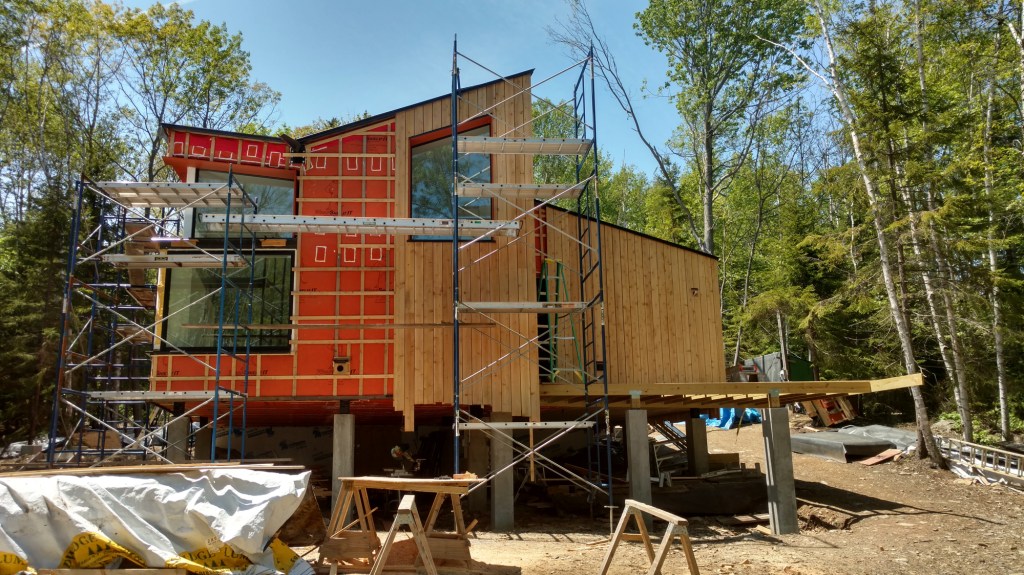
Since last fall, JLC has been following the work on a unique architect-designed custom home on Peaks Island, an off-shore neighborhood in the Portland, Maine, harbor. The building’s unconventional form and its ambitious high-performance energy goals have posed one challenge after another for lead carpenter Mark Pollard and his crew at Thompson Johnson Woodworks. This month, we take a look at the home’s “reverse board-and-batten” exterior, hand-crafted from locally milled 1×6 rough-sawn white cedar.
PERFORMANCE—AND LOOKS
Unlike conventional board-and-batten siding—where boards are fastened directly to the wall, and battens are nailed over the gap between the boards—with this technique, the narrow battens are applied first, and the wide boards are nailed on second.
“We were hashing out ideas in a design meeting with the architects [Portland-based Kaplan Thompson Architects], talking about types of siding,” Pollard explains. “First it was vertical shiplap, then it was regular board and batten, and finally we decided on reverse board and batten because of the extra airflow that it would provide behind the siding.”
By holding the wide boards an inch away from the wall, the battens would create air space behind the boards to help keep them dry and stable through seasonal weather changes. But Pollard adds, “The architects immediately liked the way the reverse method would create a little, 5/16-inch visual gap between the board edges, for shadow lines.”
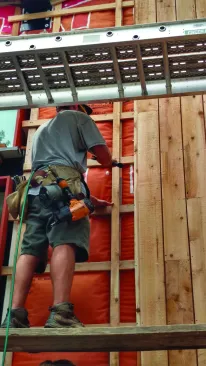
For a reverse board-and-batten cladding, the thin battens are nailed onto the wall first.
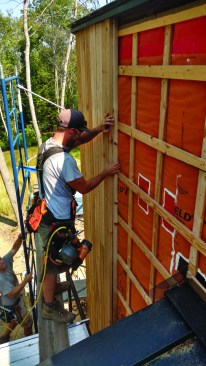
The wider boards are nailed over them, so the battens are behind the gaps.
The method creates an ample space between the siding and the weather resistive barrier, for enhanced drying ability—a significant concern in this deep, superinsulated wall assembly.
LAYOUT AND FASTENING
Right off the bat, however, the building’s high-performance wall system created complications for the siding application. The fat assembly consists of an inner 2×4 stud wall that’s sheathed with Huber Zip System oriented strand board (OSB) sealed at the joints with Zip tape. Outboard of this airtight box are fastened vertically run wood I-joists, with airtight, vapor-open WrapShield IT weather-resistive barrier membrane (vaproshield.com) stapled over the I-joists to create cavities for dense-blown cellulose insulation.
The original idea was to apply horizontal 1×3 strapping over the WrapShield and nail the vertical battens and boards to the strapping. Unfortunately, however, horizontal strapping couldn’t contain the insulation. In an early test on a dormer cheek, says Pollard, the insulation blower popped all the staples and blew the membrane off the I-joists, forcing the fiber into adjacent bays and pillowing out the wall surface. So the team had to backtrack and nail a vertical 1×3 over each I-joist to firmly secure the membrane to the wall, then attach the horizontal strapping over the vertical strapping, creating the grid shown here. “The horizontal strapping is really just there for nailing for the siding,” says Pollard, “but combined with the vertical strapping, it did help create a bigger air gap for drainability and drying.”
With that problem solved, nailing the siding in place was relatively straightforward. But there were a few time-consuming wrinkles, says Pollard. “We made a story pole for layout,” he explains. “And where we had multiple windows in a run of wall, we didn’t want to end up with a skinny little 1/2-inch piece of the 1×6 running down the side of a window. We were always trying to shoot for at least one-third of a board next to the window jambs. So in some places we had to thin down five or six courses from roughly 6 inches to 5 3/4 inches, to try to grow that last board that would land against the window. Kind of like you might do with clapboards or shingles—you adjust so you can hit the tops and bottoms of the windows. But we were doing it with the sides of the windows.”
VARIABLE MATERIAL
Thickness of the boards also turned out to be an issue, Pollard says. “The lumber company milled this wood at an inch and a quarter,” he explains, “but the pieces shrank differently. We had some that shrank down to 1 3/16 inches, and some that shrank down to an inch, depending on whether the piece was vertical grain, rift sawn, or plain sawn.” The reverse battens were ripped from the same 1×6 material, says Pollard—“so you had to be careful which reverse battens you put next to each other, because you could kick the 1×6 pretty heavily at an angle, if you weren’t paying attention.” Tall walls compounded the thickness problem, says Pollard: “We had to pay attention to the thickness of the battens and the thickness of the boards as we stacked them on top of each other.”
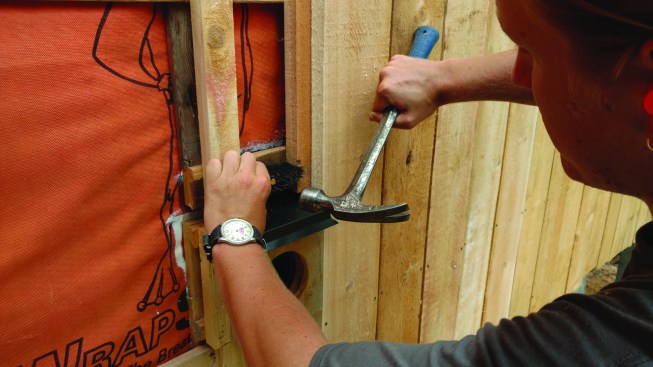
“The work went more slowly than we expected because of all the nailing,” adds Pollard. “Each reverse batten gets one nail per course of horizontal 1×3, and we alternated sides as we went up. And then when you nail the 1×6 on, it’s two nails every 16 inches, all the way up the wall—and you have to be careful, because you want those nails to visually line up. I bought 70,000 stainless steel ring-shank siding nails, and we used just over 50,000 by the time we were halfway done. It’s a shocking amount of nailing.”
DETAILING THE OPENINGS
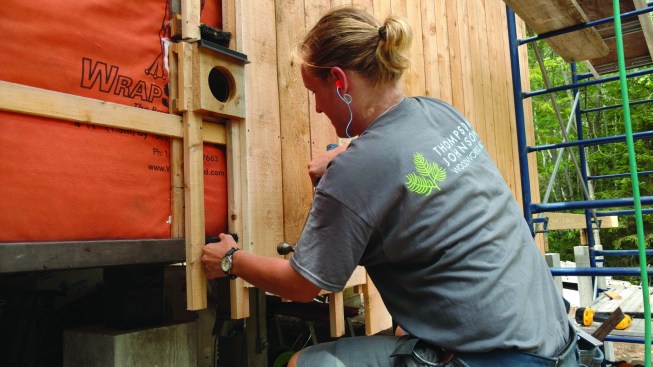
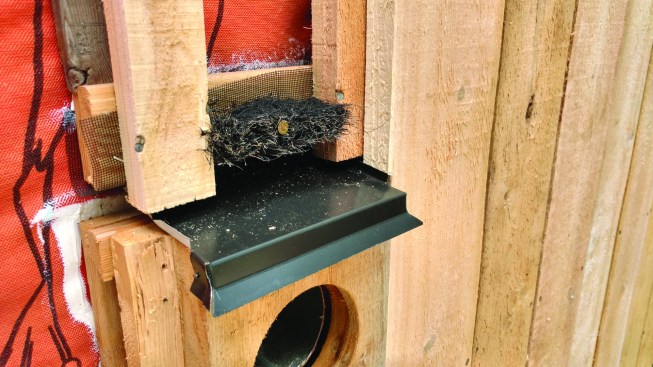
The rainscreen system requires a way for any windblown rain that penetrates behind the siding to drain out, and for air to enter at the bottom and exit at the top for drying. Openings have to allow good airflow and drainage, but without letting bugs in. This makes for a complicated detail above windows and penetrations. The roofing company had supplied some pre-bent coated steel flashing, says Pollard: “We used the steel roofing material, and it was too heavy for our brake to handle.” But Pollard did site-bend the ends of the flashing pieces after cutting them to length.
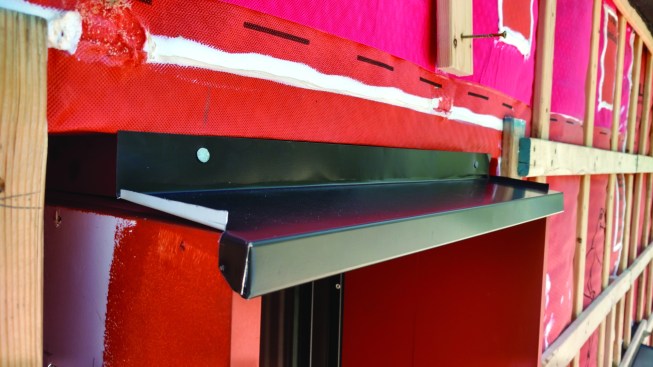
At window heads, the crew applied pre-bent flashing, supplied by the roofing company and made with the same heavy-gauge steel as the roof.
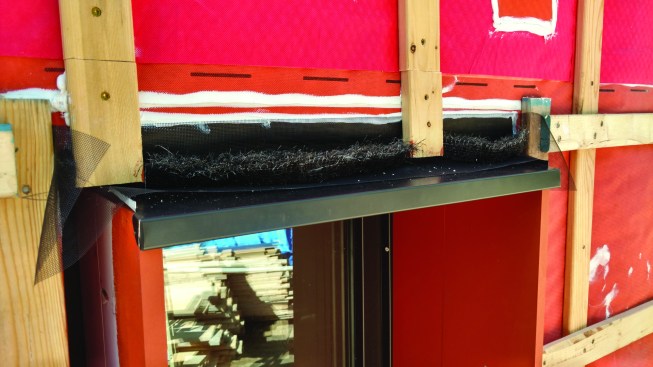
Nylon insect screening and Roof Saver ridge-vent material were installed between the vertical battens (behind the horizonal batten) to protect the air inlet from bugs.
Then the screen was wrapped around and stapled to the horizontal batten.
To flash above windows, the crew taped each piece of flashing to the WrapShield membrane, then caulked the tape joint for good measure. Then they applied insect screen to the wall and nailed the vertical strapping over the screening. Next they placed a piece of Roof Saver ridge-vent material, cut to fit, between the battens, then installed a piece of horizontal strapping over the Roof Saver, and finally folded the screen material under the opening and up onto the horizontal batten. The result is a screen-protected drain opening and air inlet behind the horizontal strapping.
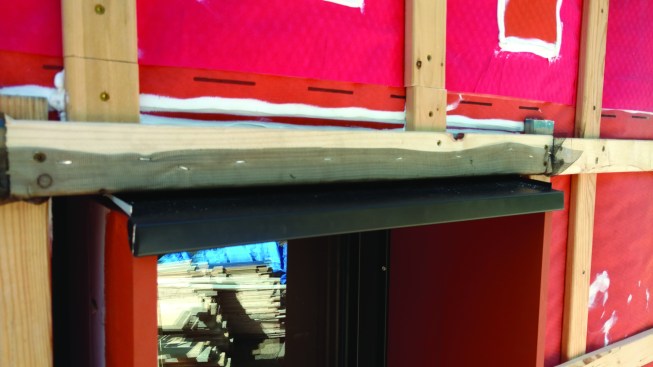
This still leaves another air opening to protect behind the full-width boards, between the reverse battens. At this gap, Pollard decided not to use screening, which might be visible through the small gap between boards. So the crew nailed small pieces of Roof Saver into the gaps, sized so that the material would get slightly compressed as the boards were nailed on.
The reverse board-and-batten method creates a substantial air space behind the wood siding, allowing excellent seasonal drying potential. Air inlets behind the horizontal strapping are protected with screening.
Gaps between the strapping are protected using Roof Saver vent material, but no screening, in order to keep screens from being visible at the spaces between boards.
None of these details, notes Pollard, were drawn on the architectural plans. But early on in the project, Pollard and his carpenters built a full-scale mockup of the whole wall assembly using the actual materials. The model included the floor-to-roof and roof-to-wall structural connections, and as the job progressed, the crew added siding details to the mockup.
CONNECTING TO THE SITE
As the project nears completion, the cladding system is serving an interesting design function: The rough material, applied in its distinctive way, is helping the building with its strikingly original forms to blend into its rustic setting on a back road on a wooded island. “At this point,” says Pollard, “we can step back and look at it, and we’re thinking, ‘this is pretty cool.’”


