In the area where I work, many of the existing homes have cedar shingle siding. Currently costing more than $225 per box, the prestained No. 1 grade R&R (rebutted and rejointed) red-cedar shingles that I used on this project are a premium siding material, so they’re not as commonly used in new construction as they once were. But I renovate and remodel a lot of existing housing stock and often have to match the home’s siding when modifying a wall for a new door or window, or when building a new porch, deck, or addition. It makes sense to use installation details that ensure that this premium building material lasts as long as possible.
In this article, I’ll focus on the corners. Some shingle-sided homes have corner boards, but another traditional option—especially here in New England—is to wrap the shingles around both the outside and inside corners. In addition, the old homes in our area often have siding that is flared out over the foundation at the base of the wall, instead of terminating at a water table or remaining in the same plane as the wall. This complicates shingle installation a little bit, especially at the woven corners, but it looks great and is actually a practical detail for homes with irregular fieldstone foundation walls. With a careful approach and a few special tools, it’s not difficult to install flared, woven cedar-shingle corners.
Underlayment
I’ve dug into plenty of walls that lacked any 15‑lb. felt paper (the old-school WRB) or building paper between the shingles and the sheathing, without finding any significant water damage. That’s because shingles with 5 inches or so of exposure provide triple coverage, an effective way to shed water. But I always install building paper over the sheathing as required by code, first covering any inside or outside corners with peel-and-stick flashing membrane.
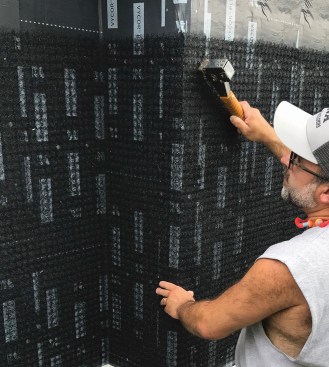
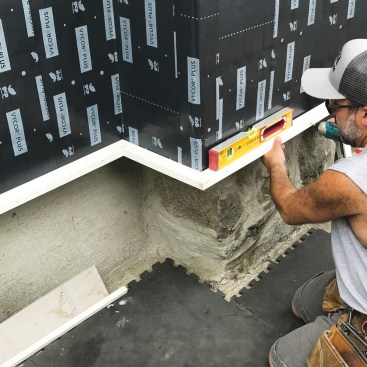
After prepping the inside and outside corners with an additional layer of peel-and-stick membrane, the author staples up Cedar Breather to provide a space for airflow between the shingles and the WRB.
On the corner shown here, I installed 12-inch-wide Vycor Plus vertically, overlapping the inside and outside corners by 9 inches on one side and 3 inches on the other. Then I ran a full width of Vycor up the wall at the corners to cover the 3-inch legs. On a larger wall section, I would detail the corners and then cover the rest of wall with Blueskin SAF housewrap.
Next, I installed Cedar Breather, a nylon matrix that creates a gap between the back of the shingles and the WRB. This rainscreen detail allows the shingles to quickly dry out from both the inside and outside, which helps to prevent them from curling and cracking.
Adding the Flare
As far as I know, there is no uniform angle for the flared shingle detail at the base of the wall on old homes, so there was a bit of trial-and-error in my method. I started by ripping a couple of pieces of 1-by PVC trim to make a pair of upper and lower furring strips—one measuring 1 inch wide and one measuring 2 inches wide—to kick out the shingles. Then I mocked up the flare detail on my workbench to find the proper bevel angle for the furring strips.
A mock up of the flare detail helped the author determine the 15-degree bevel angle on the PVC furring strips.
When a shingle is pressed against the furring strips to make the flare, the back of the shingle contacts only the top edge of the furring strip. So after a couple of trial cuts, I figured out that a 15-degree bevel on the edge of each furring strip provided the proper angle for full contact.
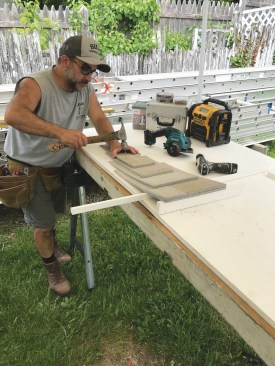
After ripping the upper and lower furring strips and cutting them to length, I assembled them as single units on my workbench, rather than installing them one piece at a time on the wall. This made it easier to square up the assemblies, level them, and shim them as needed as I screwed them to the wall.
The author glued and screwed the furring strips together into an assembly.
This made it easier to square the furring strips up and keep them level during installation.
There are a couple of reasons why I made the furring strips from PVC rather than wood trim. For one thing, PVC won’t rot; but even more importantly, it holds the ring-shank siding nails that I use to install the shingles tenaciously, much more so than eastern white pine does. This is especially important with flared shingles, which are under some tension that tends to make the nails want to withdraw from the substrate.
Starter Course
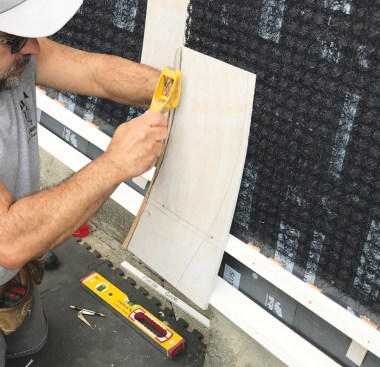
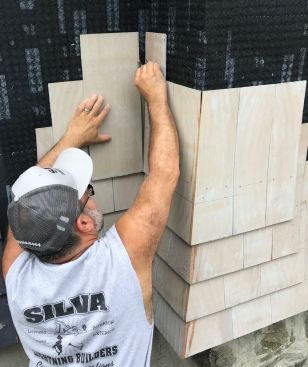
I always begin with an inside corner and work from the inside out, as it is much easier to run an outside shingle long and trim it to fit than it is to cut an inside shingle to the exact size needed. Before installing any shingles, though, I scribed a pair of lines across the butt end of each one to mark the 5-inch exposure line, and to mark the 5 3/8-inch fastener location above the butt. Then I tacked the first (right-hand) shingle in place so I could use it to scribe the flare on the adjacent (left-hand) shingle with a compass.
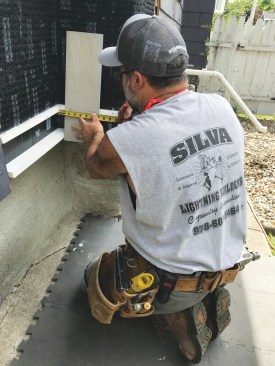
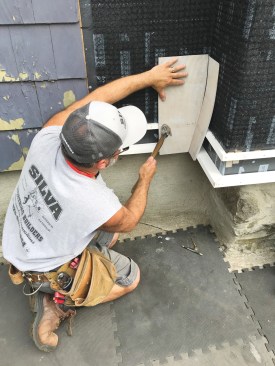
The author trims enough of the butt of the first inside corner shingle so that the left edge is tight to the wall.
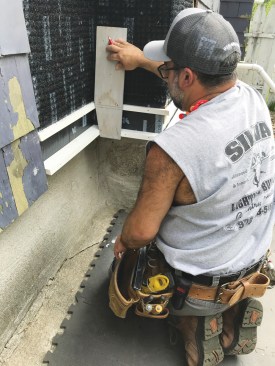
After the first shingle is tacked in place, it is used to help scribe the curve on the opposing shingle.
A compass is used to scribe the flare on the opposing shingle.
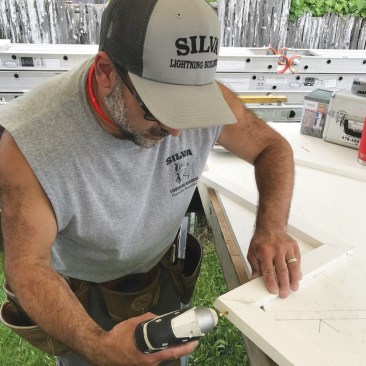
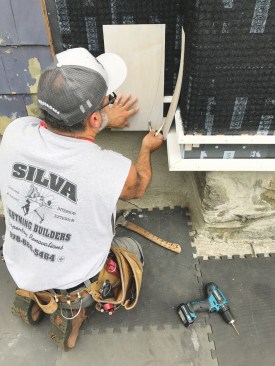
Until recently, I would have used a jigsaw to cut the shingle just off the scribe mark. But lately, I’ve been using a Makita 12-volt Max CXT 3 3/8-inch cordless circular saw for trim cuts in 1-by stock, including curves like this, because it’s faster and makes a smoother cut. Then I pared the cut back to the scribe line with a Stanley Surform 21-115 shaver, a versatile and virtually indestructible tool that belongs in every toolbelt. Unlike a block plane, this tool can also be used to carve out concave curves, an ability that’s needed for the shingles on the outside corner.
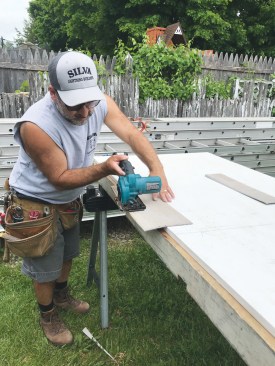
Then he cuts the shingle to the scribe line with a small cordless circular saw, which has a 3 3/8-inch-diameter blade that allows him to follow the curve.
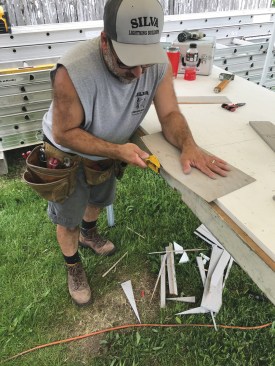
To clean up the cut, the author uses a Stanley Surform shaver, which – unlike a block plane – will work on both concave and convex surfaces.
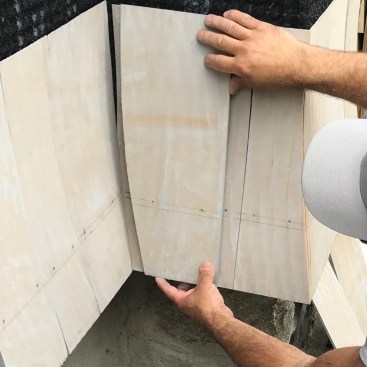
To roughly scribe the back of the first outside-corner shingle, I used a flexible 3/8-inch-by-3/4-inch batten ripped from PVC stock. After cutting and shaving that shingle to the scribe line and tacking it in place, I pressed the adjacent shingle into position against the furring strips and scribed the back of that one. After cutting and trimming this second outside-corner shingle to the line, I nailed it to the furring strips. Then I cleaned up the corner where the two shingles overlapped, using the Surform.

On the outside corner, a flexible batten is used to scribe the back of the first starter shingle, which is pressed in place against the furring strips.
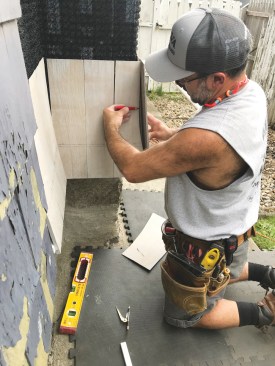
After the first shingle is trimmed to the scribe line and tacked in place, it is used as a guide to scribe the back of the opposing corner shingle.
After installing the remaining outside corner shingle in the starter course, the author uses his Surform tool to smooth the joint.
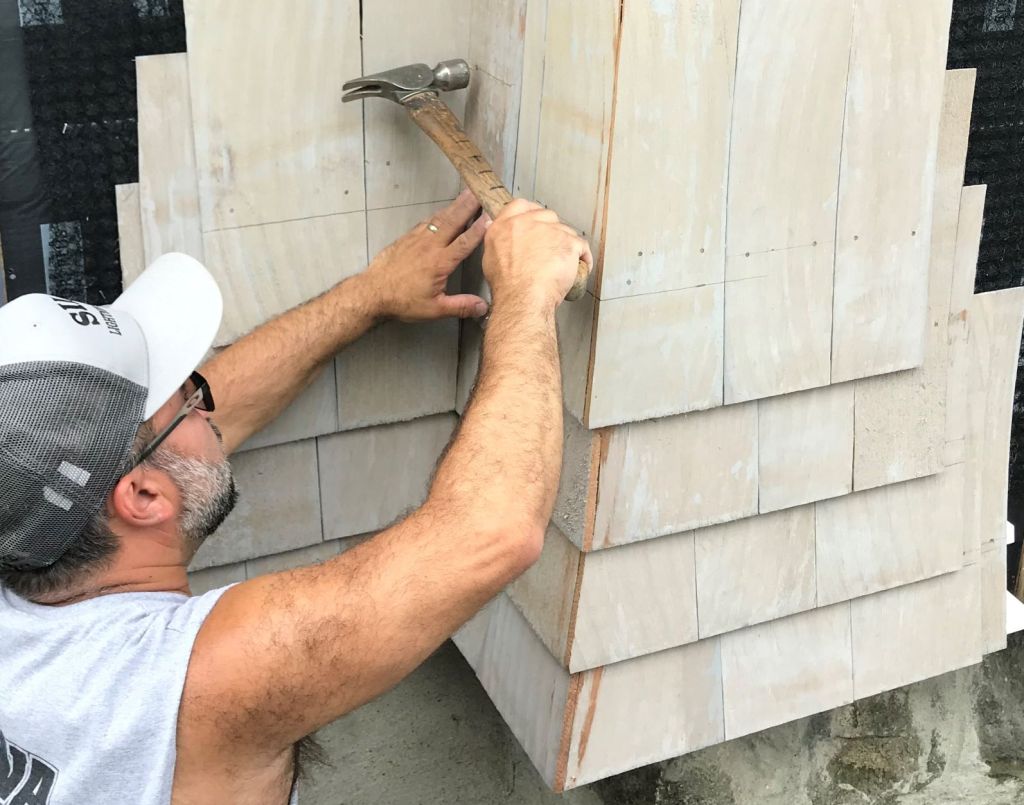
Nailing
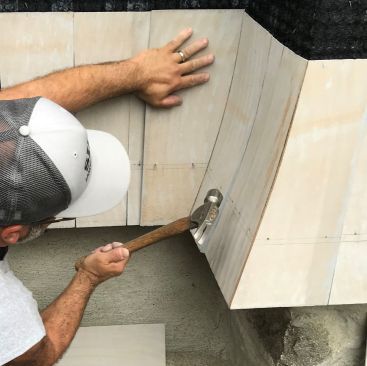
There’s nothing fast about weaving shingle corners, including the nailing. For one thing, I carefully hand-nailed these shingles to the wall. To prevent cracks and splits, I drilled holes for all of the 2-inch stainless steel ring-shank fasteners, using the 5 3/8-inch scribe line to accurately place the holes in the right location, 3/8 inch above the exposure line and at least 3/8 inch away from the edge of the shingle.
On the flared portion, I drove the nails in as close to simultaneously as possible rather than nailing off one side at a time, tapping in one nail and then the other until they both were driven home. Otherwise, the shingles would have split. As I move up the wall and the shingles flatten out, predrilling isn’t as critical, but I still usually hand-nail the shingles rather than fire up a siding nailer. As I said, there’s no quick way to install shingle siding.
After the starter course was nailed off, I duplicated the scribing procedure with the first course of shingles, starting from the inside corner again but instead scribing the shingle on the opposing (right-hand) corner. This created a water-shedding overlap at the inside corner.
As I installed the field shingles, I overlapped each joint on the starter course by at least 1 1/2 inches. At the outside corner, I again reversed the scribing sequence so that the woven shingles would properly overlap the starter-course shingles.
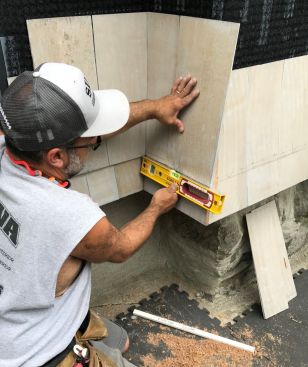
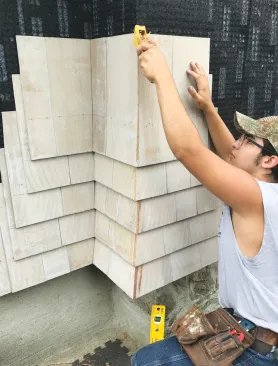
I continued the same sequence as I installed each course of shingles, working from the inside corner out and using a spirit level to keep the courses on track. Occasionally, I nailed together a corner shingle joint that had opened up, carefully drilling a small pilot hole through the face of the outer shingle into the edge of the opposing shingle to keep the nail on track and keep it from splitting either shingle. But in general, shingles with only a 5-inch exposure lay flat on the wall, and this step isn’t as necessary as it is with shingles that have a wider exposure.
After I finished weaving the corner, I came back and lightly cleaned up the shaved joints with 120-grit sandpaper as needed, then touched everything up with matching stain.
Photos by Carter Silva


