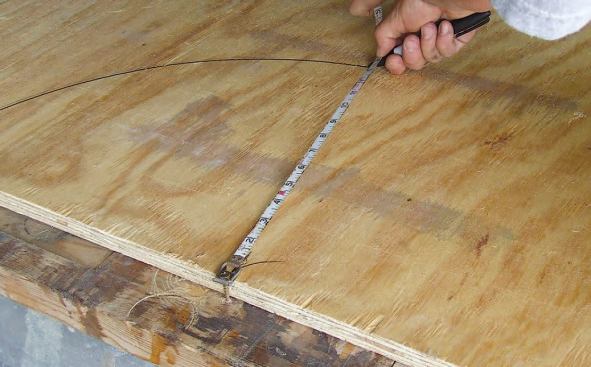

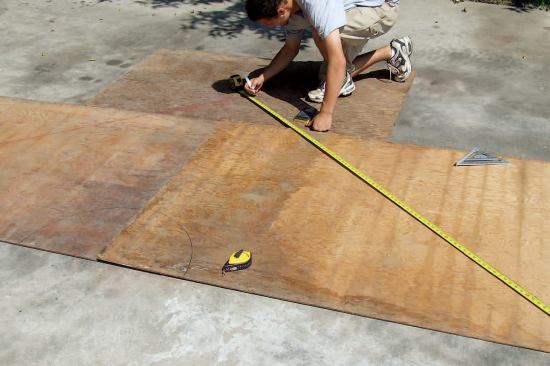

After stripping the old siding, I measured down perpendicularly …
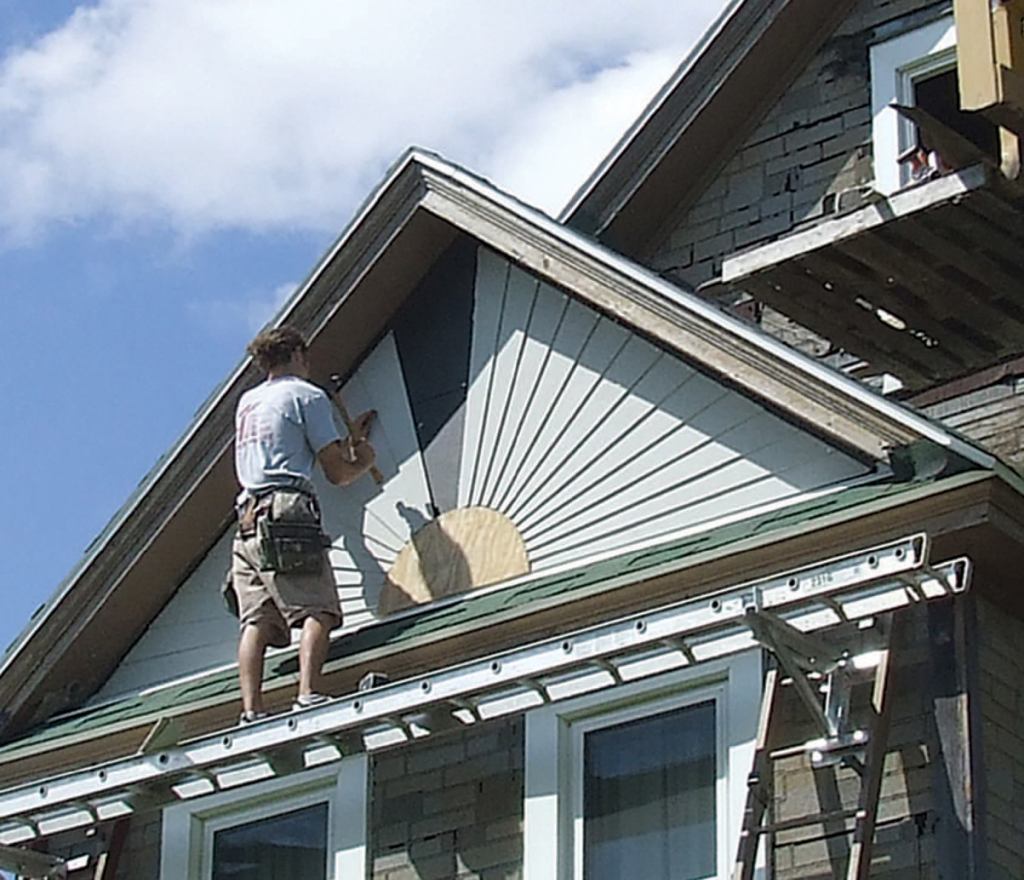
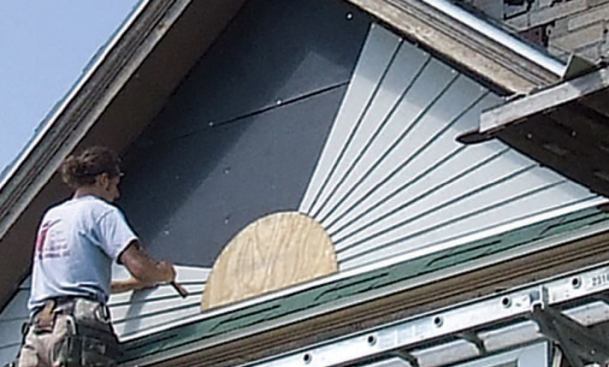
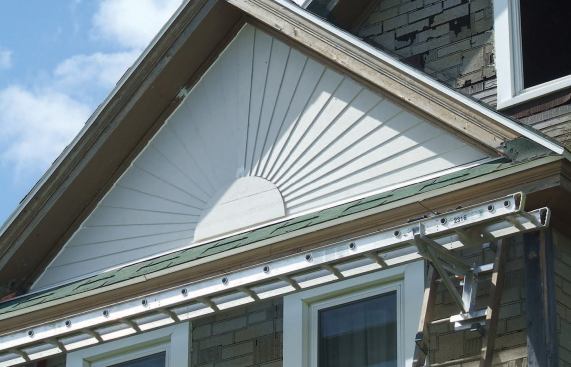
Things have been a little slow this year, so I had time to help out a friend who’s refurbishing an old home. The siding had seen better days, and the gables were about the worst of it. After some brainstorming, we settled on adding a sunburst pattern for all four gables.
I looked around for some type of instructions, but to no avail. Because I had several gables to do, I thought it would be smart to think through the process and develop a systematic approach. Here’s what I came up with.
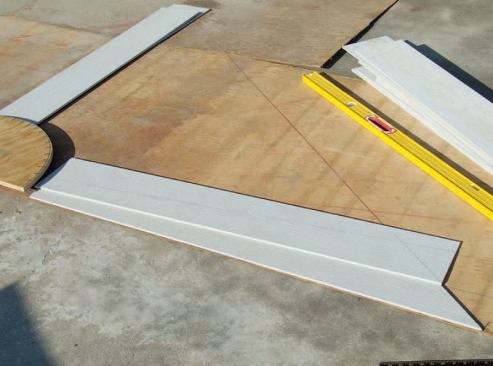
First, I needed accurate measurements. After stripping the old siding, I measured down perpendicularly from the peak to the base of the gable, and up the rake from the base flashing to the peak. This gave me what I needed to easily reproduce the gable triangle on the ground. I wasn’t concerned about being absolutely accurate, because I’d be reinstalling the bed molding under the soffit, which would give me about an inch of play.
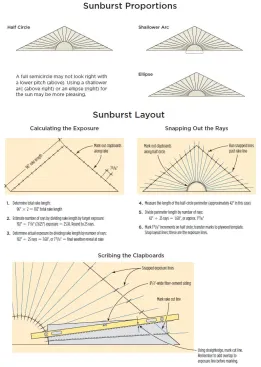
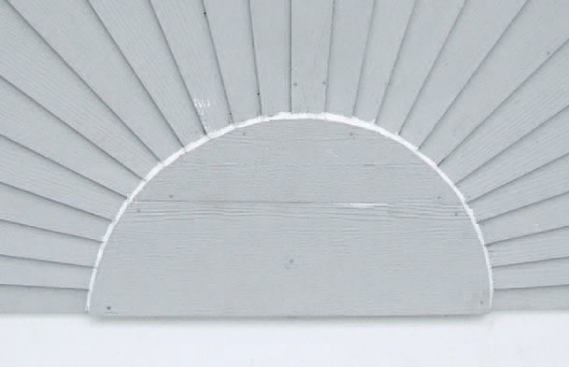
Sunburst Proportions and Layout
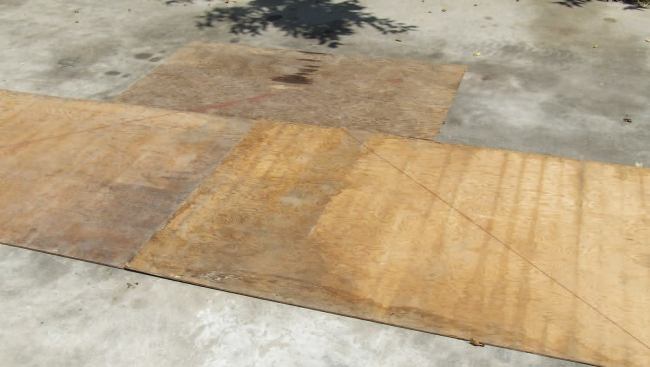
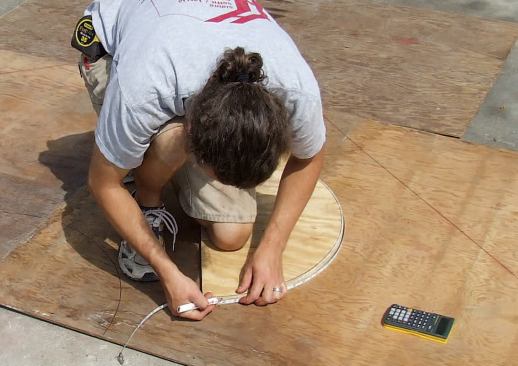
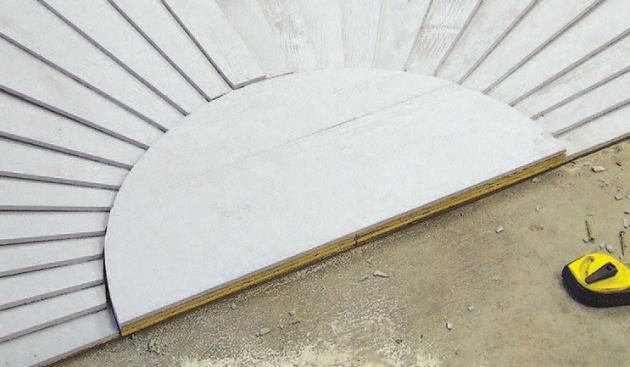
I snapped out the gable full-scale on some sheets of plywood. Then, by trial and error I came up with a half circle — the “sun” — that was pleasing to the eye. In this case, the diameter of the half circle was about a fifth the length of the base of the triangle. You can get a different look by cutting a few inches off the bottom of the half circle — use a shallower arc of the circle. This creates the impression of the sun rising over the horizon, and may look better with shallower pitches. With the steep pitch, the full semicircle looked right, so I cut a pattern out of 3/4-inch plywood.
Tim Healey
Calculating the Exposure
I was using 8 1/4-inch fiber-cement siding and wanted to leave about a 7 5/8-inch exposure at the widest point (the rake). While 5/8 inch is not a big overlap, keep in mind that fiber-cement clapboards aren’t tapered, and I wanted to avoid the big buildup that would occur at the narrow end if the overlap was greater.
To fine-tune the layout, I added up the lengths of both rakes together (192 inches), then divided by 7 5/8 — my target exposure — to get a number slightly over 25. This was ideal: I wanted an odd number, to give me an even number of rays up each side and a cap piece at the top. (I’ve seen designs that have an even number of rays that meet at the top, with the joint covered by a mullion piece, but I preferred to make the cap look more like a natural part of the design.) To get the actual exposure, I divided the rake length (192 inches) by 25, for a final weather reveal of 7.68 — or 7 11/16 — inches.
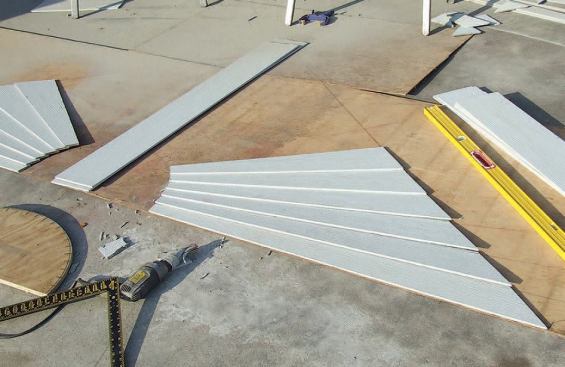
Snapping Out the Rays
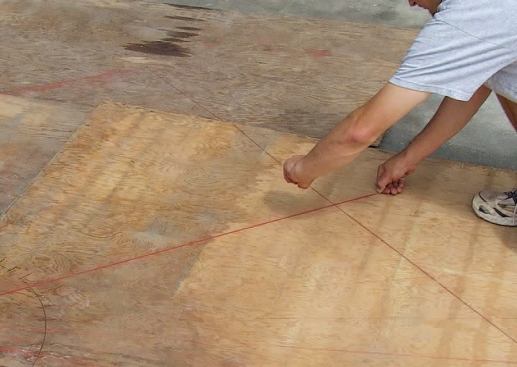
Next I marked out the clapboards along the rake, starting at the bottom and marking the exposure up both sides. I used a construction calculator to speed this step, adding the exposure number itself by pressing the “plus” button and marking the cumulative number on the tape measure.
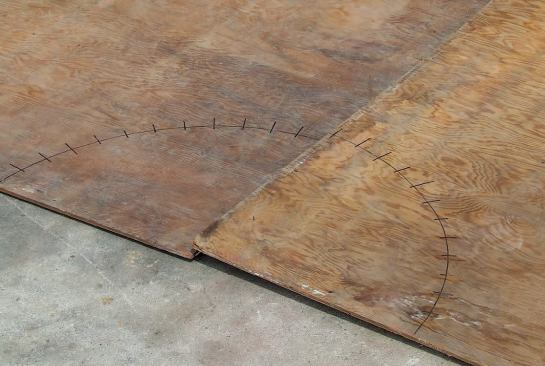
To lay out the bottom of the rays, I measured the circumference of the plywood half circle, then divided that by the number of rays. I marked the layout on the half-circle pattern, then transferred the marks to the full-scale layout. I now had endpoints for the rays marked on the sheets of plywood, so I snapped lines through the marks, laying out every ray from a couple of inches inside the half circle to a point several inches past the rake line.
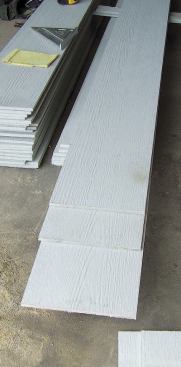


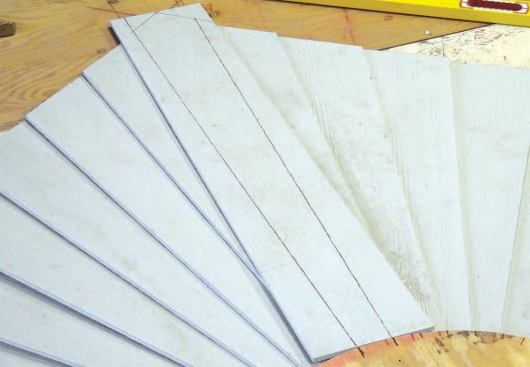
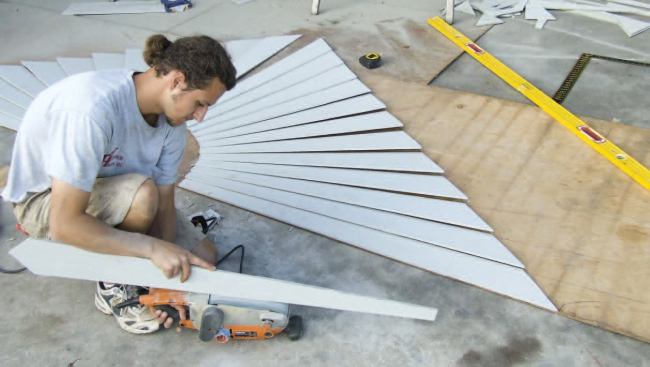

I measured and rough-cut the first few clapboards to length, off…
Cutting the Clapboards
I measured and rough-cut the first few clapboards to length, offsetting them and cutting several at a time. I marked the rake angle at one end, then set each board on the full-scale layout to scribe the cut line. Because I had snapped the layout lines long, I was able to align my straightedge with the chalk lines at each end of the clapboard, then add the overlap before tracing the cut line. I worked up from the bottom, marking opposite pieces, then placing them back-to-back and cutting both at once. I then placed the tapered boards back on the full-scale layout and positioned the next pieces for scribing. I repeated the process until I was ready for the last piece.
Up to this point I had been keeping a factory edge along the bottom of each clapboard, so that the embossed grain stayed parallel with that edge. I centered the top piece before tracing it, though, so the grain would run parallel to its centerline and perpendicular to the base. After cutting out the last piece, I smoothed both its edges with a belt sander.
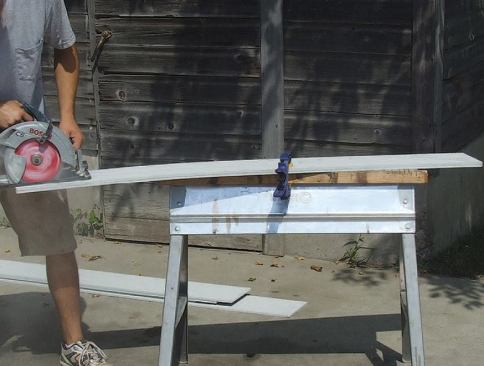
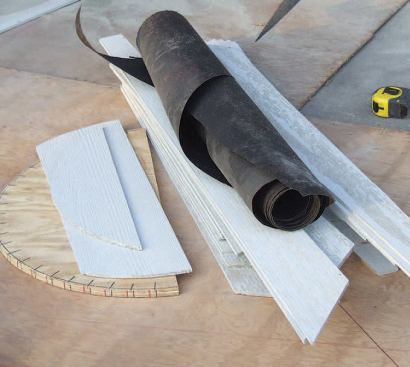
I next duplicated the half circle, placing a couple of fiber-cement cutoffs side by side and tracing around the plywood pattern. I cut them out with a jigsaw fitted with a carbide tile blade, which works well for cutting fiber-cement siding.
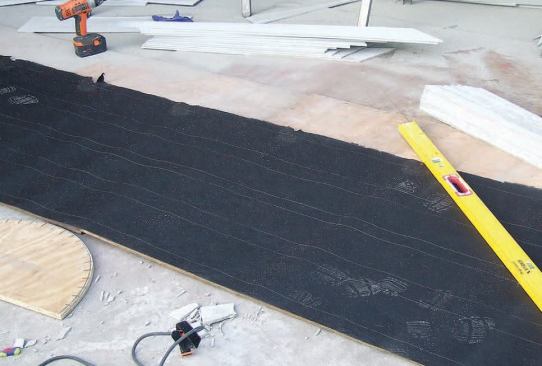
I laid tar paper across the template and cut it to size so that …
Installation
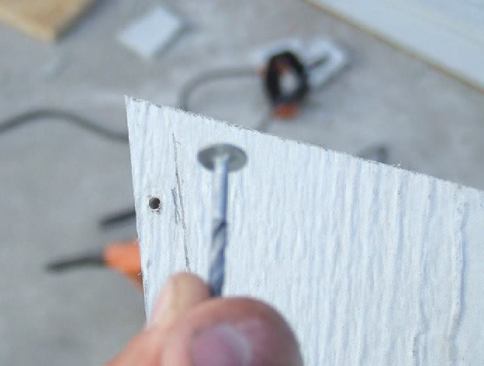
As I gathered the cut clapboards, I went ahead and predrilled nailing holes about every 2 feet along the blind edges, placing a couple of holes closer together at the more delicate narrow ends, to prevent crumbling. I then laid tar paper across the template and cut it to size so that it would neatly fit the gable. Everything was now ready to be loaded on the lift and installed.
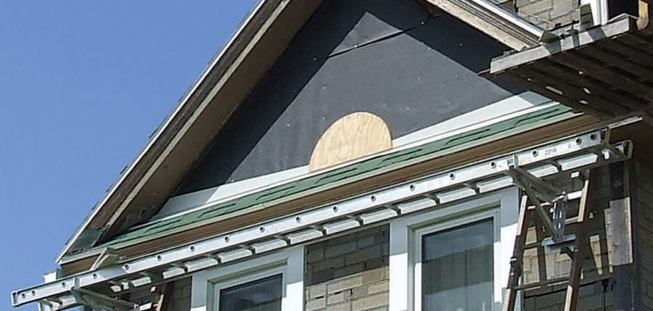
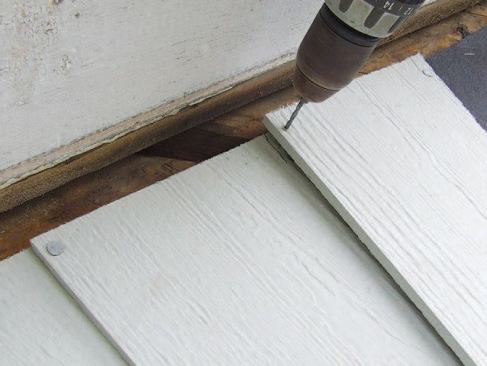
Working in the gable, I first installed the tar paper, then drew a plumb line down from the peak. To guide installation of the clapboards, I screwed the plywood half circle in position, lining up a mark at the top with the plumb line.
Now I was ready to install the siding. I nailed the narrow end first. If you nail the wide end first, you’ll find that the lower corner of the narrow end will be sticking out, and it’s difficult to flex it into place without cracking it. I worked up from the bottom, aligning the narrow end with the marks on the plywood template, and marking the overlap on the wide end to guide the next course. I nailed where necessary, using roofing nails for blind nailing and screw-shank nails for the exposed spots, always predrilling through both courses. Because of the small overlap, I ran a bead of caulk along the top edge of each clapboard.
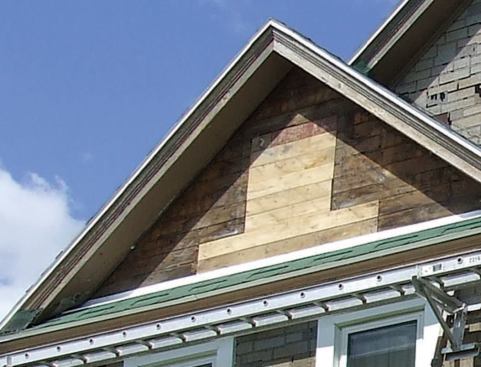
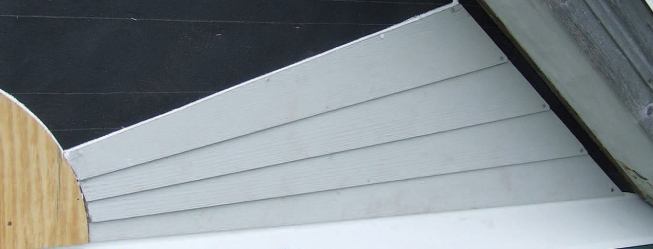
I worked up both sides, to the top piece, which I caulked along both edges before installing. I then installed the fiber-cement “sun” on top of the plywood template and carefully caulked the joints at the bottom of the rays. I reinstalled the bed molding, and the gable was ready for paint.
Ray Habenicht operates Habenicht Homes in Columbus, Wis.


