Here in Columbia, Mo., we have a wet climate, averaging more than 40 inches of rainfall per year, which makes water management a critical concern on all our builds. On the new homes my company builds, we typically build slab-on-grade for simplicity with both water management and thermal efficiency. But for additions on existing homes, and particularly hillside homes, foundation waterproofing is unavoidable.

A bitumen coating needs a dimple mat in front of it to relieve hydrostatic pressure. The dimples create a space between the soil and the concrete, allowing water to drain freely to footing drains.
Waterproofing Walls
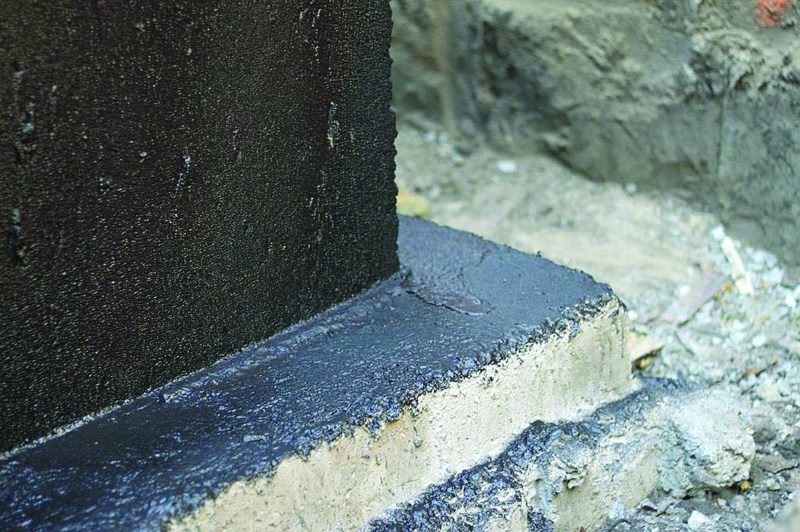
The foundation waterproofing system we use is not fancy or expensive, but it works extremely well to fend off water problems. We begin by coating the foundation walls with a regular foundation dampproofing—what is called a “tar coating” around here. The guys put on the full suit, roll or spray the coating on, and use chip brushes to make sure it is worked into all the cracks and crevices on the surface of the concrete.
Bitumen-based dampproofing is a standard, traditional material for foundations, and 15 years ago, that’s all you would have gotten. Dampproofing materials have changed over the years. Most are now water-based and not as hazardous for workers, but they still perform similarly. The important thing to understand is that, by itself, this material can’t hold back pressure-driven water. Under hydrostatic pressure—the weight of water in the soil next to the foundation—water can be forced through the material. This is particularly true as the material ages, especially if cracks develop over time. The material is somewhat elastic but is limited in its crack-bridging capacity.
To prevent water from penetrating, we cover the foundation walls with a plastic dimple mat. This is typically a high-density polyethylene material that we attach to the wall with Tap-Cons and cap off along the top edge with a profiled plastic cap.
The 3/8- to 1/2-inch dimples keep the mat off the wall, creating a void behind it that allows any water that reaches the foundation to drain to the bottom. The water that finds its way past the mat is not under hydrostatic pressure that will drive it through the wall. The dampproofing is there to prevent the free-draining water from being absorbed into the concrete. Plain, old dampproofing works well in this capacity.
There’s no secret here that makes one dimple mat that much better than another. It’s simply the void—the air space behind the mat—that provides a clear path all the way down the wall for water to drain. There’s no way for water to do anything but drain straight to the bottom.

When laying down perimeter drains, the author first lays down filter fabric, then embeds the pipe in gravel. Large (1-inch) gravel creates plenty of voids through which water can freely move, but the filter fabric needs to be there so soil won’t fill up the voids over time.
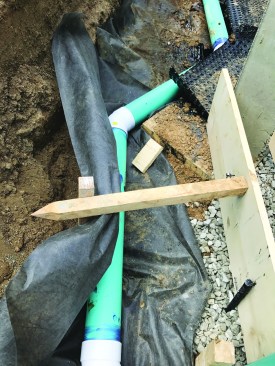
Note that the holes in the drainpipe face down to limit the volume of water that accumulates at the footing.
Perimeter Drainage
At the bottom of the wall, the dimple mat turns and runs out over the footing where we have a perforated drainpipe. We lay the perimeter drainpipe, with the holes facing down and pitched at least 1/4 inch per foot, over filter fabric. The fabric sits on a layer of 1-inch clean gravel. We then bury the perimeter drainpipe with more clean gravel and wrap the filter fabric over the top. We throw a little more gravel on top of the filter fabric, but this is just to keep the fabric from moving around too much while we backfill.
We install the drainpipe with the holes facing down so the water can be carried away as quickly as possible. As water accumulates in the gravel around the pipe, we want it to spill into the holes in the pipe as soon as possible. If we oriented the pipe with the holes facing up, a lot more water would accumulate around the footing before entering the pipe, and we don’t want it to accumulate to that volume.
Using this system, we have confidence that we can manage any water draining through the soil around the home. Of course, it works in conjunction with good grading as well as with gutters or wide overhangs to manage roof runoff. Like every detail on a home, it’s all part of a system.


