

John Spier
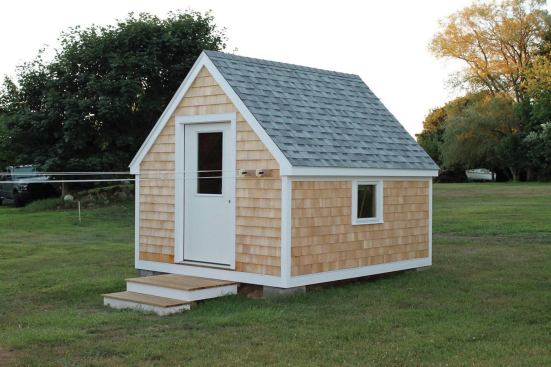
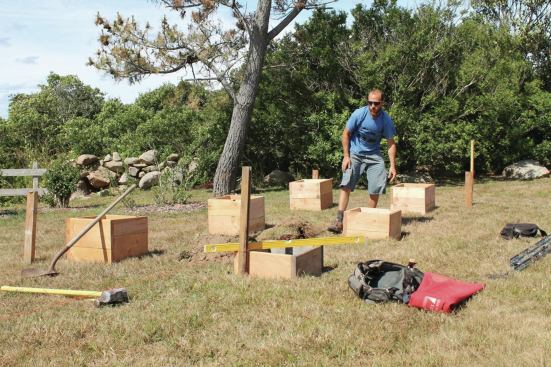
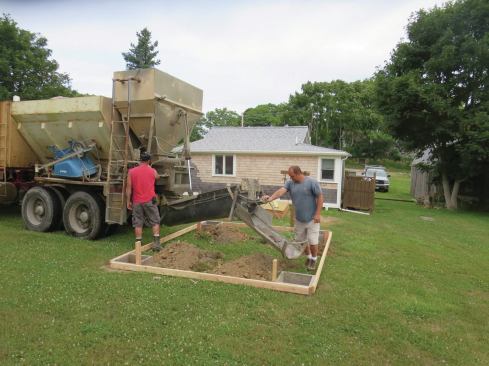
This small shed sits on four piers at its corners.
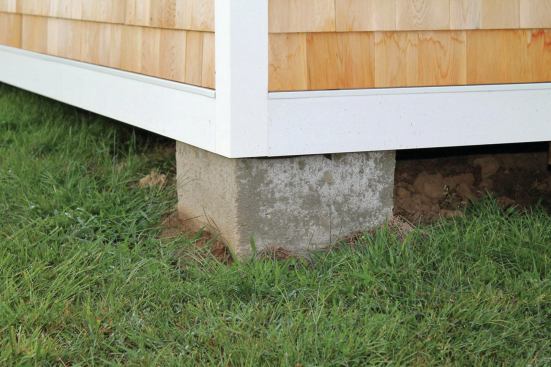
The time-honored method for putting small piers under buildings and decks is to stick Sonotubes into holes in the ground and fill them with concrete. But I’ve never been a big fan of those cardboard contraptions; they’re flimsy, prone to collapse, and difficult to install plumb and level, and it’s hard to get a clean finish on the concrete when you use them. And at the end of the day, you’ve got a bunch of square structures sitting on round bases. I’ve been building a lot of small buildings lately, and I decided a while ago that there had to be a way to make nicer-looking piers.
Ideally, I like my small buildings to sit on substantial-looking square or rectangular piers, perfectly aligned at the corners and edges of the buildings. I want the piers to be exactly the right size, in exactly the right place, and all at the same height, so I don’t need to do any shimming or trimming. Of course, I also like to install these piers with minimal effort and with as little site disturbance and cleanup as possible. The two buildings pictured in this article are small sheds; one sits on four piers at its corners, and the other is cantilevered in both directions on six piers. The basic techniques for forming and pouring the piers were the same for both, and I’ve also used the same techniques for piers that support posts for the decks that I build.
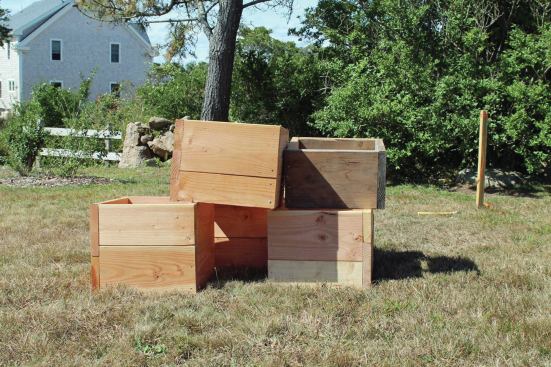
Forms from Scrap lumber
First, I knock together form boxes from scrap materials—usually leftovers from a framing job. I always pour concrete to the top of the forms, so I make them a few inches deeper than the part of the pier that will be visible above grade; the extra inches ensure that the forms will extend into the ground a little. If I’m siting a structure on uneven ground, I approximate the heights. The cantilevered shed that I built was on a gently sloping site, so for those piers, the height of the boxes varied according to the topography.
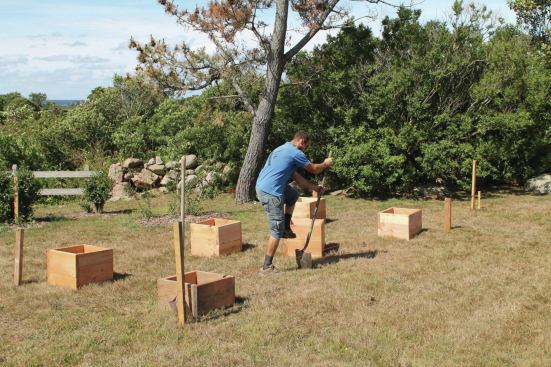
To lay out the boxes, I set them in their ballpark locations and mark the ground. After cutting out the sod to the size of the boxes, I dig out flat areas where they will sit, making a nice, clean, and level base for each one. I try to get the areas fairly close to their final heights.
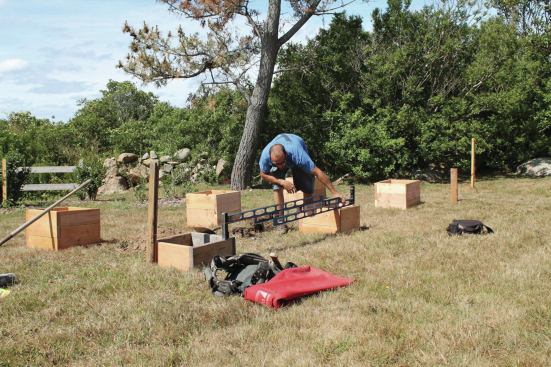
Level all the forms at once
With the form boxes in place, I nail or screw a perimeter of 2x4s or 2x6s to them to connect them all together. Using fairly straight stock ensures that the tops stay in line and in plane. If need be, a diagonal or two can be added to keep the assembly square.
Next I level the whole assembly, scraping and adjusting the ground under each box until all the tops are exactly at the correct height. When everything is level, I stake the assembly in place as a unit. I find this process much faster and easier than setting, plumbing, and leveling each form box individually.
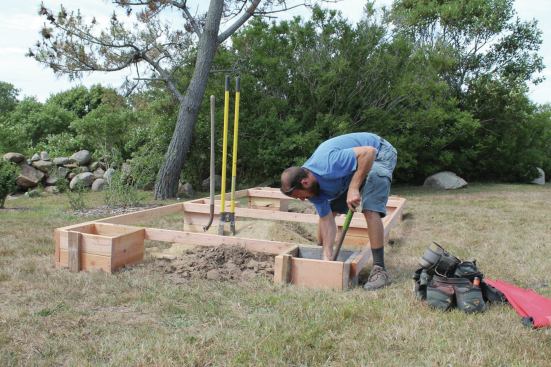
Dig the holes last
At this point, I dig the holes for the piers down to frost depth—36 inches in my area—packing some of the excavated soil around the boxes temporarily if needed to contain the concrete for the pour. With most soil conditions I find that I can dig each hole to the proper depth in about 15 to 20 minutes using just a shovel, crowbar, and post-hole digger. Occasionally, I hit a big rock or a root that requires extra work, so I also keep a reciprocating saw and a small jackhammer handy.
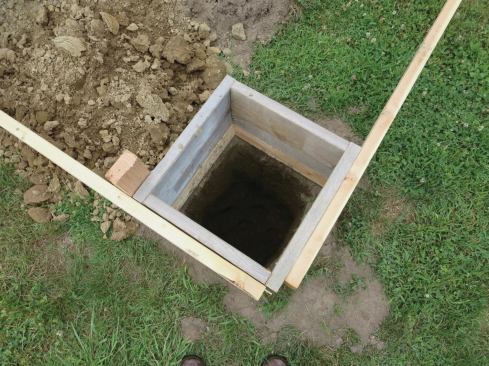
Digging the holes by hand means no over-digging—the soil becomes the concrete form below grade. As I dig the holes, I throw the dirt into the middle of the structure’s footprint, to keep the mess contained.
Our concrete supplier uses a dry-mix truck, so I can have the exact amount of concrete I need for the piers mixed and poured on site. After the concrete cures, I strip the forms, often without disassembling them completely; I simply loosen the corners and lift them off the top. Then I pound them back together and set them aside for the next job.
I finish up by replanting some of the sod around the outside edges of the piers and raking out the extra material for a smooth grade under the building. At the end of the project, I can walk away from a brand new building in the middle of an established lawn—with no evidence that the ground has ever been disturbed.
Floor framing alternative
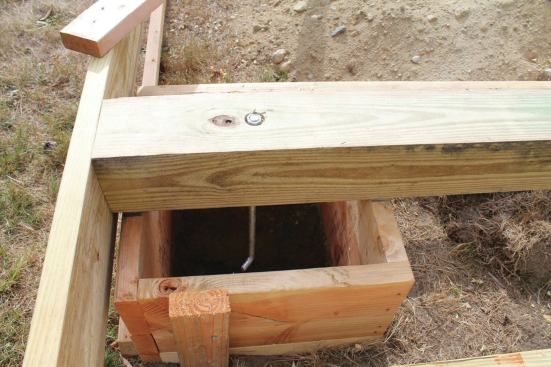
For the cantilevered building, I assembled the main floor beams directly on top of the form boxes, drilling and installing the anchor bolts through the beams. I then poured the concrete around the bolts with everything in place. This guaranteed perfect bolt placement at the right height and saved lots of time. (I often do the same with mudsills on simple foundations; see “Wet-Set Mudsills,” Apr/07). Framing the floor before the pour made stripping the forms a bit more difficult, but all in all it saved a lot of time over conventional forming and framing methods. The floor of the smaller building was much simpler to frame—just eight pieces of wood and four blocks in the corners for the bolts—so I framed it after the piers were cured and stripped.
For most small buildings and average-size decks, a 16-inch-square box is easy to dig and makes an attractive pier, but I’ve made piers as small as 12 inches and as large as 24 inches. A 16-inch hole gives me about 1.75 square feet of bearing area, or between two and five times as much as a typical tube form. And if I want more of a footing, I can usually flare the bottoms of the holes.
Of course you could always add a manufactured base, such as a Bigfoot, to give a Sonotube pier greater support. But that would mean leaving a big, expensive piece of plastic in an oversized hole, not to mention the extra work digging and backfilling.
I’ve sometimes been accused of being a square peg in a round hole. In this case, I’ll own it. I’m happy to have figured out how not to put round piers under square buildings.
John Spier owns Spier Construction, a building and remodeling company on Block Island, R.I.


