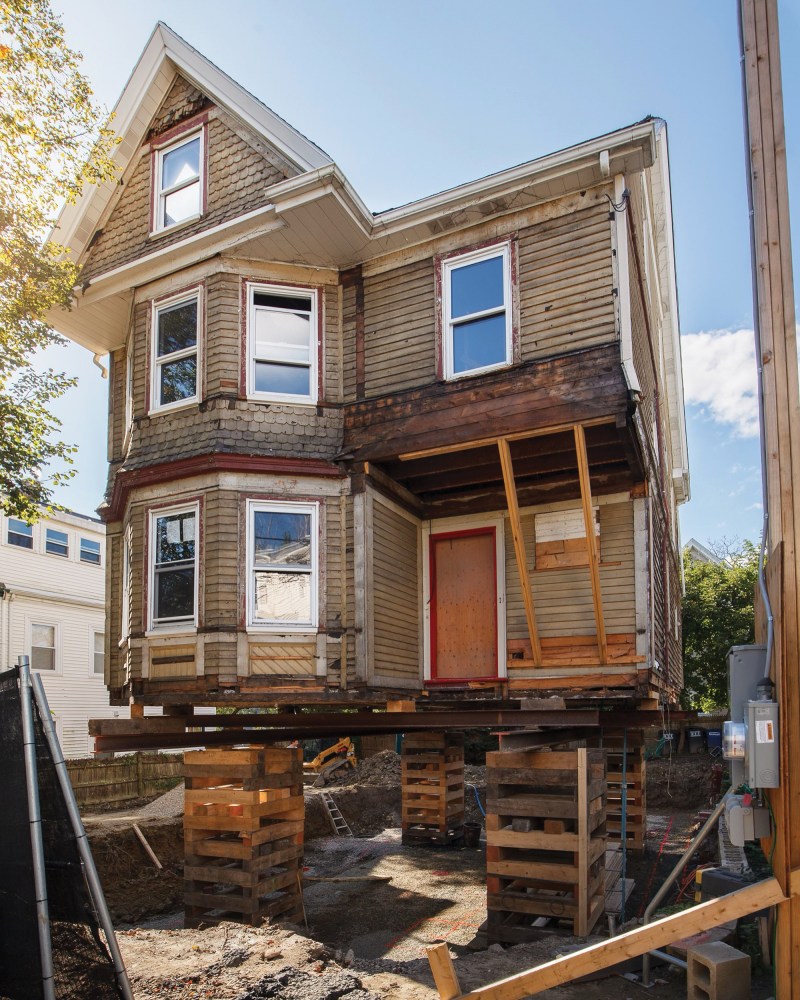
When I was approached about renovating a rundown Victorian in Somerville, Mass., the owners of the house were hoping to create an additional 2 feet of headroom in the basement for a future workshop. As this was one of their central goals for the renovation, we were motivated to make it happen. Initially, we considered underpinning the existing foundation with buttress walls and digging down. But after we dug a series of test pits, we discovered that the groundwater elevation would preclude this approach.
Since we couldn’t go down (and were still determined to create this basement workshop), there was one direction left, and that was up. We were fortunate to be working in a city that didn’t have a fixed height restriction built into its zoning ordinances, although the architects did have to navigate through story calculations, which we were able to comply with.
Ultimately, it was determined that we could raise the house by just under 2 feet and still have the project be “as-of-right.” Because the house was sitting on a fieldstone/brick foundation, we knew that we would need to replace the foundation in its entirety. And because the foundation was almost directly next to the neighbor’s driveway, we also knew that we wouldn’t be able to demolish the existing foundation and dig out for a new one without disturbing the neighbor’s property. Our workaround for this was to leave the foundation wall that abutted the neighbor’s driveway as a sacrificial retaining wall and then move the house over 3 feet, which would allow enough space for the work to take place around the new foundation.
Preparing to Lift
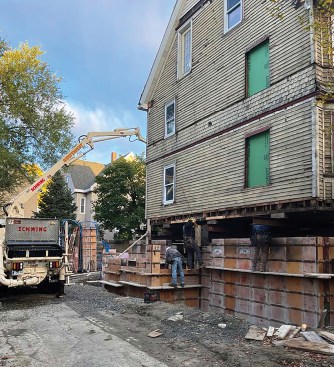
We engaged a local house lifter, Chris Nastasi of CN Building Movers, to do the lift and move. He would need to set up four cribbing towers, on top of which he would place a series of steel beams to support the house. One of the decisions that I had to make was whether to place the cribbing towers on top of the basement slab or take out the sections of the slab where the towers would sit and excavate to the footing depth grade. Either approach was fine, and I ultimately settled on the former. Since we were maintaining the slab elevation, we needed to drop the grade by only 16 inches (10-inch footing + 2-inch foam + 4-inch slab), and I didn’t think that would be problematic. If we had been dropping the slab, I would have probably advocated for the other approach to avoid having cribbing towers sitting on pyramids of dirt after the demo/excavation was completed. However, this approach saved us a step and allowed the site work contractor to do their work in (mostly) one mobilization.
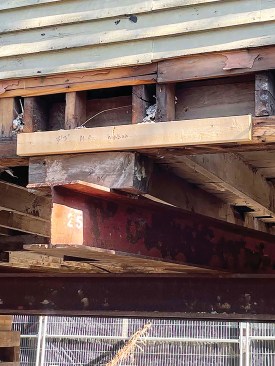
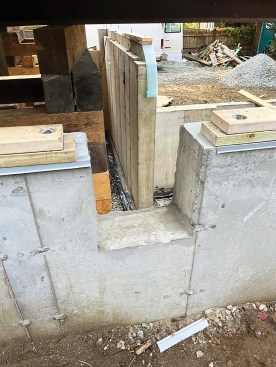
With the cribbing towers in place, holes were busted in the sides of the foundation to facilitate getting the steel in. There were two long steel beams that ran front to back and then a series of four beams that sat on top and ran side to side. We cut 2x4s to the length of the future window openings and screwed them into the mudsill. This allowed the house movers to see where the future openings would be and locate steel accordingly. Where the steel did not correspond to a window opening, the area would be patched with CMU.
Once the steel was in place, we were almost ready to lift. To establish a benchmark, we set up a transit and shot the existing T.O.W. (top of wall) in all four corners. Then we took the average of those measurements (no house is ever level) and transferred that to a “permanent” monument (in this case, a temporary electric service pole). We would benchmark all our heights from this.
Wherever possible, the house movers located the steel support be…
House Lift
The lift itself was straightforward with a hydraulic lifting system. As the house was lifted, cribbing was added to the towers until the bottom of the steel was above the elevation where the formwork would be. In our case, we had 8-foot-6-inch foundation walls, which required using 9-foot-4‑inch-high forms.
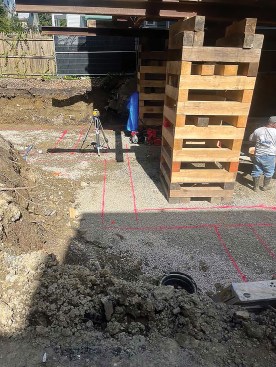
After the house had been lifted, the site work contractor started the demolition of the foundation. He dug a ramp down into the basement and maneuvered a mini-excavator underneath the house, using that to demo the foundation walls. The site work contractor then removed the debris and basement slab with a skid steer. As we typically do, he also covered the bottom of the hole with 2 inches of crushed stone.
At this point, Chris Nastasi came back to the jobsite to move the house over the 3 feet we needed. This was the part of the process I was most excited to see. To do it, the house mover first set up another four cribbing towers on the bottom-of-hole grade adjacent to the towers that were holding up the house. He set up a piece of flat steel on the first cribbing tower and then jacked up the two long steel beams enough so that he could get a “skate” underneath the beams. The “skate” is what you might imagine it to be: a skateboard for a steel beam. Chris then used a come-along to pull the beams onto the new cribbing tower.
Footing and New Foundation
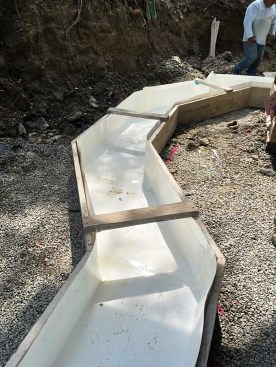
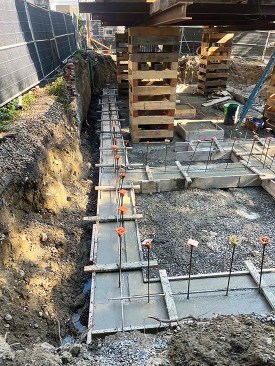
Once the house was in its final position, we laid out the foundation in partnership with our surveyor. We plumbed down opposite corners of the house, which he used as benchmarks to lay out the rest of the foundation, including additions. Because we were using GCP Preprufe waterproofing membrane underneath the footings, it was important that the footings be formed as accurately as possible and without any board lapping. We spray-painted the footprint of the footings to make the formwork contractor’s life easier and to give ourselves an easy and visible quality-control tool.
The foundation work was relatively straightforward. The only thing different was that once we had the footings placed, the site work contractor came back to place stone to the top of the footing. It was a lot easier to do this before the walls were formed and poured and a house stood over it. Beyond blocking out pockets for the steel, it was business as usual for the rest of the foundation work.
Once the footing had been poured, the site work contractor place…
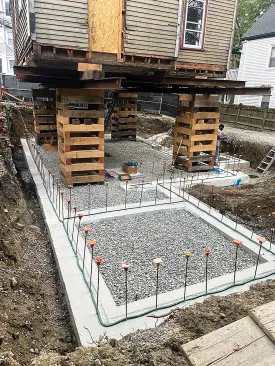
Probably the biggest challenge was navigating the pump around the building during the pour. We were constrained by the size of the pump that would fit in the driveway but were able to reach probably 80% of the walls with the pump and “dragged” the rest. The formwork contractor, Bammco Concrete, did an excellent job.
With the foundation placed, stripped, and waterproofed, we prepared to lower the house back down on its foundation. We backfilled and then installed the mudsills, as we typically do, with one layer of pressure-treated (PT) stock and an additional layer of kiln-dried (KD) stock. Since the old mudsills would be lowered on top of these, we had to countersink all the anchor bolts’ nuts and washers. We also stepped back the PT/KD stock around the steel pockets so we could splice in new pieces once the house had been set back down.
Setting the house down went quickly. Afterward, we walked around the house to see how it matched up to our new mudsills. The house mover had said he could shimmy it in any direction we wanted, but we were happy with where it came down on the first try—an outcome due, no doubt, to being methodical in all the prior steps.
Photos by Nick Portnoy.


