Structural steel seems to be playing a larger role than ever before in homes. From supporting vast open floor plans to bridging expansive exterior openings, structural steel allows us to turn creative designs into reality. Over the last 17 years, the company I work for, Great Lakes Builders, has installed hundreds of beams. In that time, 30% of our jobs have been repairing competitors’ work. This article should give you a basic working knowledge of steel and hopefully keep you out of that 30% club.
What Is Structural Steel?
Structural high-strength steel used in construction comes in a variety of shapes and configurations. In residential construction, the steel shapes specified most often are elongated beams that have profiles with specific cross sections and weights. These beam profiles and weights allow engineers to incorporate the correct beam for specific purposes in specific spaces within a house.
In this country, structural-steel shapes, sizes, chemical composition, and mechanical properties are regulated by the American Institute for Steel Construction (AISC), which works in conjunction with the American National Standards Institute (ANSI) and the American Society for Testing and Materials (ASTM) to establish the set of standards for working with steel in construction. In comparison to steel structures like bridges and skyscrapers, residential use of structural steel is about as simple as you are going to get. Let’s start with an overview of the types of steel you’re likely to see in residential construction.
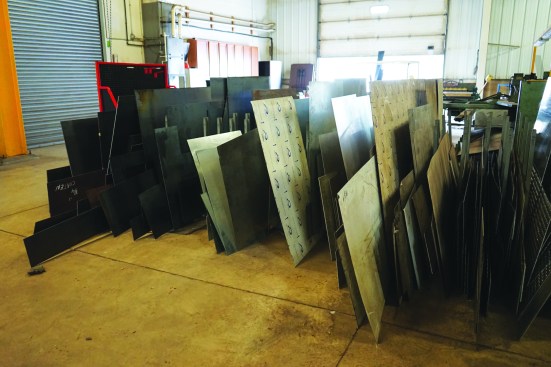
In residential steel work, contractors are likely to encounter steel plate.
Steel Plate
The steel plate that you are most likely to encounter in home construction comes in the form of top plates and base plates (at the top and bottom of a steel column), bearing plates (which help to transfer loads onto beams), and flitch plates (usually sandwiched between or alongside layers of wood and bolted to them to increase their bearing capacity). In all of these cases, the steel plate will be specified ASTM A36, which means that the plate has a minimum yield strength of 36,000 psi (pounds per square inch).
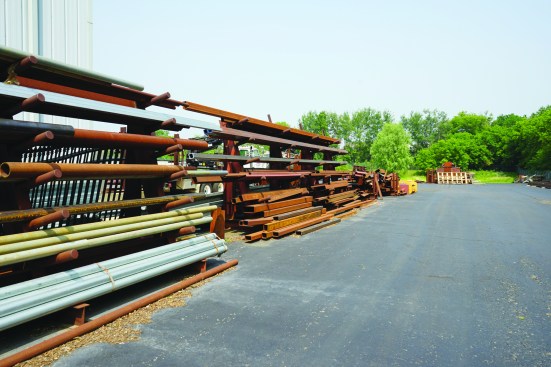
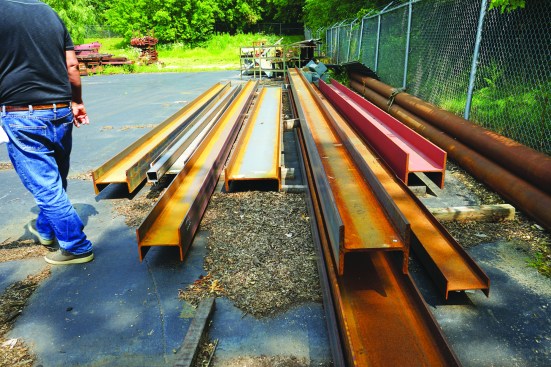
Also columns of various shapes, shown here in their racks at a metal yard.
Columns
For residential steel, the columns most often specified have a round cross section, and on some occasions, square. Round columns are specified both by schedule, which refers to the thickness of the column walls (typically either 40 or 80), and by nominal diameter (3 inches, for example). The thicker the walls and greater the outside diameter, the more the columns can support. The dimension for round steel columns refers roughly to inside diameter, or I.D. The steel industry refers to square columns as HSS, or hollow structural sections; as with the round columns, HSS columns come in a variety of interior dimensions and wall thicknesses.
When an engineer specifies steel columns, top plates and base plates should always be included in the discussion. When you give a set of plans to a steel fabricator, be absolutely positive that they are bidding on and building what is actually on the plans. In the field, I regularly see undersized top plates or missing base plates, and most often, those mistakes stem from a lack of detail on the drawings. In many cases, the plans don’t call out the size of the base plate or top plate, or the plates have been deliberately undersized or omitted due to value engineering—trying to reduce costs—without an understanding of the ramifications. Either way, as the builder or contractor, you will be responsible for these mistakes.
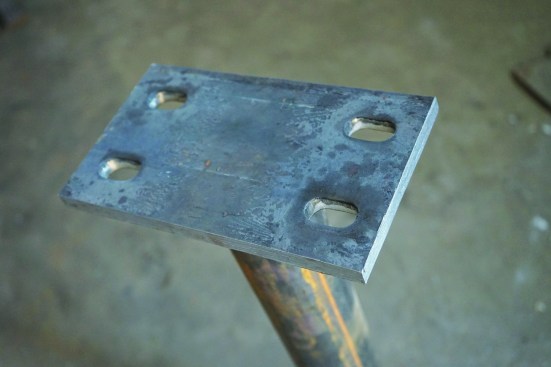
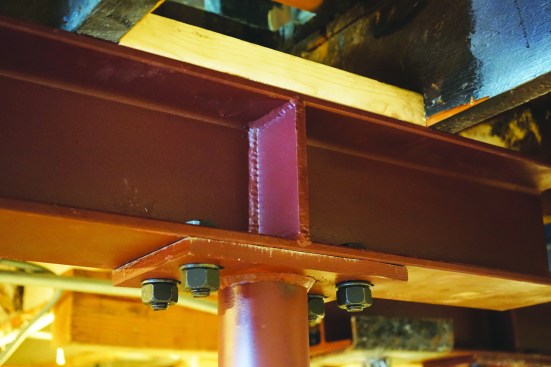
One example of using the two together is a connection plate welded to a steel column.
If there are no specifications for the top and bottom plates and I need to get pricing, I typically tell the fabricator to figure on a plate thickness that is twice the thickness of the column wall, and I always specify that the plates be fully welded to the column. This strategy should get you close to the actual price of having the columns prepared. If the dimensions are missing on the plans, I request that information from the engineer and have them put the dimensions in writing. I also let the fabricator know that the base plates for our columns will have round holes for anchor bolts, while the top plates usually have slots that give us a little leeway when we’re aligning them with the fastener holes in the beams.
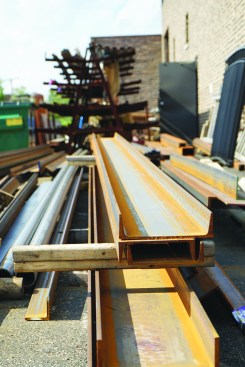
Engineers often specify steel I-beams to carry heavy loads or to span large distances in a home.
I-Beams
The most common structural steel elements used in home construction are beams, generically referred to as I-beams because of their profile. The names given to various versions of I-beams, such as W-beams, S-beams, and the like, can vary by region. The important thing is that the engineer or architect provide the profile dimensions and weight dimensions of every beam that they include on the plan.
I-beams consist of two elements: top and bottom horizontal elements, called flanges, and a vertical element, called the web. Changing the dimensions of the elements as well as the thickness of the steel can affect how the beam functions. Architects and engineers can usually manipulate these dimensions as well as the weight to let a beam do its job while fitting into a specific area in a house, such as when a beam is concealed in the ceiling framing.
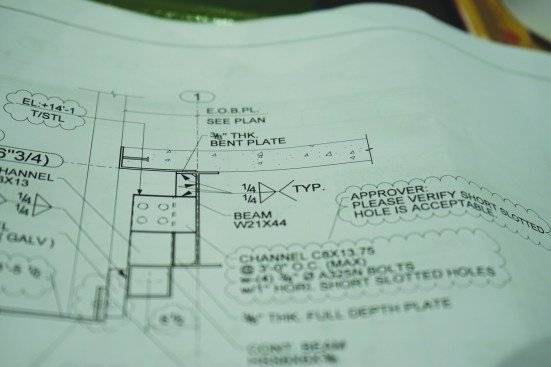
On plans, beams are labeled according to size and weight.
I-Beam Sizes
I-beams are available in a wide variety of weights and dimensions. On the plans, the engineer or architect should specify the beam size, as well as any column sizes and footing sizes. For example, a typical I-beam label on a set of plans would be W6x25, where “W” indicates a wide flange beam, “6” means that the beam is 6 inches tall, and “25” indicates the beam weighs 25 pounds per foot. Similarly, an S8x23 label specifies an American standard beam (S) with a height of 8 inches and weighing 23 pounds per foot.
In my experience, most steel beams specified for residential construction are wide-flange beams between W6 and W10. But it’s not uncommon to see W12, W14, and even larger sizes specified in certain situations. Be aware that there is a standard allowance for height variance, sweep (bend in the vertical axis), camber (bend in the horizontal axis), and out-of-square conditions in beam stock. Whenever possible, I try to get all the beams needed for any single job out of one continuous beam, and in a sequential order. If the fabricator makes sequential cuts from a beam, it would be difficult for the naked eye to pick up a 1/8-inch difference over a 40-foot run. But if beams are cut at random, or if the steel company uses several drops (steel beam remnants) to make up your order, it’s possible to have unsightly height differences at your connection points. It may not seem like a big deal, but with a little planning, these discrepancies can be avoided.
Steel channel is often specified for support instead of I-beams.
Other Common Steel Shapes
While I-beams are the most common type of beam specified in residential construction, C-channel, structural tees, and structural angle may also be specified. The top and bottom flanges of a C-channel beam extend from one side of the web (creating the “C” shape), while a structural tee has just a single flange at the top or bottom of the web. A structural angle is the shape of an “L.” Situations where these shapes are specified is up to the discretion of the engineer or architect.
The industry uses the same basic nomenclature for these other types of beams. A C6x20 label would indicate steel channel that is 6 inches high and weighs 20 pounds per foot. For tee beams, architects and engineers generally use the prefix “T” or “WT” (the latter indicating a tee beam with a wide flange). Angle is usually indicated by the length of its legs; for example, each leg of a 6×6 angle is 6 inches long.

Cleanliness is a sign of a well-run shop and a quality fabricator.
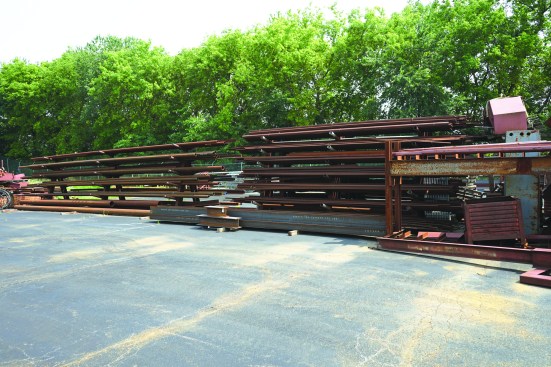
So is order.
Finding a Fabricator
Depending on where you live, finding a steel fabricator can be challenging. In cities where a lot of commercial fabrication is being done, you will probably have more choices. If a fabricator doesn’t seem to be available in your area, look to other industries that might use the services of a fabricator, such as the marine industry near the coast, or the agriculture industry in rural areas. The bottom line is that you should always choose a fabricator based on competence, not price.
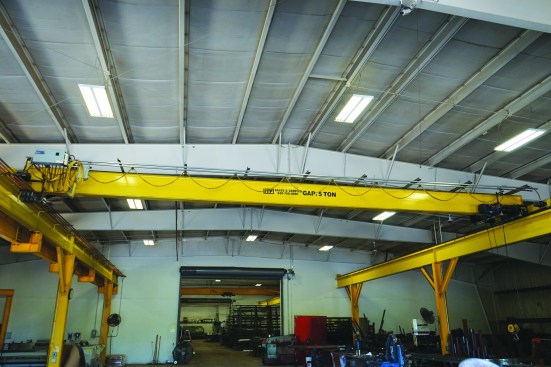
Overhead cranes help move heavy beams safely around a shop.
When looking for a fabricator, I look at the condition and organization of the shop and yard as an indication of the quality of work that they might produce. Steel shops can vary from places that look like junkyards to well-groomed shops that are almost hospital-like. Random pieces of steel in disorganized piles are an instant red flag for me. Because steel work is dangerous, I look for shops that are equipped to handle large pieces of steel safely.
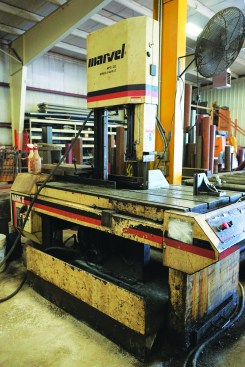
Tools typically found in a metal shop include beam saws.
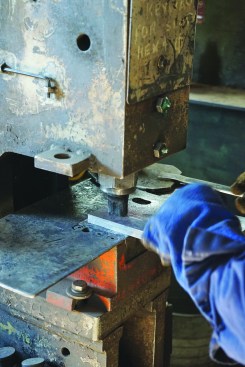
Also punches called “ironworkers”
I also look at the shop’s tools and the condition they’re in. There are several tools that every good fabrication shop should have. One is a beam saw for making clean and square cuts at the ends of beams. Others include a shear for cutting metal plate and an ironworker for making holes or slots in steel plate. Steel fabrication shops should also have a brake for bending steel plate. I check that the tools are well maintained, too. Shop tools that aren’t taken care of can break down, which can have a negative impact on your schedule.

The steps for basic metal-shop work are set by standards to ensure consistent work throughout the industry. Here, a fabricator follows the standard procedures for laying out bolt-hole positions.
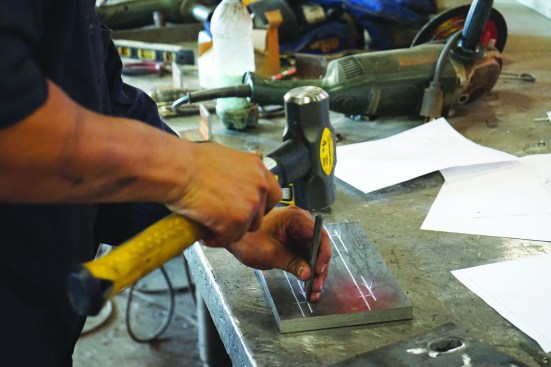
Then they are marked with a center punch.
Quality fabricators follow a standard procedure for tasks such as laying out fastener holes in plates. Watching the fabricator go through that type of procedure can tell you instantly whether they know their craft.
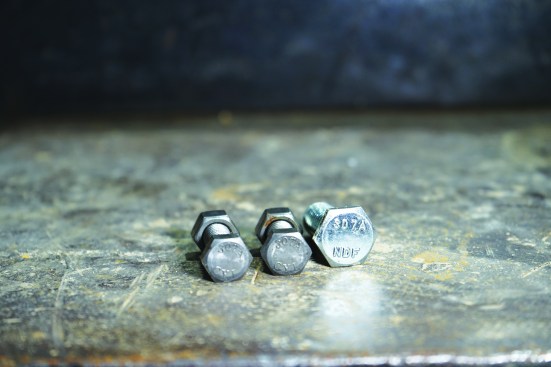
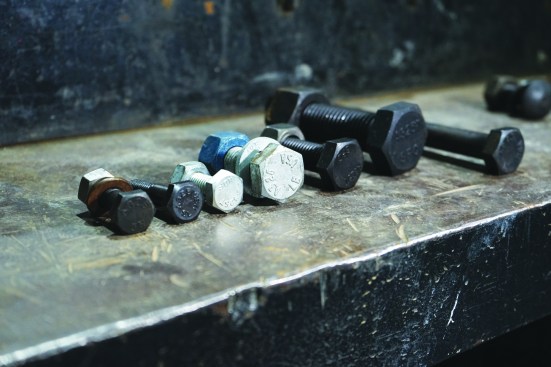
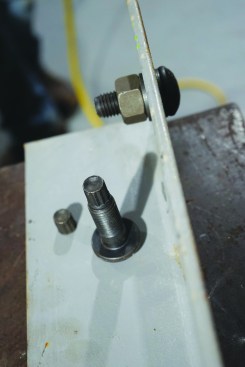
Bolts for residential steel work should all have an ASTM number stamped on the head, which means that they have a specific strength rating. A307 is a non-high strength bolt.
A325 may be specified for high-strength applications.
Fasteners
There’s nothing more upsetting to me than seeing big-box-store bolts used in structural steel work. Structural bolts are graded differently and are much stronger than conventional bolts. Structural bolts are stamped as A307, A325, or A490. A307 bolts are a significant upgrade from regular bolts, but in structural-steel terms, they are considered ASTM non-high strength bolts (even though your engineer may deem them strong enough for the task at hand). A325 and A490 are ASTM high-strength bolts. Engineers and architects most often specify A325 bolts for steel in residential projects. These bolts have a heavy hex head that gives you a large bearing surface, and they come in a wide variety of lengths and diameters. A325 bolts are pretty affordable, and most fabricators will have a good selection of these bolts readily available. A325 bolts are also available galvanized, for steel work that is going to be exposed to the elements.
Torsion control (TC) bolts maintain specific torque settings.
After threading on the nut, a special wrench tightens it while gripping the splined end.
On occasion, you may see TC (tension control) bolts specified on plans. These bolts come in ASTM A325 and A490 ratings and have a splined shaft that extends beyond the bolt threads . A special wrench holds the bolt by the splined end and tightens the nut. When a certain predetermined torque has been attained, the splined section breaks off. On large commercial projects, this type of bolt makes it easy to verify that all fasteners have been tightened to a specified torque. For most residential projects, TC bolts are probably overkill, and if called for on the plans, I would ask the architect or engineer if I could substitute a comparable hex-head bolt tightened with a regular torque wrench.
It breaks off at a given torque.
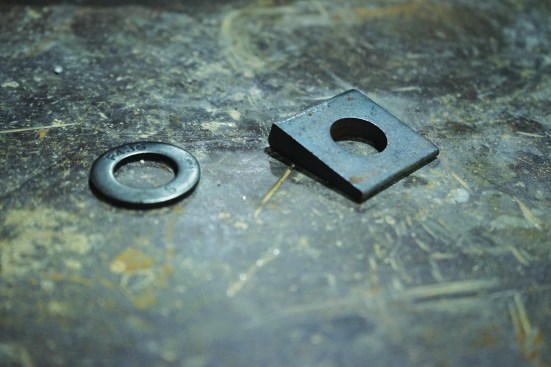
Washers should always be made from hardened steel.
Washers are a very important part of the fastening system, but they often get overlooked. When working with structural steel, you should always use hardened steel washers. Bevel washers have a tapered profile and are used when bolting together uneven or nonparallel surfaces to create a tight and stable fit. For C-channel or S-beams, these washers fit inside the beam flange to provide a parallel bearing surface, with the tapered shape of the washer compensating for small differences. The hardened steel washers for A325 or A490 bolts will have the F436 stamp.
When sizing bolts, make sure that the grip length or unthreaded part of the shaft extends just past the materials you are bolting together, but is not long enough to interfere with being able to properly tighten the nut. The bolt should be long enough that the thread extends about 1/4 inch past the nut. In general, an expert architect or engineer will specify the correct grade and diameter of any bolts that are needed on a project, and most competent fabricators will supply bolts that are the correct grade and proper length for the project.
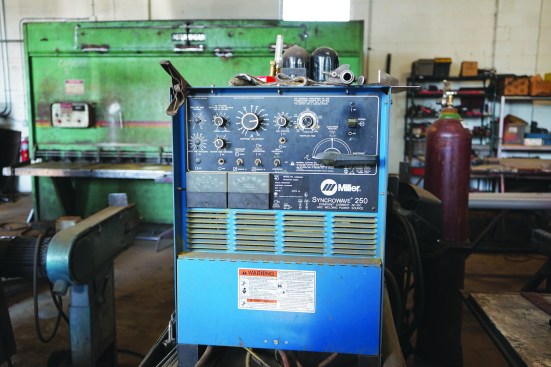
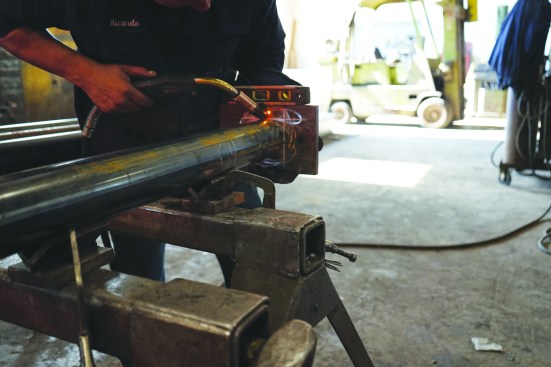
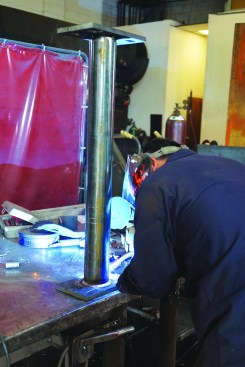
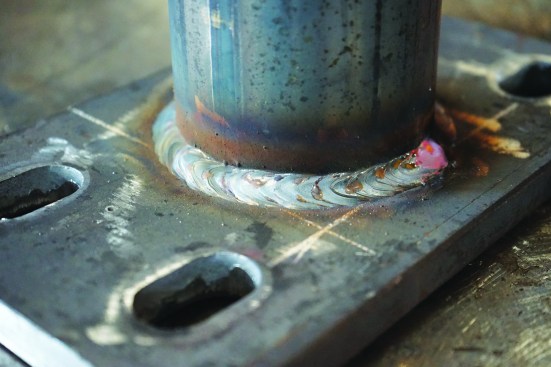
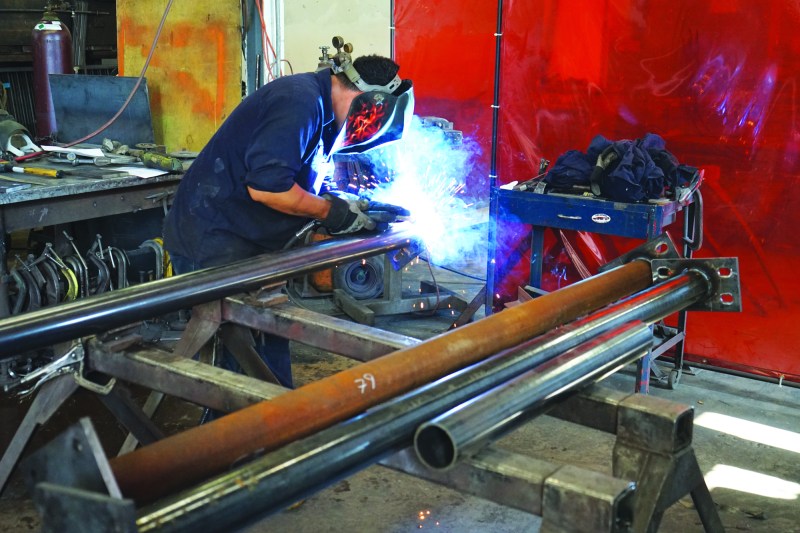
Most residential steel welding is done in the fabrication shop w…
Welding
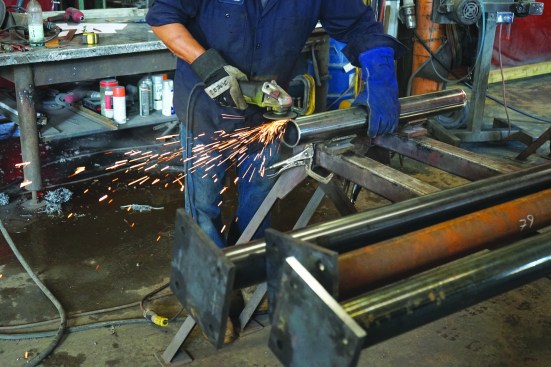
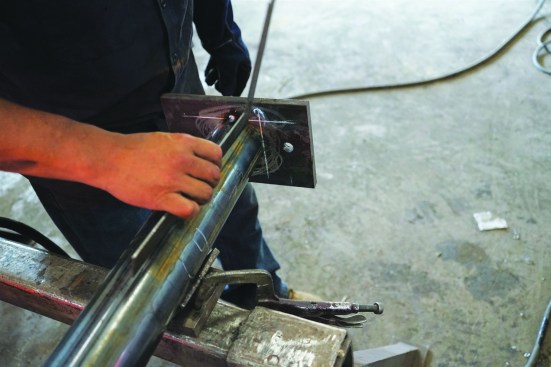
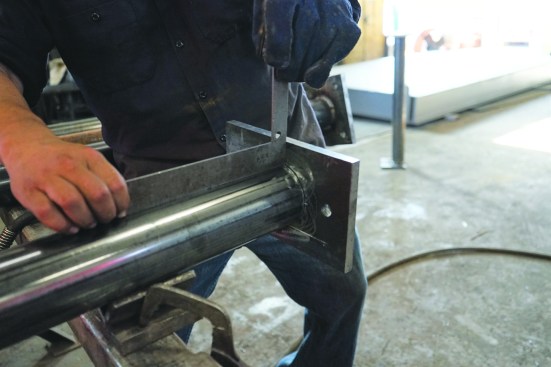
For residential steel work, the fabricator will do most of the welded connections in the shop using a MIG (metal inert gas) welder. Welding is where fabricators really get to display their craftsmanship, taking their time to go through each of the proper steps. A typical welding job for a residential project would be attaching plates to a column. After cutting the column square, the fabricator takes the surface of the column down to clean, bare metal with a grinder. He then tacks the plate to the column and checks to make sure the plate is perfectly square to the column in both directions. When satisfied, he runs a weld around the entire joint where the column contacts the plate. The finished weld should have an even width with a consistent look and pattern along the entire joint.
Most welding done on site is done with a stick welder. Instead of the wire used in a MIG welder, a stick welder uses a metal rod or “stick,” known as an electrode. Electricity then melts both the stick and the metal in the joint to fuse the two together. The most common rod for structural work is 7018, the 70 indicating that it has a tensile strength of 70,000 psi. 7018 rods come in many different diameters, and an experienced welder will determine what rod size is needed. It’s important to note that I always make sure that any welder working on our jobsites has the proper American Welding Society (AWS) D1.1 structural welding certificate.
Finish
I always ask the fabricator to deburr any metal work that is done for me. Deburring is typically done with an abrasive wheel that softens the sharp edges where the metal has been cut. For most shops, deburring is standard practice, and it greatly reduces the chances of being cut with a sharp edge or getting painful metal splinters.
Unless I request differently, most fabricators that I work with apply a coat of primer to the metal before it is delivered. In the industry, we joke that you can get structural steel painted any color you want as long as that color is red oxide primer. Red oxide primer is an anti-corrosive coating that helps prevent rust from forming.
Photos by Jake Lewandowski


