I am the lead framer on my crew, and one of my primary goals is to “make things click.” You know the feeling: It’s the gratification you feel when the framing goes together quickly and cleanly. This doesn’t happen by accident. High-quality framing and production comes from good organization and planning and a crew that wants to work hard and do a good job.
Over the last 10 years, we have tried just about everything in an effort to increase quality and increase production. I’ve read every article I could get my hands on about production, production tools, and crew management, and continually discuss these issues with my crew. My crew has changed quite a bit over the last few years, but regardless of the experience level of the people involved, we’ve been able to maintain, and even increase, production.
This article will describe how we approach the framing process to be as productive as possible, without sacrificing quality.
The Crew Chief
There needs to be one person who is in charge of a job. I’ve worked on crews where two or more of us had similar experience—in a case like that, it is still important to decide who is responsible for what. Otherwise, you can spend too much time standing around discussing things. Production plummets when every decision is made democratically.
Being in charge is not the glamorous job that it might seem to be to some people. You are responsible for knowing how to frame the house, install the hardware, pass inspection, and schedule lumber—and sometimes you also have to be the crew psychologist. In order to frame cleanly and productively, you absolutely must have the respect of your crew and know how to handle each crew member’s personality. This includes knowing each of their strengths and weaknesses and where to best use them.
No Substitute for Planning
I’ve been on crews where everyone just jumps into a project without much forethought, and it doesn’t usually work out well. Without good planning, it’s nearly impossible to be productive.
Sets of plans for everyone. We give each member of the crew a set of the plans, as well as the engineering reports and lumber takeoffs. This has dramatically cut down on the time we spend explaining how things will proceed on the jobsite. We have found this to be true regardless of the experience level of the crew. As an incentive, we allow framers to count time for studying the plans, and it noticeably shows when we start framing. We also make sure to switch things up so no one person has to be a laborer all the time. No one feels slighted, and everyone becomes a team player.
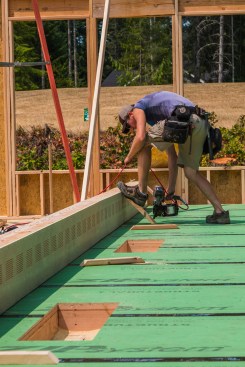
There is a great deal of complexity to framing a house, even a simple one. In our area, this is especially true now owing to seismic requirements that call for a lot of hardware, most of which cannot be installed until after the framing is in place. So part of the planning challenge now has to include making sure we leave enough room to manipulate tools for installing hardware and to allow the inspector to see what he or she needs to inspect.
Tim Uhler
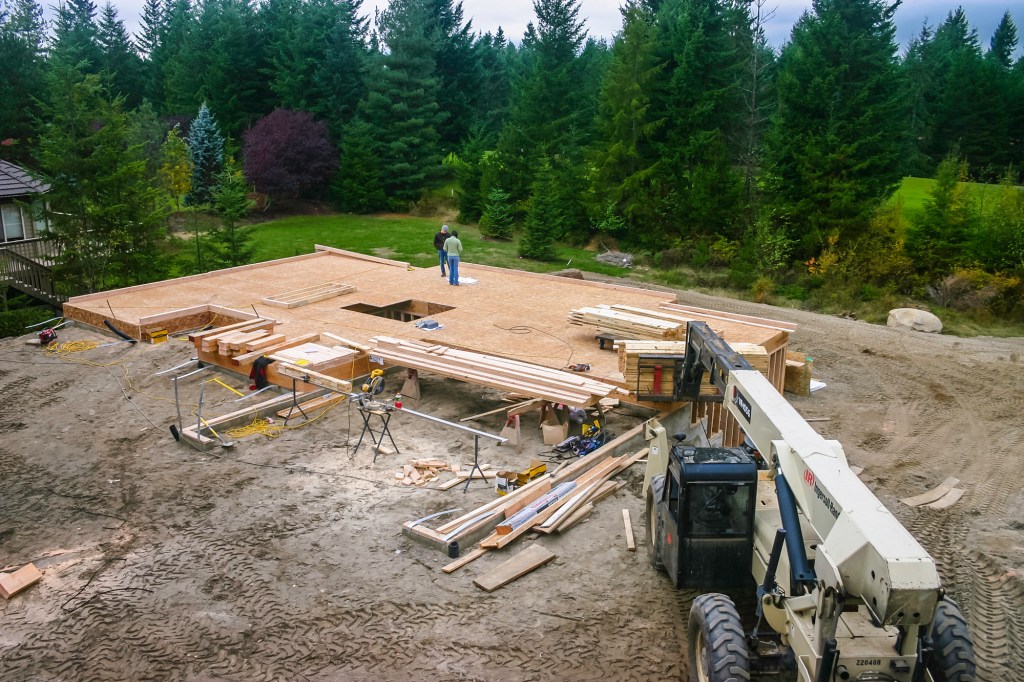
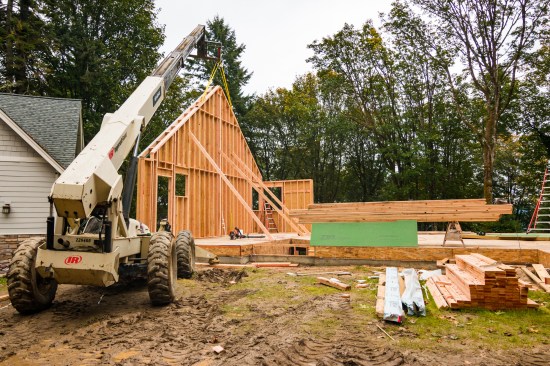
An all-terrain forklift has revolutionized the framing process for the author. With it, he can keep the area relatively free of lumber, and just serve it up when and where he needs it.
Distributing materials. We have the lumberyard do a materials takeoff, except for the roof. (We typically stick frame roofs and have found we have a better understanding of the specific requirements than anyone at the lumberyard.) Those takeoffs are key to establishing a schedule of deliveries so material gets dropped on time. We no longer have the lumber load for the entire house dropped at the same time. Instead, we order by task—for example, first-floor framing, then first-floor walls, then second-floor framing, then second-floor walls, then the roof—and have these delivered separately. This keeps the lumber organized, and leaves us with more room to move around the site.
For most houses, we have the first-floor framing delivered before we get to the jobsite, and we rely on a forklift—that we own—to move the packages where we need them. When we didn’t have a forklift, we made sure that the lumber was dropped as close to the foundation as possible, but that sometimes created an obstacle we had to work around.
Typically, we schedule the first-floor wall framing package for delivery later on our first day. This way if we finish framing the floor and the inspector hasn’t arrived yet, we can start to cut window and door packages for the wall framing.
Jobsite Organization
Buying a forklift totally changed the way I look at a framing job. Now it really is just a giant spread-out assembly line that we can set up and maintain as materials are delivered. To make the assembly line as efficient as possible, I break the framing process down into basic tasks, and then group materials, tools, and framers into units for each task.
Tim Uhler
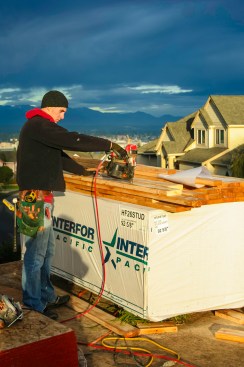
The crew typically sets up a cut station in the garage, placing all the plate stock and window and door material on sawhorses at the same height. That way, the framer doesn’t have to bend over when cutting stock.
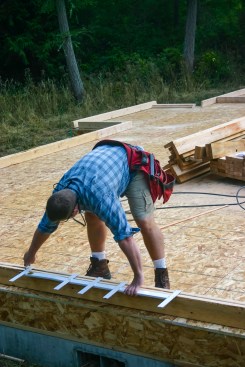
We typically put stud material in the middle of the floor deck so it is easy to get to it from all sides.
With a four-man crew, we typically set up a cut station in the garage area with a sliding compound miter saw (SCMS) and table. We place the framing stock that is both our plate material and window and door package on sawhorses behind the cut station. That way, the material is at the same height as the saw, and all the framer has to do is turn around to grab materials. It wastes time if a framer has to leave the cut station to get material, so setting this up in advance is time well spent.
Tim Uhler
While one framer works at the saw station cutting cripples and plates, another framer uses a 10-inch Big Foot saw to cut the header list. The person cutting header stock will finish first. After he’s done, it’s his responsibility to jump in where he can. Most likely, he will move to tacking plates to the line, and to scattering materials in preparation for nailing walls together.
For sheathing the walls, either we’ll place a unit of sheathing next to the studs if there is room on the deck or we will leave it on the forklift at the edge of the deck where we can easily access it.
Framing Crew as an Assembly Line
A four-person framing crew can usually frame all the outside and inside walls on the same day (not including rake walls) for a normal 2,500-square-foot home. This is how I typically break down the task for exterior wall framing:
Tim Uhler
After cutting all the trimmers, a framer nails them to king studs and stacks them next to the pile of stud material in the middle of the floor.
One framer cuts all cripples and sills, and groups by window. He cuts scrap into 14 7/16-inch blocks so we can install ladder blocking for the drywaller or backing for the finish carpenter.
One framer takes a Big Foot 10-inch saw and cuts the header list. This doesn’t take very long because on the houses we frame, there are usually fewer than 20 headers that need to be cut. He labels the size of the header and stacks the headers close by on the floor. If he gets done early, he can help nail together king stud/trimmer combinations or corners.
One framer cuts all the trimmers, nails them to king studs, and then stacks them next to the pile of stud material in the middle of the floor.
One framer starts plating and detailing. I prefer that the most experienced guy on the crew do the layout—because he is most accurate and the fastest. However, I want every guy I work with to be able to progress as fast as he is able, so I am not always the guy doing the layout.
Plating goes quickly because we use a Big Foot 10-inch saw to cut two plates at a time, and a layout stick to speed up layout.
Tim Uhler
The author uses a layout stick to mark out plates. He splits all plates longer than 16 feet on a stud, pulling the layout from a corner, cutting the plates right at 16 feet, then pulling 16 feet to the next stud.
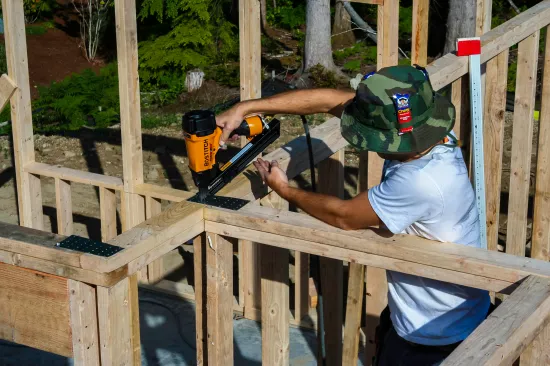
We don’t overlap all our top plates at corners or overlap intersecting walls. Instead, we use Simpson TP-37 plates to connect walls to eliminate errors relating to overlaps.
Tim Uhler
To avoid problems with top plate overlaps, the author simplifies this for the crew and relies on Simpson TP-37 plates at intersections.
Whoever is in charge should also keep an eye on how things are progressing, but it’s each framer’s responsibility to figure out how to fit in and keep things moving. Oftentimes, the framers cutting headers and those nailing king studs and trimmers together are done first, then the framer cutting window packages, and then the framer doing layout. So as soon as someone is done, he can tack plates to the line, and start scattering materials in preparation for nailing walls together.
We try to have two framers do nothing but nail walls together, while one or two framers pack and scatter materials so that the ones who are nailing never have to stop. The framers scattering material split this duty with squaring up the walls that have been framed and sheathing them.
There is a lot of overlap and flexibility in this because no two jobs are the same and some walls are bigger than others. The bottom line is that I want each guy doing as much as he can of a task before he has to stop and switch to a new task. We want as many walls nailed and sheathed before we start lifting them. We usually frame parallel walls at the same time—for example, we frame and sheathe all the front walls and all the back walls, then the sides.
For interior walls, the process is basically the same: One framer lays out, one cuts headers, and one cuts trimmers and nails them to king studs. While the interior framing gets started, the fourth framer fills in any exterior sheathing we couldn’t install before raising walls, and tapes the seams (we use Zip Wall).
Two-Man Crew
The last few years, I’ve been on a two-man crew plus forklift. We’ve had to change the way we do some things to keep production up, with fewer guys. While most of the principles discussed above for a four-person crew apply to my two-man crew, we’ve found there are some modifications that needed to be made.
Beam saws. Instead of using the SCMS, we use our 10-inch Big Foot and 10-inch Sawsquatch saws. We can bring the saw to the material instead of the material to the saw. This saves time on setup and rolling out tools. We keep our scrap and whenever possible, cut it into 14 7/16-inch blocks or 22 7/16-inch blocks as we go.
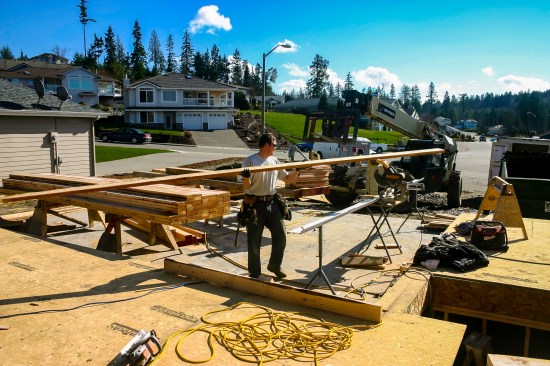
Preassembly. One of the biggest savings in labor is building every gable wall we can as a rake wall with as much trim on it as possible before lifting it. This is safer and much faster. It is also a lot easier on the body.
Tim Uhler
Every gable wall is built as a rake wall and is lifted into place. Each end will be built and placed before the side walls, but it is helpful to frame up a short section of the side wall early, to brace the gable.
Other preassembly tips that make us more efficient include:
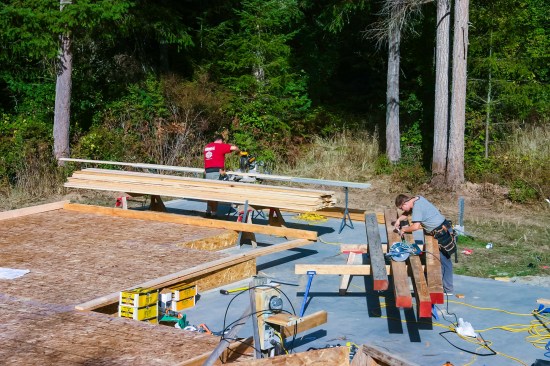
We build closed soffits on the wall before lifting. It is very fast, helps keep the wall straight, and is safer than working off ladders and staging.
Tim Uhler
To increase productivity with a two-person crew, the author builds closed soffits on the wall before lifting. It’s faster, keeps the wall straight, and is safer than working off ladders or staging. But it does require temporary bracing to keep the soffit from sagging before the roof is framed.
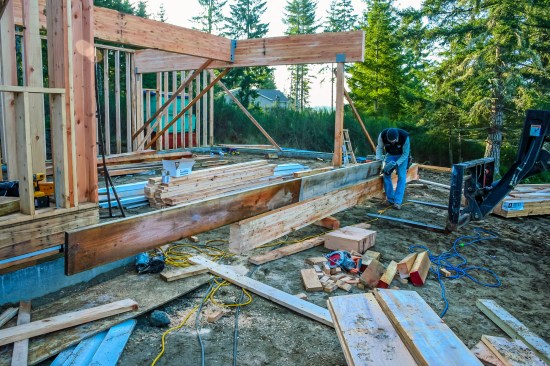
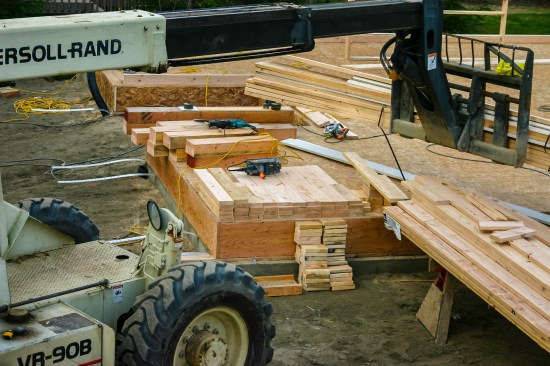
Tim Uhler
Shown above are two preassembly tricks that save time: A framer preattaches a rim joist to a girder before it is lifted into place with the forklift.
Whenever possible, we build walls on the floor deck. This is better (and faster) than working in the dirt or mud.
Tim Uhler
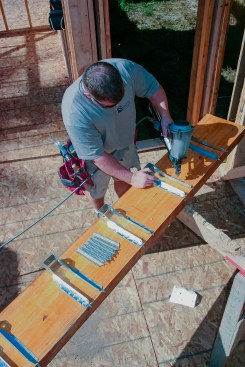
On ledgers and rim joists, it also saves time to preinstall joist hangers. It’s much easier and faster to do this on sawhorses than while balancing at the top of a ladder.
To further save time, we typically preattach hardware like joist hangers before we install a ledger or rim board.


