Like most framers, I learned my trade from one of the older carpenters on the crew. He was a good framer, but he was intimidated by the math required to lay out complicated roofs. Instead of calculating, we often resorted to eyeballing cuts, estimating angles, and just cutting until the pieces fit.
After several years of framing, I decided it was time to stop guessing and learn how to do the calculations. In this article, I’ll show my approach to laying out an irregular Dutch gable. Though the math may look a little intimidating at first glance, it’s not so bad if you break it down into individual steps.
Calculating the Gable
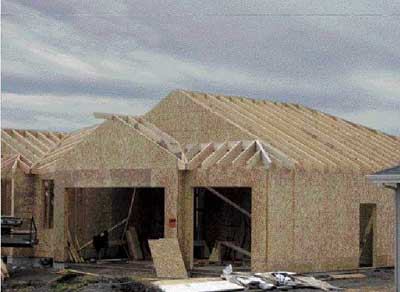
A Dutch gable (also called a Dutch hip) is a combination hip and gable roof. The pitches can be equal, but they were different on the roof shown here, so part of this story is about how to frame an irregular pitch hip. I’ll focus specifically on the front right corner of the garage roof (see illustration, above). Note that on this job, we did not make the front and side soffits equal width, which is a more complicated framing process.
The gable sits back about 3 feet from the front wall. The 32-foot garage ceiling span is broken by a glulam beam that carries both joists and the posts supporting the structural ridge. The gable has a 5 15/16-inch pitch — arrived at in order to maximize the building height within the zoning restrictions.
I use a Construction Master Pro (Trig Plus III) for roof calculations. First I calculate the adjusted run of the gable common rafters:
(span – ridge thickness) ÷ 2 = adjusted run of the common rafter
(32 feet – 3 1/2 inches) ÷ 2 = 15 feet 10 1/4 inches
With that number still on the screen, I punch the Run button, then enter the pitch by keying in 51 5/16 inches and hitting the Pitch key. At this point the calculator contains all the information needed to calculate the rafter length and rise. To get the length of the common rafter, I hit the Diag key, which returns the value 17 feet 81/4 inches. This gives me the rafter length to the wall plate, for the birdsmouth plumb cut. To cut the rafter to proper length, I have to add the 12-inch overhang to the run and redo the calculations.
With the rafter length still on the screen, I calculate the length of the ridge posts by hitting Rise. The calculator displays 7 feet 101/8 inches, the height of the ridge above the plates for a theoretical rafter with a 0-inch heel stand, or height-above-plate (HAP). This roof happens to be framed with 2x12s, so I made the HAP 103/4 inches, which provides plenty of bearing for the seat cuts on both roof pitches. I determine the length of the ridge posts by performing the following calculation:
Rise + HAP – ridge depth – depth beam in garage = adjusted ridge post length
7 feet 10 1/8 inches + 10 3/4 inches – 14 inches – 14 inches = 6 feet 4 7/8 inches
Dropping the ridge. To make sure air can reach the ridge vent, I drop the ridge by subtracting another inch from the ridge post, making it 6 feet 3 7/8 inches high. At this point, we can frame the gable portion of the roof and sheathe the gable wall. We leave off the fly rafters for now; they would only be in the way when we frame the hip.
Figuring the Hip
I start the calculations for the hip by calculating the short 8-pitch rafters that end at the gable wall. The sheathed face of the gable wall is 35 1/2 inches back from the front of the building. Because we’re nailing the 8/12 commons to a 2-by ledger, I subtract another 1 1/2 inches to get an adjusted run of 34 inches.
I begin by entering the run and pitch. To do this I enter 34 inches and Run, then 8 inches and Pitch. Hitting the Diag key gives the result 40 7/8 inches, the length — not including overhang — of the 8/12 king common. To get the height of the ledger, I hit Rise (22 11/16 inches), then add the HAP (10 3/4 inches) to get 33 7/16 inches.
Irregular hip adjustment. The calculator already “knows” that one side of the roof has an 8-inch pitch, so I have to enter the other side as well. I enter the other pitch, 51 5/16 inches, and without hitting the Pitch key, make the following keystrokes: Conv, Hip/V, Hip/V. The result is 61 3/8 inches — the length of the irregular hip to the plate line. Hitting Hip/V a third time gives me 21.67 degrees, the angle on the Speed Square that I use to mark the plumb cut.
To get the other angles, I continue punching the Hip/V button. This gives me a level cut (seat cut) of 68.33 degrees and complementary angles of 53.42 and 36.58 degrees for the diamond point on the hip, and the cheek cuts on the jacks. To keep track of the angles, I make a full-scale working drawing on a piece of plywood. This is particularly helpful with an irregular hip, because it skews toward the steeper slope, and the bevel angles at the top of the hip are opposite those at the bottom. The drawing provides a ready, useful reminder of which angle goes where. It’s worth noting that when you cut a bevel, you tilt the saw to the complementary angle — to 37 degrees to cut the 53-degree angle, and vice versa.
I’ve now calculated the 8/12 commons, the hip, and the cut angles. Another quick calculation gives me the length of the king common on the 51 5/16-inch side: I enter 34 inches, but this time as the rise, then enter 36.58 as the pitch. Punching the Run button gives 45 13/16 inches, the run of the king common that’s fastened to the gable on the 51 5/16-inch side. To get its actual length, I enter 45 13/16 inches, Run; 51 5/16 inches, Pitch; then hit Diag to get 51 1/8 inches.
Rafter tails. I still have to add in the soffit run to get the actual rafter lengths. This is easy on the 51 5/16-inch side, which has the same 12-inch overhang as the main gable. But as I mentioned before, the overhang in front is not the same: The 8/12 rafters, being steeper, have a shorter soffit.
The 12-inch overhang, because it’s on the 5 15/16-inch side of the roof, has by definition a rise of 51 5/16 inches. Because the soffit is level, the overhang on the 8/12 side must also have the same rise. So to calculate the 8/12 overhang, I enter 5 15/16 inches, Rise; 8 inches, Pitch; then Run. The calculator displays 8 15/16 inches, which is the distance you add to the 34-inch run on the 8/12 side.
Laying Out the Hip
Using my 12-inch Speed Square, the first thing I do is square a line across the top edge at the upper end of the hip stock. Where this line hits the edges I draw the 21.67-degree plumb cuts on both faces.
Cut lines. Before cutting, I have to locate the cut lines so that the two bevel angles will meet at the center of the stock. The scale drawing shows where the lines for the plumb cuts should be, relative to the 21.67-degree lines I just drew. If the bevels are to meet in the center of the 4-by stock, the cut lines have to shift — 15/16 inches for the 53.42-degree bevels and 2 3/8 inches for the 36.58-degree bevels.
You can also use the calculator to find the setback distances: Enter half the thickness of the hip — 1 3/4 inches — as the rise, and the bevel on that side — 53.42 degrees — as the pitch, then hit Run. The result will be 15/16 inches, same as on the drawing.
Marking the length. After cutting the top of the hip, I hook my tape on the diamond point and measure down to make marks at 61 3/8 inches (the corner of the wall) and 77 1/2 inches (the end of the tail). Again I square a line across the top and plumb lines down the sides. The upper line represents the outside corner of the building and the lower one the tail of the hip. These lines will also have to be adjusted before cutting
Backing the Hip
On a regular hip roof, the hip rafter is usually dropped (lowered) so the jacks will flush out with the edges. But with an irregular hip, you have to lower each edge a different distance. Some framers handle this by cutting a backing bevel from each side, but I just bevel one side — the steep side — and set the top corner of the shallow side in plane with the shallow pitched roof. The plywood sheathing will have a small gap under it in the middle of the hip, but that doesn’t matter.
To find the backing cut line, I lay out the lower-pitched side first so that the jacks will be flush with its existing edge. I first locate the seat cut, simply measuring 103/4 inches down from the top edge of the hip along the offset cut line.
Next, I make the seat cut from this side — the 5 5/16-inch side — all the way through the stock. I then flip the stock and hook my tape on the seat-cut kerf on the opposite side — the 8/12 side — and measure 10 3/4 inches up the plumb cut line to locate the backing cut line.
Bevel angle. We make the cut with the saw bevel set to an angle equal to the slope of a triangle with a run of 1 3/4 inches (half the thickness of the hip) and a rise of “X”. Because the other side of the hip has already been dropped, the backing cut doesn’t reach the center of the stock.
We use the same 15/16-inch and 2 3/8-inch setbacks to lay out the diamond cut on the lower end of the hip. The final layout step is to draw a level line for the soffit cut. Once the layout is complete, I finish cutting the birdsmouth and make the diamond cuts and level cut at the tail.
Jack Layout
I lay out jacks from the long point of the bevel. In this case, because the hip is so short, there’s only one jack. I make its long side one of the sides of an imaginary triangle, then solve for its run.
Difference between jacks. If there were more jacks, I’d calculate their lengths by taking the length of one and then adding (or subtracting) the difference in length to find the succeeding ones. So for rafters 24 inches on-center, I’d start by finding the run of a jack 24 inches away from where the hip and wall meet. To do this, I’d enter a run of 24 inches, a pitch of 36.58 degrees, and hit Rise. The result is 17 13/16 inches, the run of that jack. We then enter a run of 17 13/16 inches, a pitch of 8 inches, and hit Diag. The result is 21 7/16 inches, the difference in length of successive jacks on the 8/12 side.
We use a similar process to figure the jacks on the 5 15/16-inch side. The difference is we’d start with the adjusted run of the 8/12 king common and use an angle of 52.42 degrees.
Tim Uhler is a lead framer for Pioneer Builders in Port Orchard, Wash., and a JLC contributing editor. Thanks to the many veteran framers in the JLC Online forum who have provided tips and guidance.


