When it comes to designing a floor system, we always want to offer our clients a rigid floor. We’ve likely all been in a house or room and felt the bounce or shudder of the floor when someone walked by. To avoid this in the houses we build, we ask our engineers to design the floor systems to be above industry standards for deflection.
To provide the stiffness we desire, open-web floor trusses have been our go-to option for the second-floor framing for around 10 years. Over this time, the houses we’ve built have grown in complexity, and open-web trusses give us the most flexibility, particularly for roughing-in the HVAC, electrical, and plumbing systems.
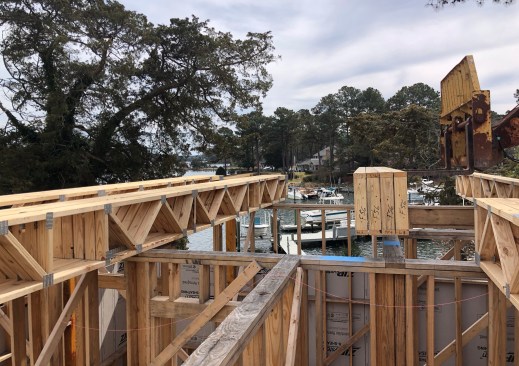
Open-web floor trusses are built just like roof trusses. In our area, southern yellow pine is the material of choice. Typically, the trusses are made with 2x4s connected together with metal gussets and configured to fit the truss maker’s design.
Incorporating floor trusses into a build always starts with the structural engineer speccing them in the plans. The engineer will typically call out the size (depth) needed for the spans in the design as well as any steel beams or LVL locations. Then, we typically submit the plans to the local lumberyard or a truss manufacturer, which will then develop a set of drawings with every joist fully detailed in plan and elevation.
Top Reasons We Use Floor Trusses
The rigidity that gives that “solid” feel to a floor is certainly the top reason we like to use open-web floor trusses, but there are two other key advantages: namely, the ease of installing ducts through the open webs and the overall ease of rough-ins for other trades.
Being able to run ducts through the webbing is especially welcome. Working on projects where the space allowed for mechanical systems is small to nonexistent can be frustrating, and building out chases and other workarounds to integrate the ductwork into such a floor system becomes very time consuming.
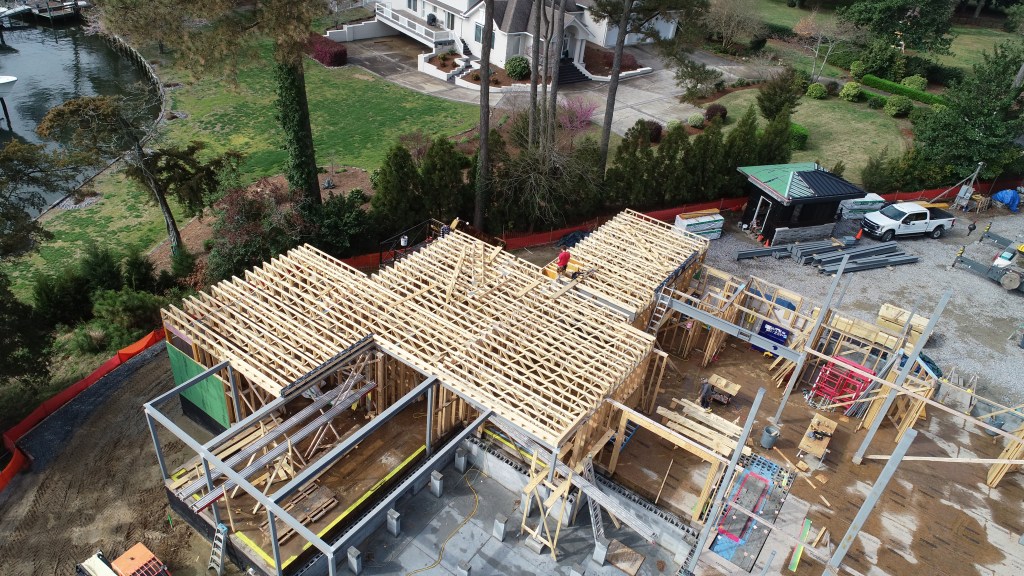
Running HVAC ducts in the open webs of floor trusses offers a distinct advantage. On this job, the truss layout was coordinated with prefabbed openings in the steel girders.
Openings for ductwork were designed into the trusses to align with openings in the steel girders.
When defining the duct pathways through the trusses, we can send an initial truss design to our mechanical contractor (or mechanical engineer, if the project allows) for consideration when designing the duct layout, or we can get the duct layout first and include it when we submit our plans to the truss designer. We find the latter usually works best because the truss maker can then accommodate the duct layout into the truss design. Inevitably, we end up with compromises or field changes to trusses when the mechanical design follows the truss design.
Rough-in for other trades is also simplified because no drilling or cutting is necessary to run wiring, plumbing, audio/video, and the like. Trusses eliminate the problems of trades accidentally drilling a hole too large in the wrong location of a typical 2-by or I-web joist. Truss designers can plan around toilet locations, as well as any other large plumbing drops. For this reason, we strive to have our plumbing layouts designed in advance and allow the plumber to take a look at the framing layout before the trusses are fabricated.
Streamlining Installation
Once the details have been submitted, it usually takes only a week to receive a design back from the truss manufacturer. This design consists of a joist layout in plan view where each truss serving as a joist is labeled. It will also include an elevation of each specific joist. Of course, detailed dimensions are also part of the elevation sheet. The layout sheets we receive from the truss designer are thorough yet still easy to follow. Each joist has its own letter and number designation. Once we’ve fully exhausted the process of fine-tuning the duct locations and any special circumstances a project may present, we will release the joist package for production. Typically, the plant needs only two to three weeks to prepare the trusses and have them ready to ship to us.
The joists will arrive on a flat bed and be set down on the site like a typical lumber package. We’ve found it’s important to stage the package with the joists accessible to the framers in the order they will be installed. Another critical detail is to make sure the joists are lifted up onto the walls oriented in the right direction. With large projects, we will sometimes paint the joist ends that face out. We have found that joists can be banded together for different areas, and painting the ends with different colors makes it easy to see at a glance which joists will go in the same location.
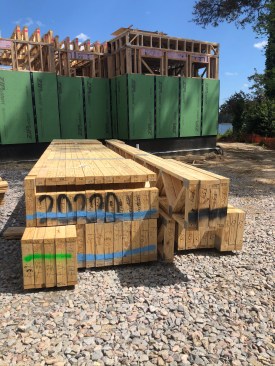
Floor-joist bundles are color-coded after the lumber drop.

This ensures the correct bundles are lifted to the right locations on the frame.
We will also mark the tops of walls where ducts will pass to make sure joists are not placed there. If we don’t do this, joists may start to be set before we discover that the duct paths that were so carefully designed don’t line up from joist to joist.
A couple of other cool features that have been designed into some of our open-web truss packages are zero-entry shower floors and “shade pockets” for roll-down window treatments. With zero-entry showers, the trusses are designed to step down, typically about 2 inches—more than enough to create the necessary slope. In some cases, the step-down can even be in the middle of a joist span. With details like this, of course, it’s paramount that they be defined prior to making the trusses.
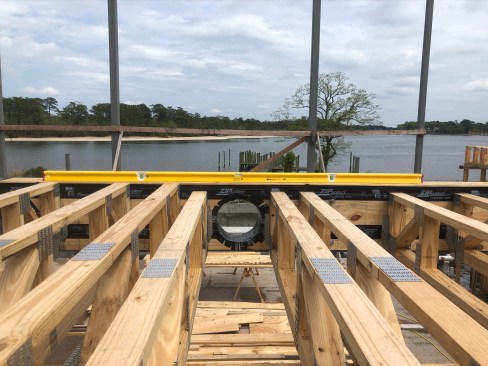
To ensure that the framers stay aware of the duct layout, the author painted the top of wall plates blue to define duct pathways.
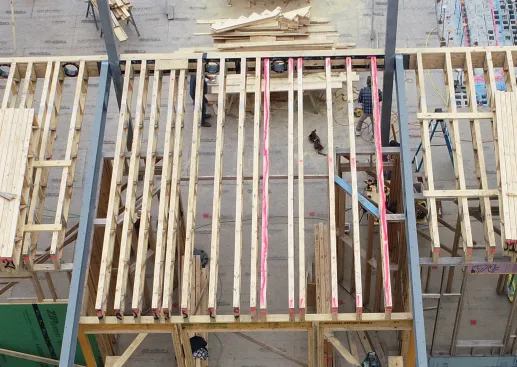
At an area where trusses drop for a curbless shower, the author painted the top chords hot pink so framers stayed aware of the small change in elevation.
The Engineer’s Considerations
I’ve mentioned the reasons we like open-web trusses, but I also reached out to our structural engineer to ask what he likes about them. Not surprisingly, topping his list is the stiffness they provide. He explained that the main reason behind this stiffness is their greater mass, and, as he put it, “mass is the enemy of vibration.” In contrast, I-joists are relatively light and tend to vibrate easily.
Our engineer noted that trusses easily allow for the higher stiffness rating (less deflection) needed for specific projects. For example, on apartment projects, which tend to have a greater intensity and frequency of live loads, he uses a higher deflection tolerance (L/600) than he typically uses for custom homes (L/360). The stiffer L/600 rating amounts to a 3/8-inch deflection in a 24-foot span, compared with a 5/8-inch deflection over 24 feet for L/360.
One last point our engineer made, which resonates with a lot of builders, is that the installation process for open-web floor trusses is straightforward. Everything has been defined ahead of time for the framers. There’s no cutting involved and, as long as framers follow the layout and use the right joist number, all the details fall into place.
On the other hand, the biggest challenge of using floor trusses is the difficulty in modifying them in the field. If a change order involves lengthening or shortening a truss, you’re going to have to call the truss designer and request a field modification detail. Trusses can be modified; this usually requires sistering 3/4-inch plywood on each side and nailing it off in a certain pattern. But this absolutely has to be done to the truss maker’s engineering specifications.
To avoid making changes in the field, I highly recommend planning for all the “immovable,” or must-have, objects that may land in the floor or ceiling. The truss designers are good about designing the layouts around toilet locations, for example. Along these lines, another big item we like to plan for early are can lights. This might not make sense for every builder but, for us, it’s critical to be thinking through at least some of the general lighting locations. We’d hate to have to tell a client something like, “Sorry, but you can’t have a can light there for your artwork; there’s a joist in the way that we can’t move.” In hallways, especially with the 3 1/2-inch width of the trusses, you need to work off the centerlines.
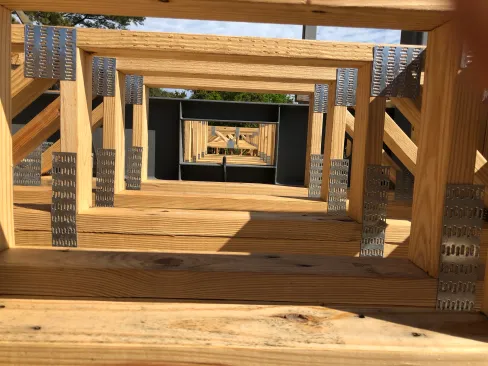
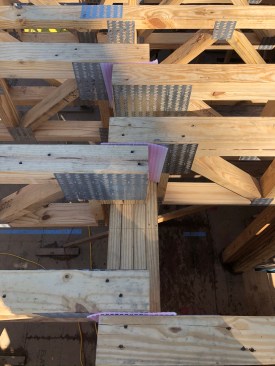
When defining the joist layout, the author’s team works off the centerlines of headers and hallways to ensure there’s room for can lights.
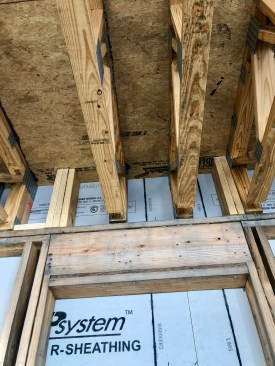
Where the gussets of overlapping joists touch, the crew inserts sill-seal foam to prevent squeaks.
With a little planning up front and some patience from the framing crew, we can usually work around anything we need to. Best case, we like to start developing room lighting layouts in the design phase. If these aren’t fully developed, then the project manager needs to spend some time firming up proposed light locations with the clients and marking those out on the subfloor before the joists start to go in.
One other fine detail concerns joists that lap each other on a wall or girder. We add a piece of foam sill-seal between the overlapping joists to make sure there is no chance of a squeak from metal gussets touching each other. This may be an unlikely scenario but, if it should ever happen, it would prove extremely difficult to remedy after the framing has been closed in.


