

Last year, we tried Huber’s Zip System wall and roof sheathing on a spec house to see how well these products would work with our construction methods. Zip panels have the same structural qualities as other types of OSB sheathing, but they also have a water-resistant kraft overlay on their outside face. After they’re nailed off, the seams are sealed with a specially designed tape. Then the siding and roofing can be applied directly to the panel face, with no need for a separate water-resistive barrier or roofing underlayment.
A big incentive for me at the time was a $3-per-panel manufacturer’s rebate that allowed us to test the Zip panels and tape without having to raise the price of the house we were building. That rebate was only for first-time users and has since expired, but we’re still using Zip System sheathing. That’s because despite the premium we pay for the sheathing and tape, we’ve found that – with a few exceptions – the installed cost compares favorably to that of conventional sheathing with housewrap.
There are numerous benefits to using Zip sheathing, including faster dry-in and less wind damage to the weather barrier before siding and roofing application. But possibly the biggest advantage is that the taped panels create a continuous air barrier, making it easier to build a tight shell and meet the 2009 International Energy Conservation Code’s requirements for air leakage. Under the newest version of the energy code, air leakage needs to be less than seven air changes per hour at a pressure of 50 pascals (ACH50) as tested with a blower door. (Washington State, where I work, has recently adopted a similar code.) If you’re committed to building energy-efficient houses or you work in an area that has adopted the IECC, using Zip sheathing might simplify how you detail the building envelope.
Cutting and Installation
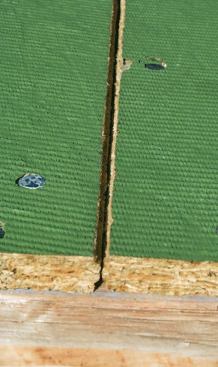
We work in an earthquake zone and typically run our sheathing vertically to reduce the need to block panel edges. So we appreciate the fact that the long edges of the wall panels have a self-spacing profile that allows us to butt the panels tightly together at this critical joint. Along the shorter 4-foot panel edges, a standard 1„8-inch gap is still required.
Nailing. Zip sheathing feels a bit stiffer and denser than standard OSB sheathing. Even so, when we first nailed off the Zip panels, it seemed that we were over-driving an unusual number of fasteners. According to Huber, overdriving doesn’t compromise the panels’ water resistance or void the warranty, but the company recommends taping any fastener driven more than 1„8 inch below the surface of the substrate. When we slowed our pace a little instead of blasting away with our nail guns, we had better success setting the nail heads flush. This simple step didn’t cost us much extra time, and we didn’t have to reset the depth-of-drive on our guns or lower our compressor settings.
Even when the nail heads are perfectly flush during installation, though, we’ve noticed that when we come back later to install siding, the nails all look slightly overdriven. My guess is that the sheathing absorbs a little of the moisture in the air and swells, so on our next house we plan to try using Bostitch HurriQuake nails (800/556-6696, bostitch.com). These nails have a 25 percent larger head and a smaller .113-inch shaft diameter (as opposed to the .131-inch-diameter fasteners we’re using now), which I think will help keep the nail heads flush with the face of the sheathing.
Cutting. The denser panel material definitely takes a toll on blades and bits, at least compared with standard OSB. We noticed when we were cutting 1„2-inch roof sheathing that the red coating quickly disappeared from the Freud Diablo blades we like to use. Since we never experienced this when cutting AdvanTech subflooring – another Huber OSB sheathing made with the same resins but without the overlay – we assumed that the wear on the blades was caused by the overlay. Most of the roofs we frame have lots of hips and valleys, and with the Zip System panels, the many cuts required were not as clean as we were used to.
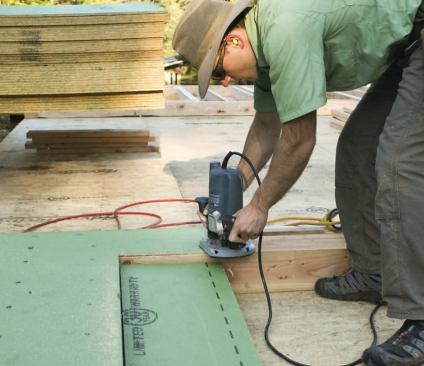
We try to keep cutting to a minimum when sheathing walls by running the panels over door and window openings, then coming back later with a router to cut out the openings. On our first Zip house, our carbide router bits lasted about half as long as they last on houses with regular OSB sheathing.
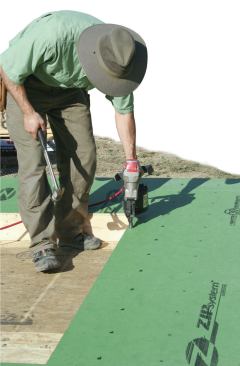
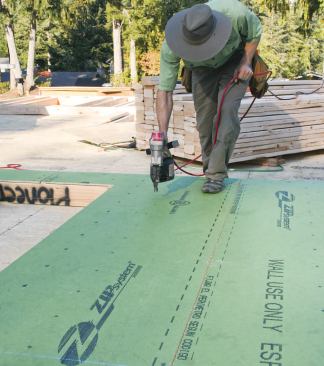
Taping the Seams
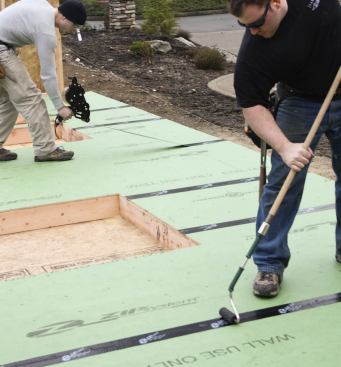
We sheathe walls while they are on the ground whenever possible, which means that we usually tape the seams at the same time. To keep the framing process moving along, we’ve learned to nail off the seams first, then have one crew member tape them while the rest of the crew finishes nailing off the rest of the panels. Because the panels are stamped with stud locations and nail spacing, we have fewer missed nails. And when the time comes to install siding, it’s easier to hit the framing.
Some building inspectors like to have a look at the nailing before the house is wrapped, which obviously complicates matters a bit when using the Zip System. Fortunately, the tape is thin enough that an inspector can see or feel the nail spacing to determine whether the fasteners are overdriven. Some inspectors are a little stricter and want to actually see the bare nails, in which case we can leave the tape off the corners and a few seams, then apply the tape after the walls are raised.
Tape sizes. Zip tape comes in 33„4-inch and 6-inch widths and consists of a polyolefin film with an acrylic adhesive. It’s thinner and less gummy than butyl- and asphalt-based tapes and can be repositioned during installation. According to Huber, the tape can be applied to surfaces as cold as 20°F as long as they’re dry to the touch and frost-free. The manufacturer warrants that taped and installed Zip panels can be left exposed to the weather and UV rays for up to 120 days.
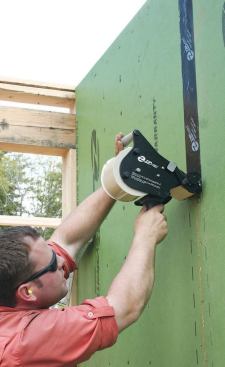
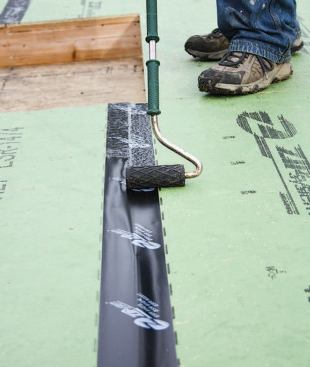
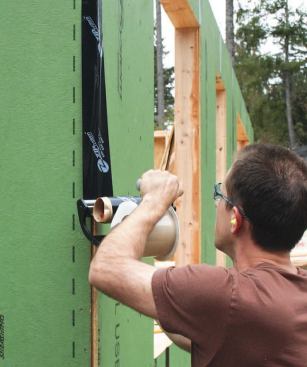
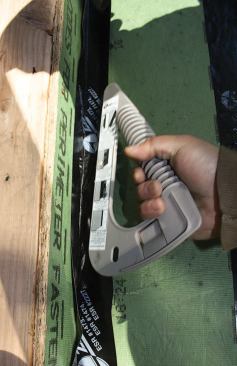
Application. The fastest way to apply Zip system tape is with Huber’s stout new tape gun, which resembles the dispensers used to tape boxes together (Figure 2). The gun’s built-in roller makes it easy to apply enough pressure to activate the tape and smooth out air bubbles or wrinkles. The gun also has a spool that automatically rolls up the release paper on the tape. It takes a crew member only about 10 minutes to tape a 32-foot-by-16-foot wall.
Keeping the tape straight on runs more than 5 feet long can be tricky, though. So for longer seams, we tack the tape down at one end, pull an 8- to 10-foot length off the gun so that the tape is straight, and then lay down the tape so that it’s centered over the seam. If there are any splices, we overlap the tape at the joint by a couple of inches. After taping, we use the Zip System’s J-roller to smooth out any wrinkles and activate the tape.
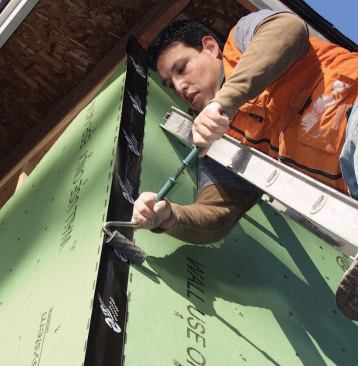
Zip tape can also be applied manually. After pulling lengths of tape off the roll and cutting them to length, we pull off the release paper as we’re taping the seam, then go back over the seam with the J-roller. This method takes a lot of time, so we use it mainly for inside corners and other odd configurations.
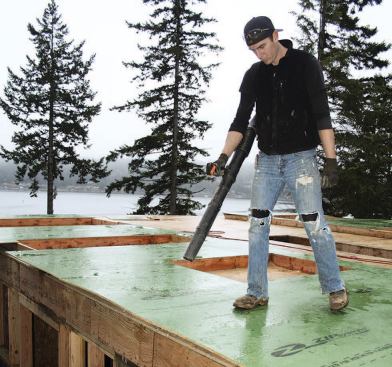
In rainy conditions, we keep the panels covered by a tarp so they stay dry. That way, we’re always sheathing with dry panels, regardless of the previous night’s conditions. If it’s raining while we’re sheathing, we don’t tape the seams immediately; instead, we return later and “blow-dry” the seams with a backpack blower. One person walks down the seam blowing off the water, and another person follows with the tape. If it’s impossible to keep the sheathing dry enough, we wait until conditions improve and the surface has dried off before coming back to tape.


