I’m a second-generation home builder working in northeastern Connecticut, and I’ve been building net-zero energy homes for about 10 years. In my early years doing this, I experimented with structural insulated panels (SIPs) and other methods, but these days, I have settled down to a formula based on a cellulose-insulated double-stud wall sheathed with plywood on the outside, and a flat attic with deep blown cellulose. I shoot for a HERS rating of about 40 without solar, and I get the rest of the way to a HERS zero rating by installing photovoltaics on the roof.
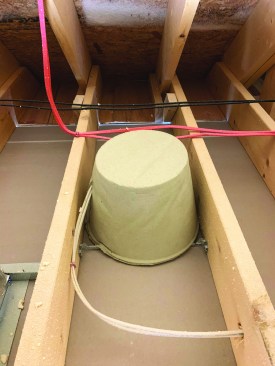
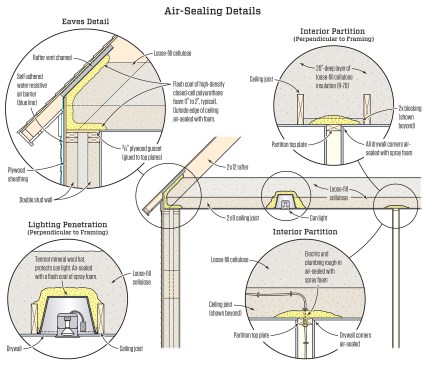
The author protects can lights in the attic using Tenmat mineral-wool hats.
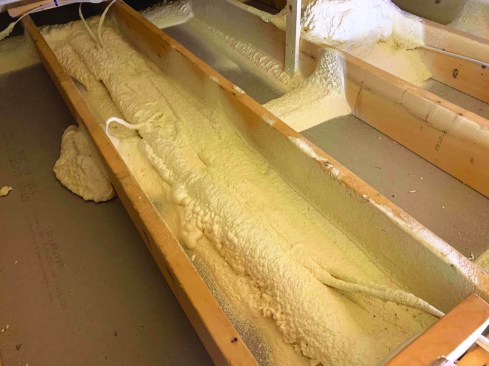
The spray-foam contractor then seals the hats down to the attic floor with a flash coat of high-density closed-cell polyurethane foam.
In 2010, I was trained and certified as a Passive House consultant. Because of client budgets and performance expectations, I typically take a step back from Passive House in terms of insulation levels and window performance. This allows me more freedom to use a variety of building forms and gives customers more choice around things like window placement.
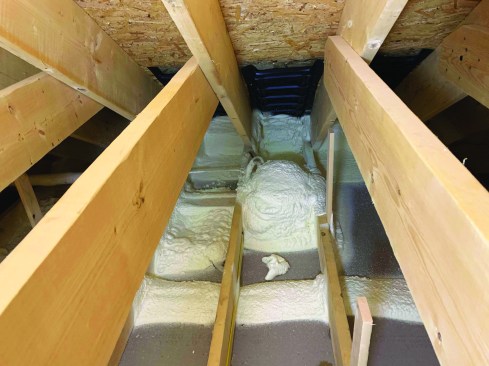
At the same time, the spray-foam contractor seals the gaps at the outside edge of the ceiling.
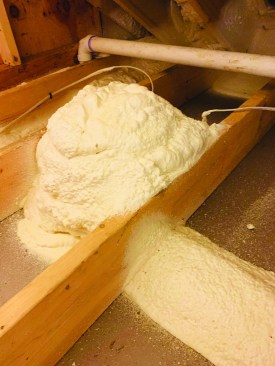
Partitions also create potential air leaks, both where the ceiling drywall butts to the wall and through wiring penetrations. So this location also gets a flash coat of spray foam.
However, my company does routinely reach the Passive House metric for airtightness. We blower-door test all our houses for Energy Star certification, and they typically measure tighter than 0.6 ACH50—usually, somewhere between 0.3 and 0.5. One way we reach that level of airtightness is by focusing on the attic, including the critical juncture between the walls and the roof.
It starts with the double-stud wall. As I mentioned, we sheathe the exterior walls with plywood. Then we cover the sheathing with Henry Blueskin to provide an airtight drainage plane. The outer stud wall and the inner stud wall are connected at the top with a continuous gusset of 3/4-inch plywood that is glued to the wall top plates. That stops any air leakage from outside those walls.
Tim Healey
But this still leaves a leak point where the ceiling drywall butts up against the edge of the plywood gusset joining the wall plates. We address that joint from above. The spray-foam insulation contractor goes up into the attic and applies a flash coat of foam to that joint between the drywall and the exterior walls. He does the same thing at all the interior partitions.
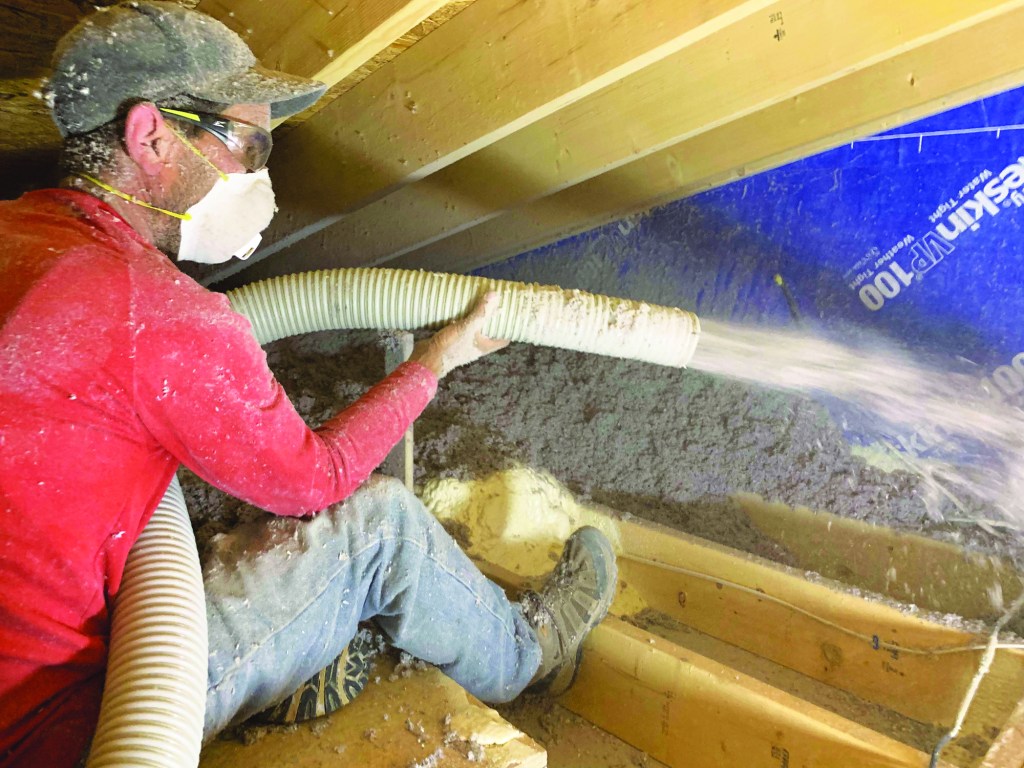
We also spray-foam any penetrations in the ceiling. Where we have can lights, we install Tenmat mineral-wool hats over the lights (tenmatusa.com) and then cover the hats with spray foam. With all the joints and penetrations sealed with foam, we can now proceed to insulate the attic using 20 inches of loose-fill cellulose.
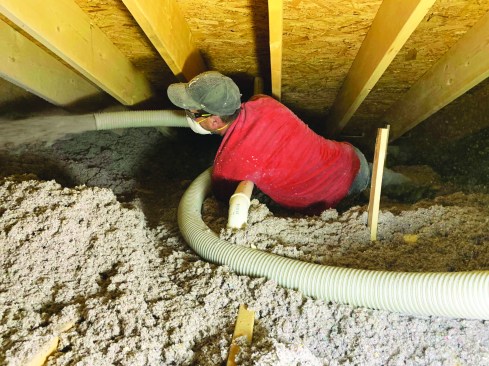
When all the leak points have been sealed with spray foam, the author’s crew installs 20 inches of blown-in cellulose insulation to complete the insulated attic assembly.
This method is simple but effective. I just received the finalized HERS rating for a house we completed a few months ago, built with the same methods I’m showing here. The house had a HERS score of -14 (37 before PV). The blower-door test came in at 0.53 ACH50.
Photos by Nick Lehto


