
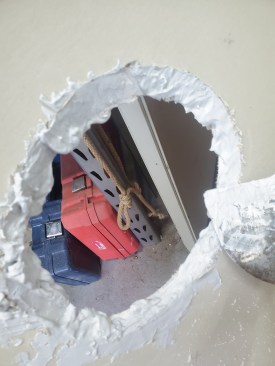
During remodeling projects, it’s frequently necessary to cut holes in drywall in order to add or modify plumbing or electrical components buried in a wall. I’m retired now, but for my company, a very common request was to add a ceiling fan to a bedroom, which requires opening up several holes in the ceiling and a wall to run wires to a switch.
Traditional thinking is to blast your way in to do the work, then call a drywaller to come in and patch everything later, but this takes time and expense that we wanted to avoid. Traditional methods of repair involve cutting away the rough edges of the hole in the drywall, cutting a new piece to fit, then adding backing and screwing the patch in place. Next, the patch has to be taped and mudded, then sanded, then get more coats of mud that need to dry before the patch can be sanded and primed and painted to match. The process generally requires several trips by the drywaller, followed by the painter, making the cost unreasonable just to add a fan.
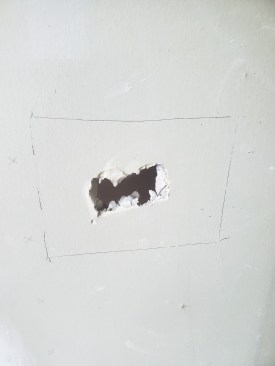
Angled cutout. We decided that to remain profitable, we would have to limit ourselves to four hours for a fan project, including painting and cleanup. To do this, we had to speed up the patching process.
One day it dawned on me that we could cut more carefully and save the original cutout piece to make the repair. Next, we asked why we needed to tape around the patch if there is no possibility of movement and cracking? Eliminating the tape would reduce buildup and thus the size of the patch to make it smooth. Finally, we needed to figure out how to hold the patch in place to reduce time. Enter the pumpkin cut.
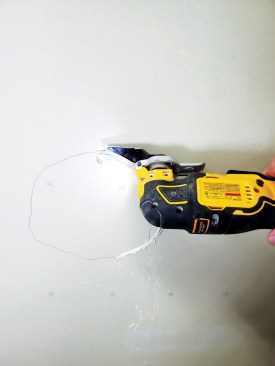
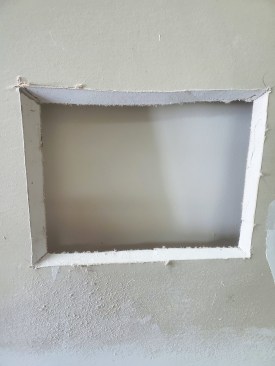
Start by drawing an outline for the access hole, then cut to the line while holding the blade at about a 45-degree angle.

A little less angle is better than too much as the mud buildup can make it hard for the piece to fit in flush with the surface.
As children, most of us carved out pumpkins for Halloween, first cutting around the top at an angle to make a lid that would not fall inside the hollowed-out pumpkin. Making our needed cuts in the drywall on an angle—as for a pumpkin top—turned out to be the key to making rapid drywall repairs. Our rule became: “Never let another trade open up a hole in the drywall for you.” If they needed access, they had to come to us first.
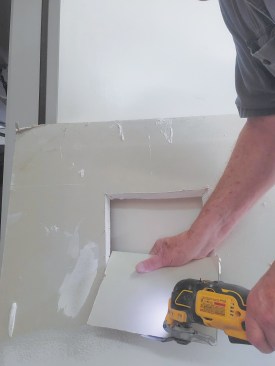
We taught dozens of electricians and plumbers this technique. Many would make the cut and save the piece for us to reinstall when we arrived on site later. When we had to patch a hole that we didn’t make, with a little effort, I could trim around the rough hole, shaping and beveling the edges to simulate the pumpkin cut, then carefully trim a new piece with beveled edges to fit the reshaped hole. To fine-tune the new piece to the hole, use a keyhole saw or just the blade from a reciprocating saw inserted in the space between the hole and the new piece and gently cut away whatever spots are touching and preventing the piece from slipping in flush.

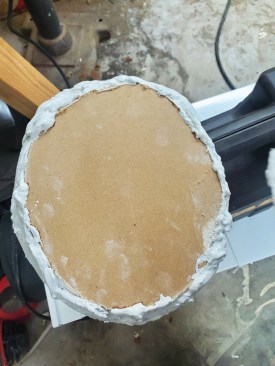
Prep the cutout by trimming any fuzzy edges off with a razor knife or scissors.
Then apply joint compound to the edge of the hole.
You can use either a fast-drying setting compound or regular joint compound to “glue” the patch in place. With regular mud, we used a heat gun to speed up the process. Then skim coat, lightly sand to just reveal the edges of the patch, and apply a second skim coat, after which the patch is ready for primer and paint.
The edge of the cutout also needs to be coated with joint compound.
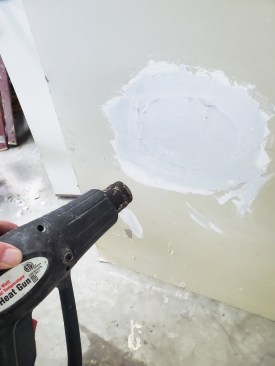
Either a setting compound or regular joint compound can be used; in the latter case, a heat gun will speed up drying.
Patching an existing hole. But what about those times you didn’t cut the hole? The same process applies, but it starts out a little differently. First, straight-cut (no bevel cut yet) a new piece of drywall at a size and shape that will cover the damaged area. When sizing the drywall patch, be generous to allow for blowout on the back of the existing drywall, as it needs to be sound. A square or rectangular patch can be a little easier to cut, but as with the previous example, shape doesn’t really matter.
To repair an existing hole, cut out the patch first, place it over the hole, and trace its outline.
Cut to the line with the blade of the multitool at a 30- to 45-degree angle.
Next, place this piece over the damaged area and trace around it with a pencil. When you cut out this traced area along the pencil line, hold the blade of the tool that you are using to make the cut at a 30- to 45-degree angle. Then bevel the edges of the patch at the same angle.
The edges of the patch will then need to be beveled to the same angle.
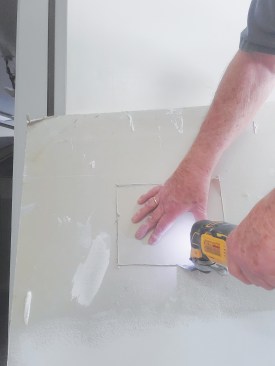
Fine-tune the fit by pressing the patch into the opening and shaving off high spots with the blade fitted between the patch and the cutout.
At first, the patch most likely won’t fit the hole exactly. While holding the piece in place, use your saw at an angle to clean out areas of contact that are preventing the new piece from matching the hole. The goal is to be able to recess the patch into the hole a little bit, so that the patch will be flush once the edges have been buttered with joint compound.
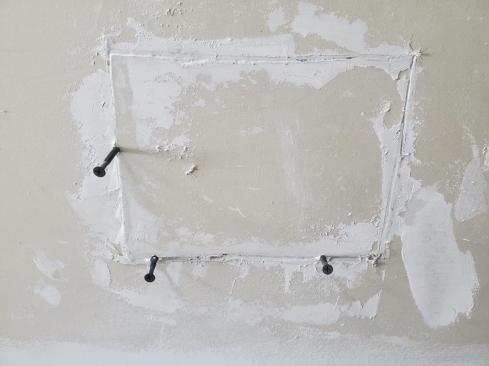
A few drywall screws will help hold the patch in place while the mud dries.
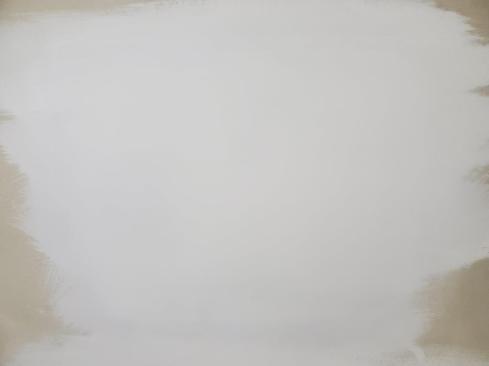
Finally, skim coat, lightly sand to just reveal the edges of the patch, and apply a second skim coat. Now the patch is ready for primer and paint.
From here on, finishing is the same as before. To help with alignment, you can add a couple of coarse-thread screws if needed. Just remember to take them out before applying the skim coat. If we did it correctly, we found that we could complete a drywall patch in a single trip and spend less than an hour doing it.
Photos by Thomas Dugan.


