Architects drool over it and clients love it, but frankly, board-form concrete can be a little daunting for a concrete sub or a builder. In this article, I am going to discuss some tips I’ve learned over the years from doing a number of architect-designed homes that have featured board-form concrete walls.
THINK “ART FORM”
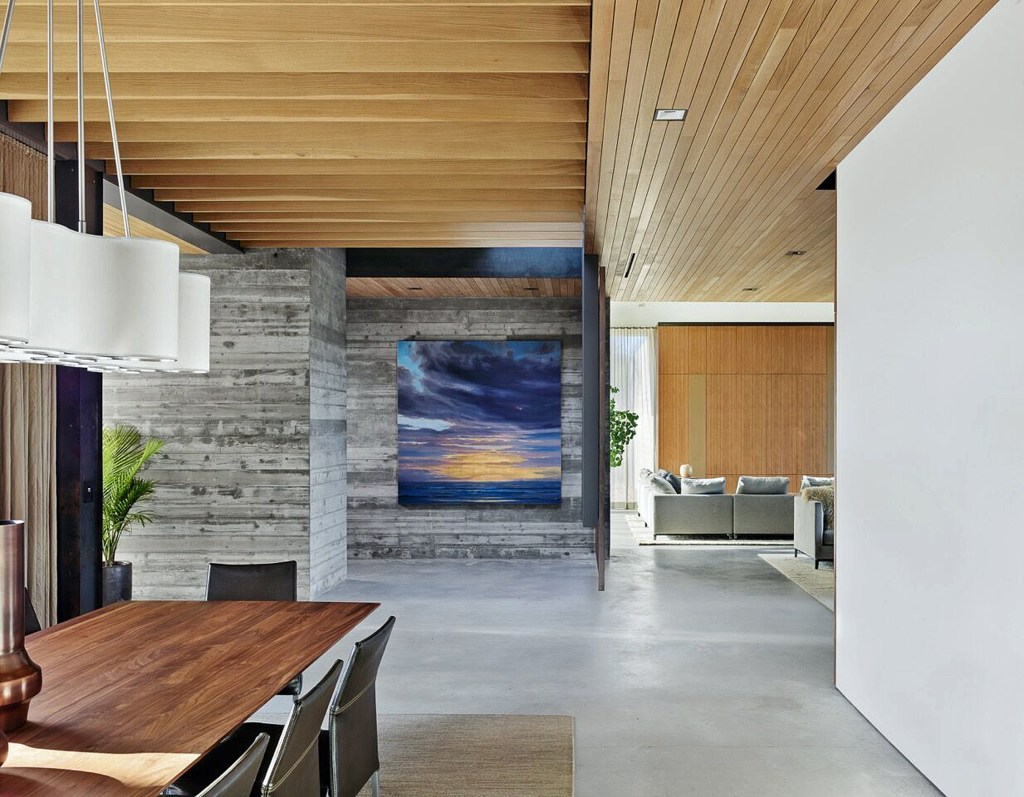
Most poured-in-place concrete walls in residential construction are for basements, which have wall surfaces that are either underground or, if exposed on the interior, are considered part of an unfinished space. What we are talking about here is still a structural wall, but it is also a finished surface for aboveground walls.
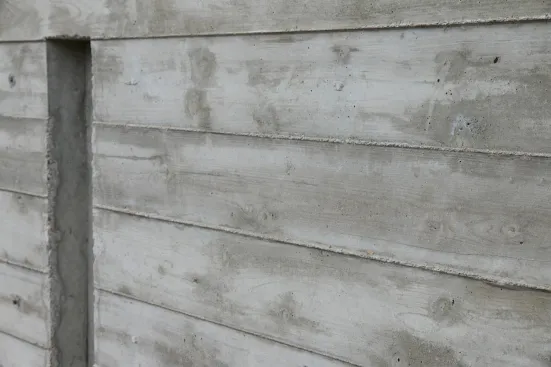
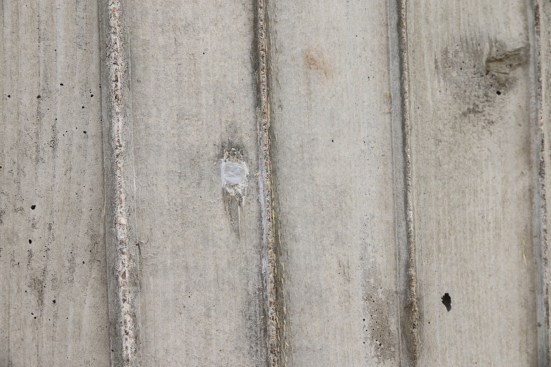
The grain and texture of the individual form boards telegraph in reverse onto the surface of the concrete.
It’s really an art form, or a sculptural process, that accentuates the surface and intentionally highlights the pattern and grain of the form boards. In many ways, board forming is an old technique; it’s how all poured concrete walls used to be done before we had aluminum and plywood concrete forms. But it has been revived by architects looking for a dramatic, textured wall finish.
NOT YOUR AVERAGE CREW
A good concrete crew is essential. This is not blow-and-go work, and you need a crew that will listen and come up with solutions. Concrete guys know an amazing amount about how concrete behaves and how to get it to do what you want. I’m lucky that I’m able to work with Chris Walcher and the crew at Boothe Concrete here in Austin. It helps that the end product is an art form that features their work. If the job goes as planned, it makes them look good, and the project becomes their art form that we’re showing off.
MOCK-UPS
When you eventually go to pour the walls, you get only one chance to get them right, so it is always a good idea to make sure the architect and the client are completely on board with what the finished surface will look like. Is the board pattern what they expect? Does the surface provide the detail and the overall look and feel they envision?
Since you get only one chance at the final pour, Risinger typically builds a mock-up on site, allowing the architect to experiment and allowing Risinger to get complete buy-in from the architect and the client.
The best way to answer those questions and get complete buy-in from everyone involved is with a mock-up. On this mock-up, we used both sides, modeling a different board width and orientation on each one before settling on a horizontal scheme for this project.
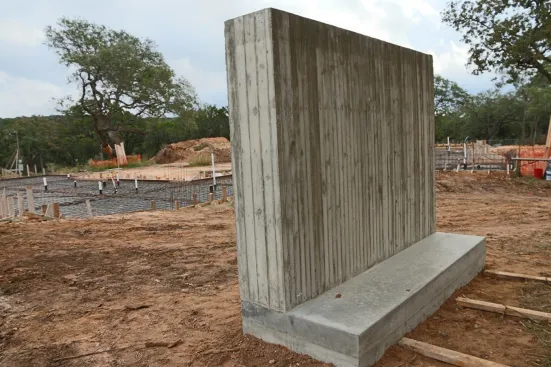
When building a small, freestanding structure for the mock-up, you have to build a super-stout structure, adding many more kickers to hold the bottom and a tighter spacing of wales than you might otherwise use. This also applied to the walls we were building for this project with intermittent, freestanding sections. For each one, the formwork had to be built like a small fortress. The last thing you want is a blow-out of a form to shift position while placing the concrete.
FORMWORK
When we’re forming these walls, we need everyone to slow down. It takes two or sometimes three times longer to build these forms than it would using conventional concrete formwork.
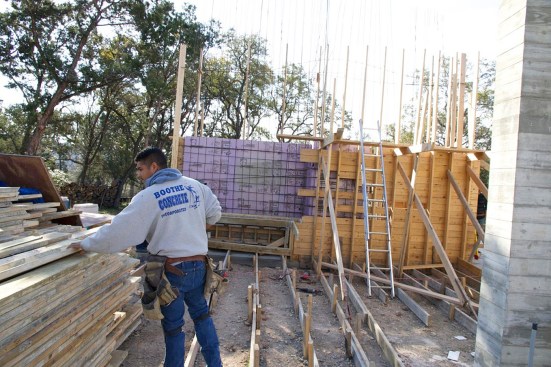
On this project, freestanding board-form wall sections required lots of staked kickers and wales to hold the formwork secure.
We screw the formwork together to lock everything in place. Nails tend to loosen up a little and we don’t want any creep in the formwork under the weight of the concrete. Using screws also makes it easier to surgically strip our forms afterwards.
We also miter inside corners, and double- and triple-check that everything is plumb and straight. When building the formwork, you need to always be thinking about what the inside of those boards will telegraph into the concrete. Sloppy work will be immortalized in the concrete for all to see for evermore.
Of all the lumber species we have tried, we have found that Doug fir leaves the most beautiful grain pattern and one that both architects and clients seem to respond to without our having to sandblast or otherwise treat each board to accentuate the grain.
When we place the boards side by side, we join the edges with a bead of silicone. This helps keep the water in the mix and keeps the concrete from seeping out between individual boards.

The form builders had to think like finish carpenters, using blue tape to protect the finished slab.
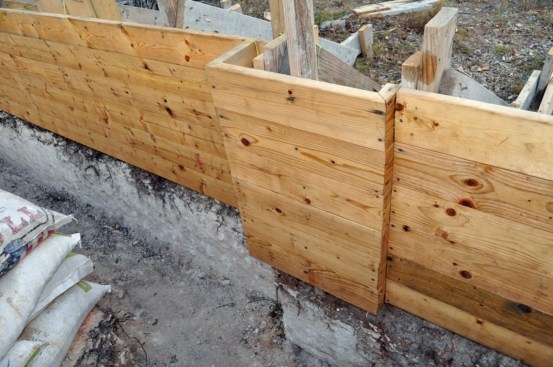
Inside corners were mitered.
When placing walls over a structural slab that will be used as a finished floor surface, as we did in the house shown in this article, we are careful to tape along the bottom of the wall. We want to prevent the wall concrete from bleeding out over the slab, and we also don’t want silicone on the slab, as this can disrupt the slab finish. You almost have to think like finish carpenters, which is a real shift from the usual process of forming and placing concrete.
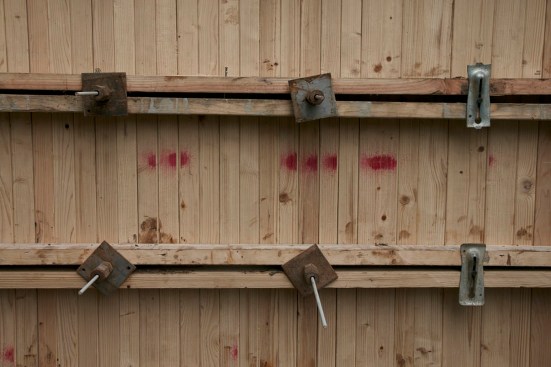
On the mock-up for this project, Risinger experimented with different form ties.
Form ties are critical. We typically use fiberglass wall ties, even though the more common choice is a steel rod. However, when these are cut flush, the steel stands out against the concrete surface and will rust over time. The fiberglass ties we use (Super Ties by RJD Industries) are grey and blend in, becoming almost invisible once they are snapped-off flush with the surface.
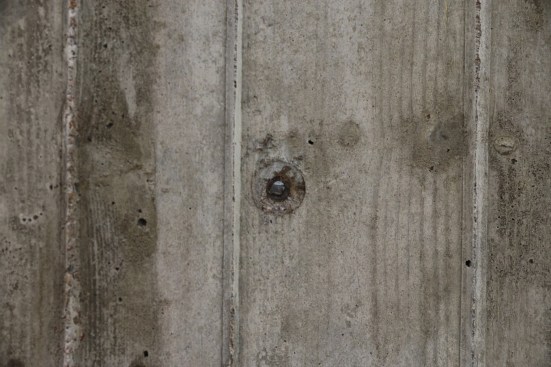
Once snapped-off, a steel tie is conspicuous.
A fiberglass tie not as much
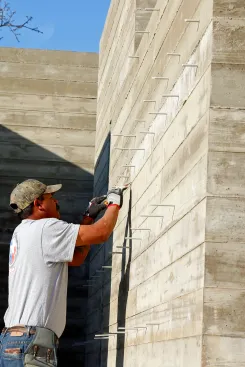
Cutting fiberglass ties flush to the surface can be done quickly with minimal damage to the surrounding surface.
CONCRETE TIPS
We spec a 5-sack, 3,500-psi mix. This is a strong concrete with a high cement ratio. You want that rich cement paste in there to pattern the wood. With this mix, we can run a 5-inch slump instead of the usual 4-inch slump so it will flow well and reduce the chance of honeycombing.
We usually get to the higher slump using plasticizers as an additive to the mix. A plasticizer allows you to keep the water content low, so you get a strong mix, without sacrificing workability.
On pour day, we pump the concrete through a steel wall pipe. You want to be able to reach all the way to the bottom of the form and place the concrete in lifts before pulling the pipe up and pouring another lift. Our crew places the concrete in 2-foot lifts, working all the way across the wall before moving on to the next lift.
Vibrating the concrete is probably the most crucial step. We use two guys with long vibrators that reach all the way to the bottom of the formwork. The trick is to be consistent, but you do not want to over-vibrate, as that will bring aggregate to the surface. To get the detail of the wood, you actually want a high percentage of cement paste at the surface, not aggregate. There is never a guarantee that you will avoid honeycombing, but we give it our utmost and have had good luck for the most part.


