
Al Coddington
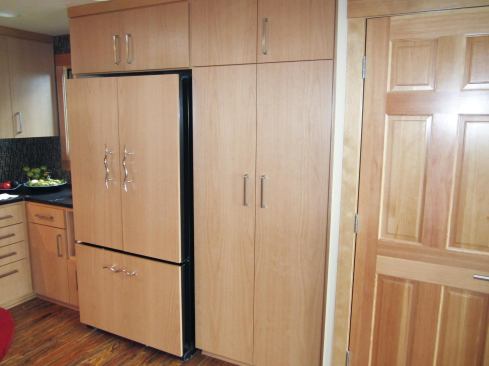
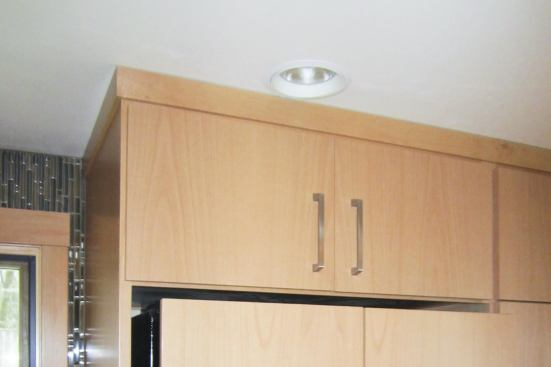
The cabinet above the refrigerator was built with a full-length …
In theory, you should be able to choose all the components of a kitchen remodel before the work starts, develop a detailed plan, and move confidently forward in the certainty that nothing unexpected will arise. In reality, it hardly ever works out that way.
A recent project — undertaken for a longtime customer — is a good case in point. It involved installing new appliances and cabinets in a remodeled kitchen and dining area, based on a plan from a local architect. Because the owner, the architect, and I had all worked together, we trusted we could do the job on a time-and-materials basis without any party having to worry about being treated unfairly.
Flattening the Floor
The plans called for replacing about 600 square feet of existing carpet and sheet vinyl with new flooring. When we finally tore off the original flooring, we found some significant high spots in the subfloor, with variations of 3/8 inch or more. This might not have been an issue with new vinyl, but the homeowners had selected a tongue-and-groove bamboo flooring, and I knew the irregularities in the subfloor would telegraph right through.
We found that the worst of the high spots were along a floor beam, so I first tried cutting a little off the wood post that supported the beam to see if it would drop down. As I feared, it didn’t work, so we shimmed the beam back to its original position, set all the subfloor nails we could find, and knocked down the high areas of the 2-inch-thick T&G subfloor with a power plane. (We did miss a few nails with the nail set, but we had no trouble finding them with the plane.) The flooring sub then took care of some remaining low spots with leveling compound. Laying the flooring turned out to be troublesome, too. The 9/16-inch material was meant to be blind-nailed through the tongues, but it was so dense the flooring contractor gave up on nailing and glued the material down.
Cost ? One and a half hours of my time, and a set of plane blades. I don’t know if there was an extra charge for gluing rather than nailing the floor, since the owner contracted directly with the flooring company.
Giant Cabinets, Big Backaches
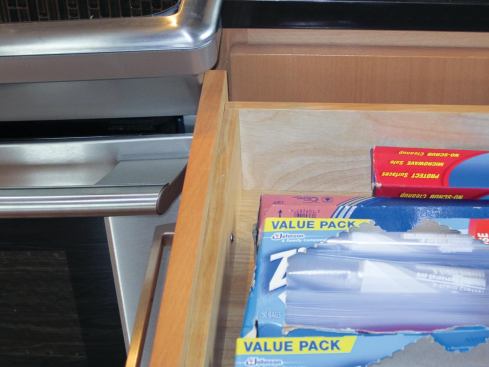
The owner had contracted with the cabinetmaker directly, so we had less input on this part of the project than we otherwise would have. And even though the problems we ran into weren’t our fault, finding the solutions was mostly up to us. The cabinet above the refrigerator, for example, was built with a full-length side panel running down to the floor on the left of the fridge. The unit would fit through the door only in horizontal position, but when the time came to install it, we realized it was too tall to stand upright. By sheer luck, there was a skylight well in the ceiling that gave us just enough space to accommodate the diagonal height as we picked up the cabinet.
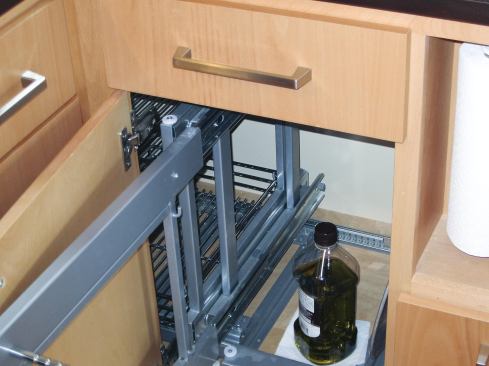
The microwave and pantry base cabinets were also so large that it took four men to carry them into the house, even after we had removed the doors and drawers. The integral toekicks compounded the problem. I generally ask cabinetmakers to provide separate bases and kicks — it’s easier to level a 10-pound toekick than a 150-pound base cabinet — but, again, I wasn’t dealing with the cabinetmaker directly on this project.
Cost ? For the refrigerator upper cabinet, a half-hour each for me and my carpenter. No significant extra time for moving the cabinets, just some worry at night about whether anyone had hurt his back (a real issue for middle-aged builders).
An Outstanding Panel
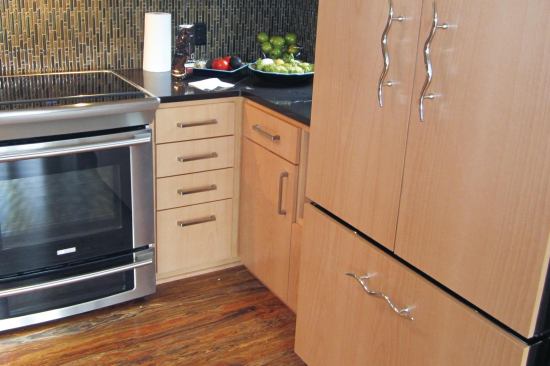
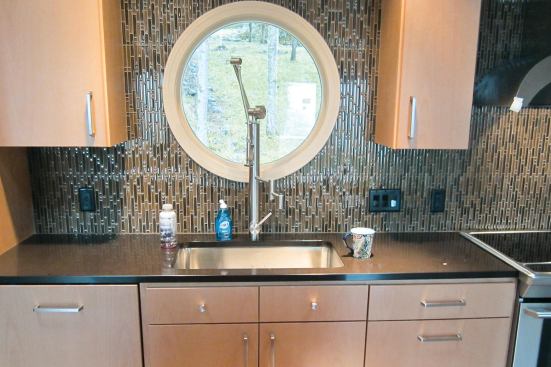
High-end refrigerators seem to get bigger every year, and the model the customer finally selected was several inches deeper than the cabinetmaker had expected. As a result, the wood panels on the face of the fridge extend several inches beyond the surrounding panels. If we’d known about this in time, we could have stolen some space from behind the wall and framed a recess for the fridge to fit into. But given that the house was none too big to begin with, the customers preferred to stick with their refrigerator selection. They don’t mind the discrepancy in the face of the cabinets, though the architect and I agree this was the biggest mistake on the entire project.
Cost ? None.
Corner Clearances
One corner of the base cabinet run was a trifecta of conflicts. The first had to do with the drawers on either side of the corner. These slid by each other easily until we installed the pulls; fortunately there was just enough side-to-side adjustment in the slides to gain the necessary clearance.
The second was a conflict between one of the corner drawers and the range, which prevents the drawer from opening fully. There was no good solution, but because the restriction is only a couple of inches, the owners find they can live with it.
The extra depth of the refrigerator created another problem. The inside corner base cabinet to the right of the range contains baskets designed to pull out and then to the right, to give access to an inner basket. The problem was that when the hardware was pulled to the right, it ran into the projecting refrigerator panel.
This was the cabinetmaker’s mistake, so he had a metal shop cut down the outer basket to fit. We made the necessary adjustments on site to reinstall the hardware and get it to work.
Cost ? The cabinetmaker spent hours figuring out what to do and incurred some fabrication cost, but my time was negligible.
Fussy Pantry Cabinet
The pantry unit has a rotating inner shelf that spins only if the door is opened beyond a certain angle. Unfortunately, the 5-inch fir baseboard used everywhere else in the kitchen got in the way here, so we substituted a piece of 3/4-inch base shoe. So far, no one has complained.
Cost ? One hour.
Troublesome Toekick Heater
The bar sink cabinet was supposed to have an electric heater in the toekick. But when the time came to install it, we found the grille of the heater stuck out 1/2 inch beyond the cabinet on either side, making it impossible to slide the bar fridge and the icemaker into place. Luckily, there was a pretty simple fix: We relocated the heater to the toekick of the island cabinet — basically just a matter of having the electrician make another trip under the house to move the wire. It was fortunate this was discovered before we cut a hole in the toekick of the bar sink base.
Cost ? One hour of my time, and a quarter-hour for the electrician, as he had to go under the house anyway for other reasons.
Trimming the Trim Ring
Although we thought we’d left plenty of space between the recessed lights and the walls, we forgot to allow for the 3/4-inch-thick trim around the top of the refrigerator cabinet. Rather than moving the fixture itself and having to patch the smooth plastered ceiling, I ripped the trim down to about 7/16 inch thick and cut a very slight amount off its edge to allow it to fit into place. Though it doesn’t jump out at you, I’m not completely happy with this solution. The clients are happy with it, however.
Cost ? One hour.
Saved By a Single Bowl
The kitchen sink and its high-end faucet were both intended to be centered on the gap between the drawer fronts below and the round window behind. Unfortunately, there was a slight discrepancy in the various dimensions: If we had centered the faucet on the window and sink, the drawer gap would have been visibly out of line with everything else. We solved the problem by moving the faucet ever so slightly off-center in relation to the sink, bringing it closer to the drawer-front gap. It’s good the customers had chosen a single-bowl sink; the discrepancy would have been much more visible against a double sink with bowls of equal size.
Cost ? A half-hour.
Tiny Tile Issues
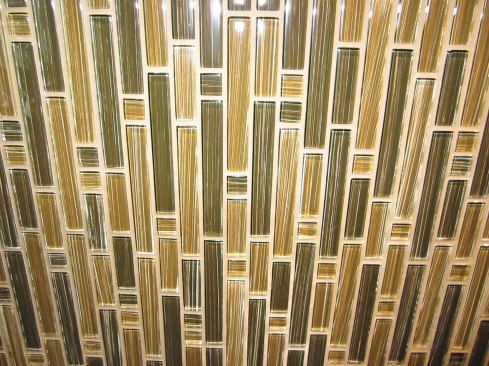
The owner chose glass tile for the backsplash, and each tile was only 5/8 inch wide. I realized in advance that laying out the electrical boxes was going to be more critical than usual, with all those vertical grout lines to contend with and no practical way to cut such tiny tiles. It may sound obsessive, but I planned the exact side-to-side location of each box, installed blocking as needed, and mounted the boxes myself with a 1/16-inch tolerance side to side. The tile installer was happy.
Cost ? Two hours.
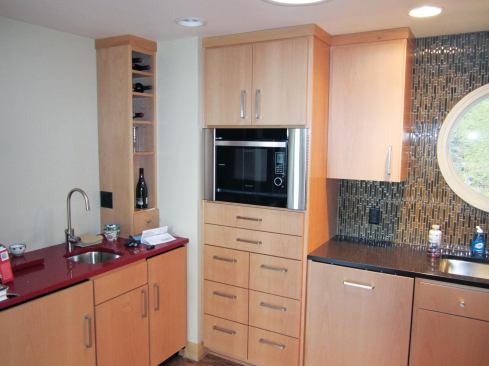
More Pesky Appliances
Like the fridge, the icemaker and dishwasher have wood front panels, but at first we couldn’t push either unit in far enough back to get the panels to align with the adjoining cabinets. In the case of the dishwasher, the issue was resolved by cutting out a section of the 1×3 I had fastened to the wall to support the back edge of the countertop. With the icemaker, there wasn’t enough room for the drain and supply hoses and the power cord, so I had to cut a 12-by-12-inch opening in the drywall for them to fit into.
Cost ? Two and a half hours.
Troubleshooting the Range
The range was designed to be pushed all the way against the wall until its back made contact with the drywall, with the power cord fitting into a recess in the range itself. When it wouldn’t go back all the way, we found that the code-required anti-tip bracket — which mounted to the wall and engaged the leg of the range — stuck out too far. We finally made it work by recessing the bracket into the drywall. Moving the range back and forth was a bear.
Cost ? Three hours.
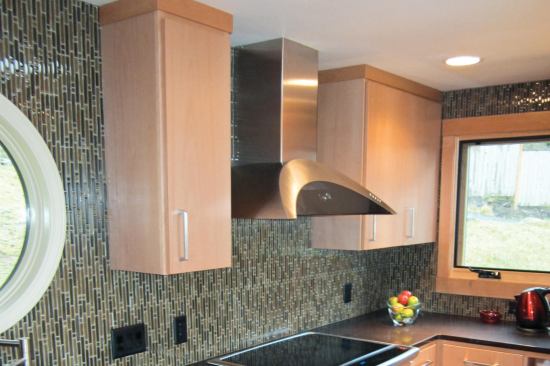
Range Hood Too Tall
The high-end range hood mounts to the wall on a concealed bracket, with a telescoping two-part rectangular chase above it that contains the electrical components and exhaust duct. Because it’s made for an 8-foot ceiling but we only had 7 feet 8 inches, the only way to make it work was to shorten the rectangular chase — a task we farmed out to a local sheet-metal shop. They did a neat job, and the modified unit went in fine.
Unfortunately, the sharply angled corners of the hood itself have proven to be a liability. My carpenter, the electrician, and I all managed to drive these corners at least a little way into our heads while installing the unit, and the homeowners have had the same problem. This is really a design defect, and there are only two possible solutions — throw the expensive item away and install a different one, or learn to avoid the corners. The homeowners have opted for the second course.
Another issue with the hood is that it has a maximum volume of 450 cfm. A local code provision requires that makeup air be provided for any hood that moves more than 400 cfm. It’s a brand-new requirement, and so far no one seems to know how to meet it in practice. It was apparently new to our inspector, too, because he didn’t call us on it.
Cost ? One hour of my time, $45 for the sheet-metal work.
Conclusion
At the beginning of the job, I estimated my costs would run around $50,000, with an additional 4 percent to 6 percent for contingencies like the ones described above. Even if I had been working with a firm quote, the contingency fund would have covered the changes and I wouldn’t have needed to write change orders. Because the job was done time-and-materials, I simply billed for the additional work.
Finally, it’s worth noting that in my experience, the number and variety of problems I encountered on this kitchen installation didn’t constitute some sort of contractor nightmare, but were simply par for the course for this type of project.


