As a production finish carpenter, I’m always looking for faster, better ways to get the work done. Over the last two years, my crew and I have developed a method for building coffered ceilings in a fraction of the time it used to take — and with a fraction of the frustration.
In the past, we would try to get onto a new-construction job before the insulation contractor so we could install blocking between the ceiling joists for coffered ceiling beams. On remodels, we used to have to open up the drywall to install blocking for the runs that were parallel to the ceiling joists. What a mess that was! I also remember bolting full-length dimension lumber beams to more than a few ceilings, because we had been taught that you had to have solid backing. The trouble was, it was nearly impossible to get it perfectly straight and a nightmare when it came to wrapping it with finish lumber.
Phooey on all that nonsense. These days we use lightweight hollow backing that goes up in hours instead of days, without having to install any in-the-ceiling blocking — and every beam is perfectly straight. The approach depends on adhesive instead of bolts, and a continuous diaphragm that’s secured directly to the ceiling joists through the crown molding.
In this article, I’ll walk through the process as it applies to a paint-grade ceiling we did recently. You’ll be able to apply the method to any style of coffered ceiling that you’re building.
HOLLOW BACKING
1. It’s faster to build all the hollow backing boxes in the shop, where it’s more comfortable to work and all my tools are only an arm’s reach away. Figuring out how many supports you need doesn’t require an exact drawing, just a sketch. Finger-jointed pine makes the best backing (rather than MDF) because pine doesn’t split, no matter which direction you nail into it.
2. The center cross-shaped supports take the most time, but with all the pieces precut and stacked close by — and a full glue bottle — the job goes quickly. Form the cross by butting two short pieces of backing into a longer piece, then overlap the three-piece joint with another piece. Use plenty of glue and brads.
3. After the base of the cross is made, nail the side backing in place. If all the pieces are cut square on a miter saw, then the inside corners will fasten together tightly and form perfectly square corners, which makes it easy to fit all the moldings.
4. For this job, we used three types of hollow backing: the cross-shaped pieces for intersections, U-shaped pieces for ends and mid-span supports, and L-shaped pieces for corner backing.
CAREFUL LAYOUT
5. Lay out the ceiling carefully, twice, with pencil lines before snapping any chalk lines. I first make small pencil marks. Once I’m sure those marks are correct, I lengthen the marks into continuous pencil lines, using a straightedge, so I can see the beams before snapping chalk lines. Only when I’m positive that all the beams are centered properly do I reach for a chalk line. I snap lines on both sides of every beam, and on the ceiling and the walls around the perimeter. In this room, we’ll be covering up the entire ceiling, so making a mess of the drywall to change lighting layout was not a problem.
6. Panel adhesive (Liquid Nails, PL 400, for example) is an inexpensive product that has quietly revolutionized the building trades. We use it frequently for securing material to concrete, stone, wood, and drywall. In this case, we depend on the adhesive for partially supporting the ceiling. Once the crown is installed, the diaphragm can never move.
7. Even though the adhesive caulking only partially supports the ceiling, we take the stuff seriously and apply a liberal amount, especially where there’s no joist passing above the hollow backing.
8. If there’s a joist, for heaven’s sake, nail it good. But if there’s just drywall, angle the nails in all directions to hold the backing to the ceiling while the adhesive dries.
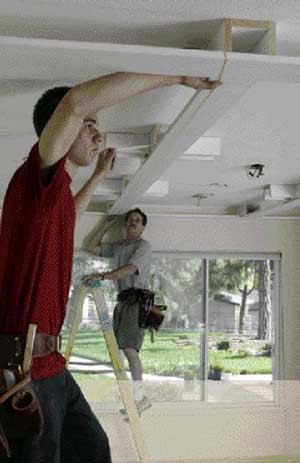
9. With premade components and careful layout lines, installing the backing goes quickly.


