Doug Horgan
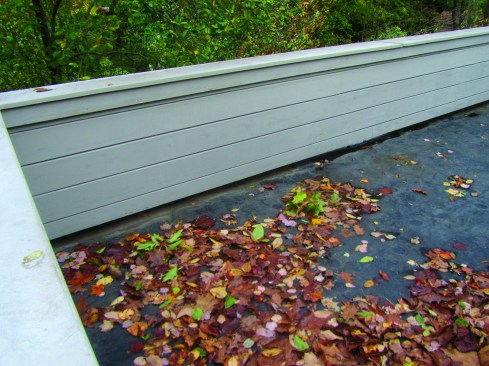
The small, 5-inch-by-5-inch scuppers in the parapet wall were in…
On many of the homes we work on, at least one area of the roof is “flat.” Of course, no roof is supposed to be completely flat. By code, a roof must be sloped at least 1/4 inch per foot of run. In our remodeling work, however, we frequently run into existing roofs that are not sloped well.
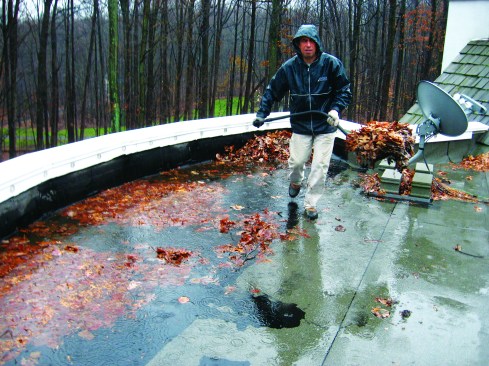
In one recent case, not only were parts of the roof dead flat, but it had only tiny, 5-inch-by-5-inch scuppers through the parapet wall. (You can’t see this parapet roof from anywhere on the property, and there was no functional or design reason to have a parapet wall there, but it was on the original plans.)
On this roof, the roofing was a single-layer modified bitumen that wasn’t maintained well. Because there wasn’t enough slope, water lay on the roof and froze in winter, creating havoc for the seams. There were patches all over it. In fact, this roof was so bad, the roofer had left the bucket of asphalt cement and a trowel up there for the next time he needed to fix it.
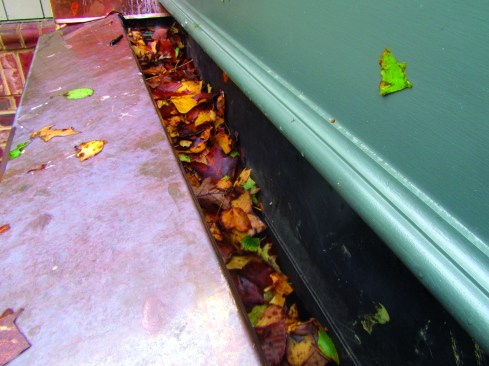
This time, we got the call during a rainstorm, and we found about 35 bushels of leaves on the roof, along with 2 inches of water. Once those tiny scuppers filled up with leaves, it was impossible for water to drain off the roof.
SCUPPERS
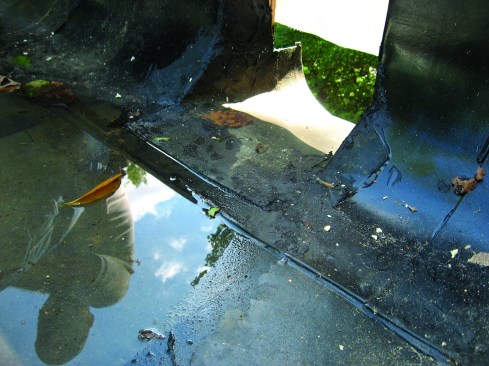
When scuppers are flashed-in correctly, they have several layers. Even if the roof is sloped, the scupper flashing can create a dam that holds water. If you’re the one sloping the roof, adding pitch here can help the water run off, but we often need to work with what’s already there.
To allow for good workmanship and to keep leaves from building up and blocking them, scuppers need to be at least 8 inches tall and about 12 inches wide. It’s also critical to mount the receptors as low as possible on the outside of the parapet.
When a receptor is mounted above the roof level, you end up with a dam when the receptor fills up with leaves, regardless of how big the scupper is. The receptor needs to be mounted low enough so that when it’s full of leaves, water pours out over the top edge instead of backing up across the roof.
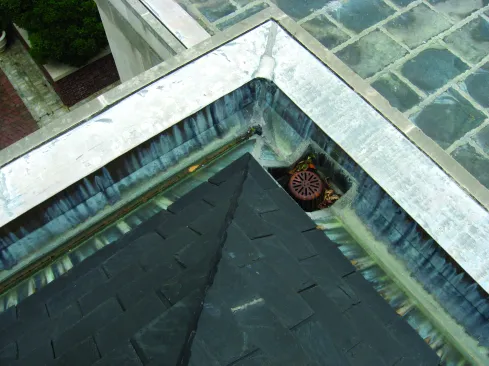
DRAINS
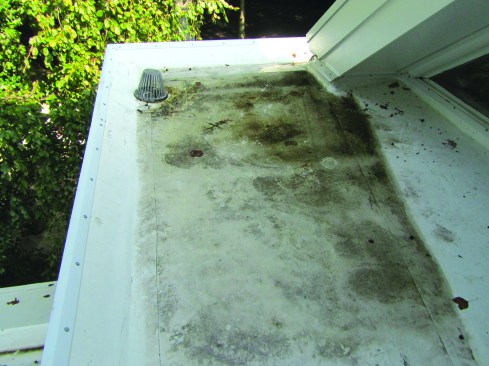
We see similar problems with drains. Even with a leaf basket over the drain, leaves still collect around its base, creating a dam that prevents water from draining. As a result, a big puddle forms all the way across the roof, which is exactly what you’re trying to avoid.
Often it is not at the roof, however, where a drain fails. We were recently called back to a job when a roof drain backed up. The roof drain assembly was not sealed to the drainpipe below the roofline, which allowed the water to spill out and soak the ceiling below, causing it to collapse. It turned out that landscapers who were working 150 feet away from the house had crushed the drainage pipe.
Not uncommonly, a drainpipe becomes clogged by tree roots, or a pipe is run over, or someone covers the outlet where a pipe drains to daylight. For some reason, landscapers love to cover the end of a pipe, probably because they don’t like how it looks.
Another problem is when there isn’t a watertight, mechanical seal between the drain unit and the pipe it feeds into. The consequences can be severe.
The proper way to fabricate a drain is to use a clamp ring assembly, and seal the roof to the top of the drain body. The drain body also must attach to the pipe. That way, if the pipe backs up, water overflows back out onto the roof and not into the building. You can’t simply drop a drain body into a drainpipe without a positive seal.
BUILT-IN GUTTERS
Built-in gutters are good only at collecting leaves. I view them as being a worse version of a drain.
It’s difficult to fit a proper drain in a gutter. It can be done, of course, but in a remodeling situation, we are usually stuck with the existing drain locations, and they often are in the wrong place for expansion joints to properly manage thermal expansion of the metal. Even with good workmanship, the metal expands and contracts, and if the movement joints aren’t in the right places, the seams eventually rip open and leak.
On one of our jobs, the drain was built into the corner, and there was no room for a clamp ring and no room in there to solder. And the drain was positioned exactly where an expansion joint should have been. I don’t think there was any good solution for that one—other than putting in another drain, running two stories down through a finished house.
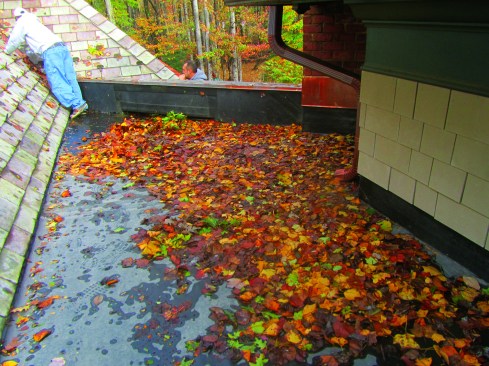
OPEN EDGE
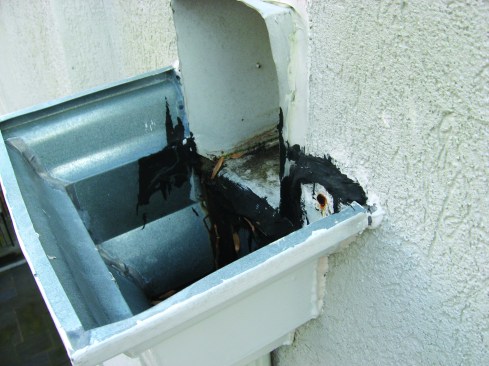
The scupper shown here was an attempt to make a scupper large enough that it would not clog. This one is only about 4 inches tall, however. It took longer to clog than the tiny ones on the house shown previously. But it eventually did after the landscaper—the only one who knew to clean off the leaves from this roof area—was fired. Making it larger—this one was about 4 feet wide—was a step in the right direction, but it wasn’t enough. It needed to be either higher or much, much wider.
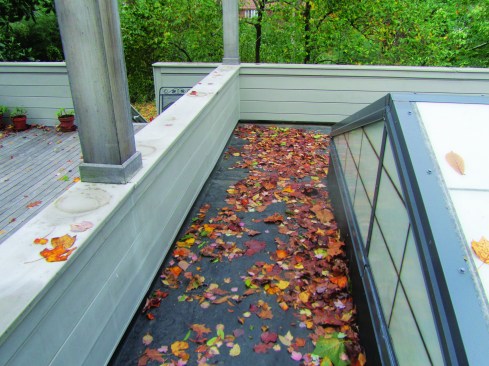
It is possible to make a completely open edge, but still have a parapet wall. On this example, we installed the parapet wall on posts. The wall ends about 4 inches above the roof, providing a continuous space for drainage. It’s easier to detail—you don’t have all the complex origami that flashing in a conventional scupper requires—and it’s much harder to clog. You can’t really see it from outside, because the gutter hides the view of the opening. If you need to have a parapet wall, I think that is the way to do it.
Of course, most houses don’t need a parapet wall at all. The main reason to have one is to stop wind from sucking the membrane off a large roof surface. They are often required only on large commercial roofs where high winds can create enormous uplift pressures at the edges of a large roof expanse. Parapets are rarely needed on homes in our area. The roofs are small in the neighborhoods we work in and typically there are many obstacles that slow the wind anyway.
WHERE DOES THE WATER FLOW?
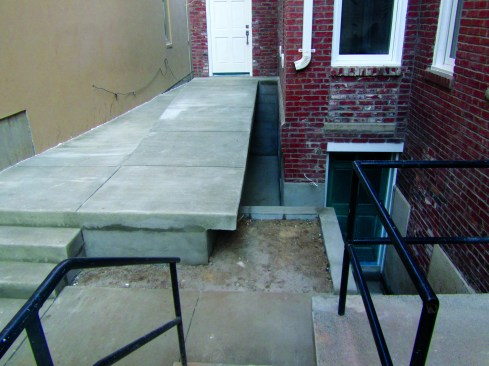
Once you have enabled a roof to shed water, one last thing you should pay attention to is where all that water is going. You need to ask what will happen if there is a torrential downpour that sends hundreds of gallons over the roof edge. In our area, it’s likely to be a summer thunderstorm that brings down enough leaves to clog the gutters, causing the bulk of that water to spill over the edge. What’s below?
You don’t want it to be a basement stairwell. Or the French doors leading to the master bedroom, or any door that is boxed in, making it the next low point after the drain. We had a situation like this on one job. What you see in the photo was below a long edge of the roof with nothing in between. We managed to convince the owners to add a small entryway roof that made it possible to get in and out of the basement door without being rained on. More importantly, this new roof deflected any overflow away from the basement area.


