I am the general manager of Evergreen Roofing, and a second-generation roofing contractor, in Vermont. About 90% of my company’s work is commercial membrane roofing; the other 10% is high-end standing-seam metal roofs for custom homes.
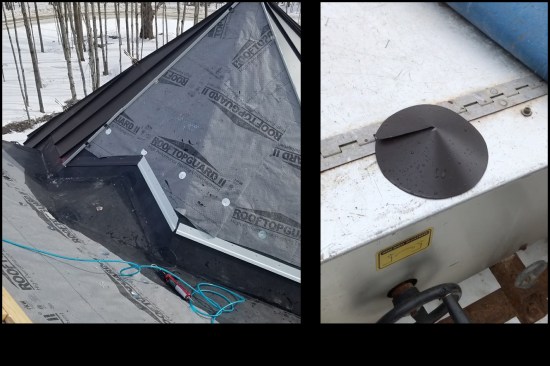
Last winter, we were called in to apply a standing-seam metal roof on a custom home (designed by architect Melissa Fletcher, of MGF Designs Architecture, in Shelburne, Vt., and built by Hayward Design Build, currently based in South Burlington, Vt.). One interesting wrinkle was that we had to cover an octagon turret roof. To ensure a good, durable, watertight result, we chose to combine a fully adhered single-ply EPDM membrane in the valley with standing-seam metal on the turret.
In this story, I’ll discuss how we applied the membrane in the valley, made the custom angle cuts on the metal roofing, fabricated the seams for this specialized architectural shape, and fastened the metal roof in place.
MATERIALS
We used both of the materials that make up our typical stock in trade: fully adhered EPDM membrane and heavy-gauge Kynar-coated steel. We went with our usual choice for the EPDM: RubberGard from Firestone, my preferred brand. For the metal roofing, we selected 24-gauge Kynar-coated steel supplied by Englert. In the market where I work, many contractors offer a 26-gauge product, but I’m not willing to apply the lighter material.
The metal roofing has an expected lifespan of 80 to 100 years. The EPDM, in this application, will probably last 50. But if we were to cover the valleys in this location with metal instead of EPDM, we would have to fabricate a lot of short seams and intersections that would all have to be sealed with silicone caulking, which needs to be maintained and renewed every 10 years or so. The EPDM valley gives a much longer-lived solution.
Because the sun heats metal roofing up to high temperatures, we require high-temperature underlayment. In this case, the builder’s crew had already applied RoofTopGuard II underlayment over the roof sheathing. This is one of the best underlayment products you can get. When we apply the underlayment, we often choose Titanium UDL, which is also tough and provides good grip underfoot. When budget is an issue, we may spec RhinoRoof U20. One thing I don’t recommend anymore is using regular asphalt felt paper, because it deteriorates quickly when exposed to sun and rain and is too likely to rip and tear on a windy day.
The builder’s crew had stapled the underlayment in place. For added security, we renailed the material in some locations using roofing nails and 2-inch circular aluminum “tin tabs.”
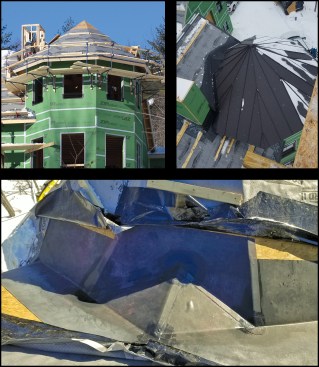
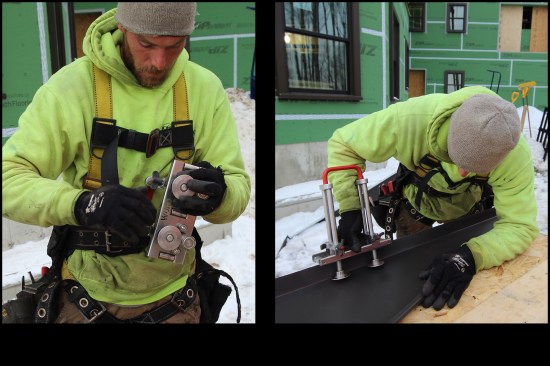
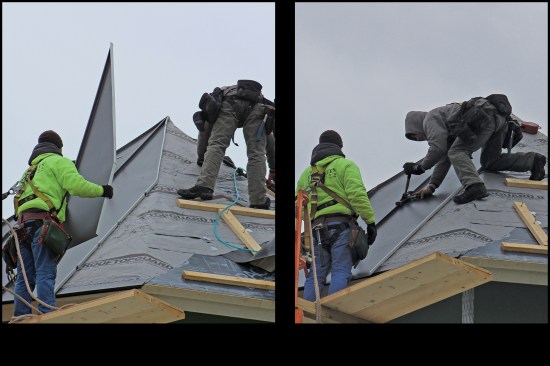
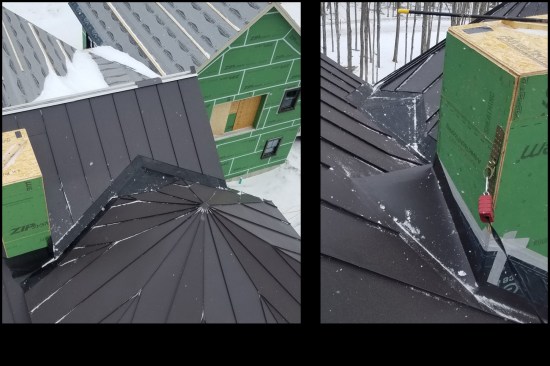
Prior to the author’s crew arrival on site, the builder had applied high-temperature roofing underlayment to the main and octagon turret roofs to dry-in the shell (top left).EPDM teams up with standing seam at this complex roof intersection. Here (bottom photo), the valleys are covered with fully-adhered EPDM, which extends 18 inches up each side of the roof deck (bottom). Viewed from above (top right), the turret’s standing seam roofing is completed and main roof’s underlayment is lapped onto the EPDM and secured with roofing nails driven through tin tabs.
EQUIPMENT AND TOOLS
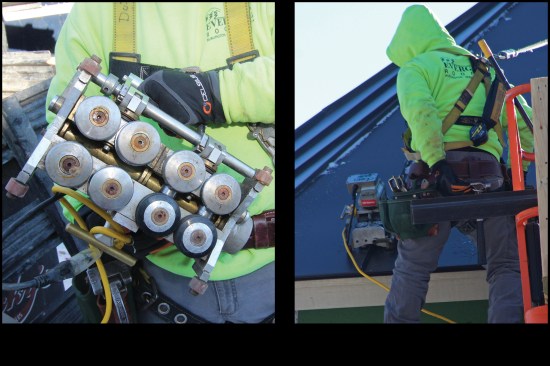
Metal roofing work requires a major investment in gear. The metal roofing comes on a 2,000-pound coil that has to be fed into an industrial pan-former that bends the vertical legs into the material. A guillotine on the pan-former is used to shear the metal off at the required length.
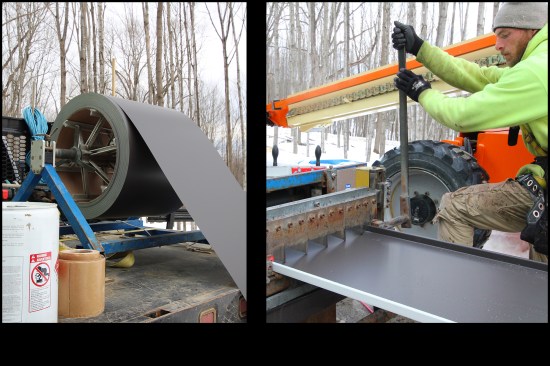
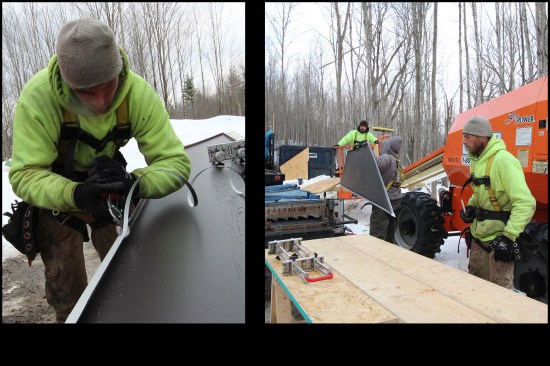
The metal roofing arrives on a 2,000-pound roll (left) and is fe…
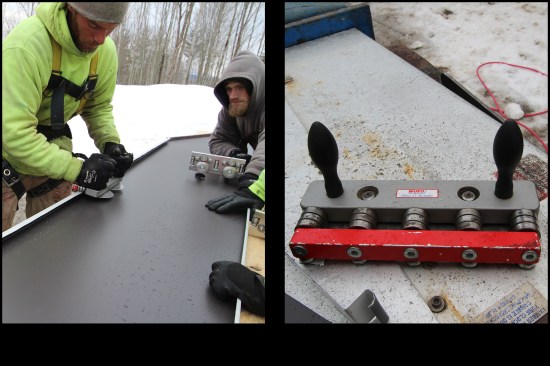
On the roof, we use an electric seamer supplied by Englert to create the double-lock bends between sheets of metal. But for the custom angles required for this turret job, we also had to use hand tools to cut and bend the metal. For cutting, my crew likes metal snips from Midwest Tool and Cutlery Co. Snips are available in right-turn, left-turn, and straight varieties; my crew tends to prefer the left- and right-turn snips.
For making custom bends, I’ve supplied my crew with a Wuko Duo Bender. This tool is designed to make quick bends in long, straight sheets of metal. It can be precisely set to create the dimension of leg that we need in a given bend. But it does require multiple passes of the tool to make each bend. So even with the Wuko, making the custom bends for a long, angled piece of steel takes time.
The crew carries other specialized hand tools as well, including a set of 45-degree hand tongs and a first-stage locking seamer for making the initial bend on a panel joint.
ON THE ROOF
The first step on this job was sealing the valley, using the fully adhered EPDM membrane. Before we install the membrane, we apply a coat of EPDM bonding adhesive to both the roof sheathing and the underside of the EPDM membrane. In warm weather, the adhesive is ready after about five minutes, but in colder weather, it may take 20 minutes to fully flash off. After the adhesive is tack-free, we lay the membrane onto the roof and smooth it out using a stiff bristle broom.
After folding the underlayment down over the EPDM and securing i…
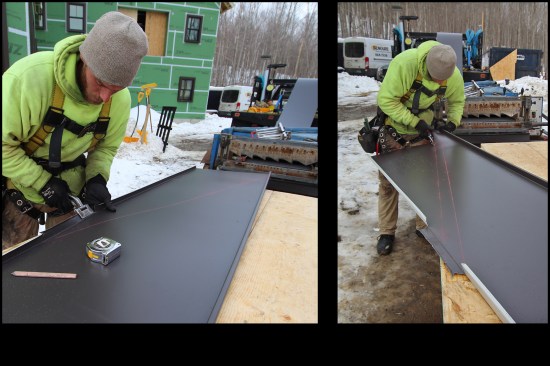
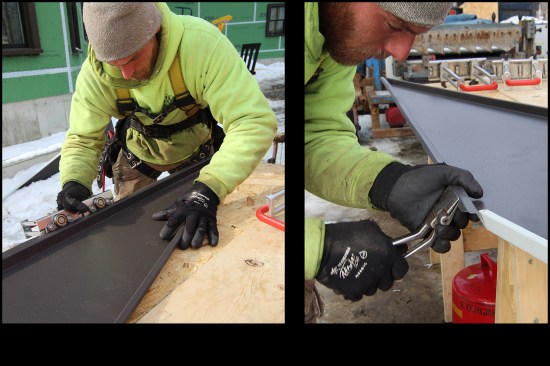
With the EPDM in place, we were ready to attach metal roofing. The crew cut the long tapered sections on the ground using metal snips, and bent the legs on the cuts using the Wuko bender and a pair of 45-degree hand tongs. Then we went about assembling the panels together onto the roof.
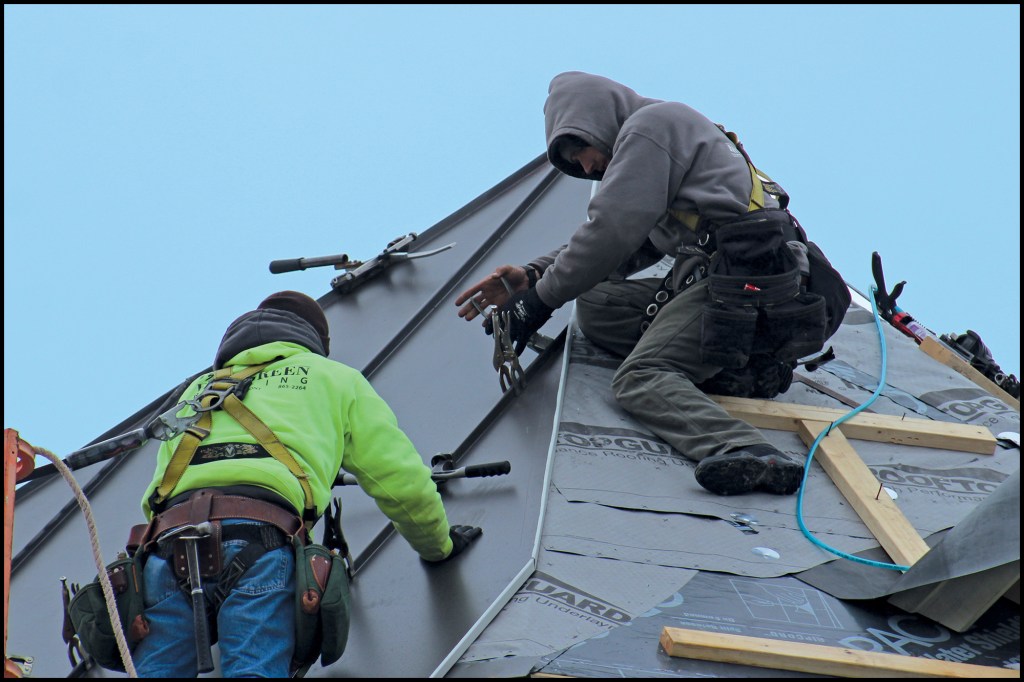
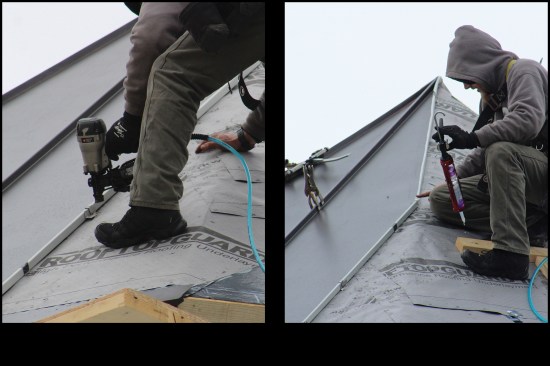
The metal pans are attached to the wood deck using clips at about one foot on-center. We typically use expansion clips, which allow the pans to slip back and forth or up and down the roof in the dimension of the roof plane. That way, when the sun heats up the roof and the metal expands and contracts, there’s less chance of “oil canning,” and the material will stay flat on the roof.
We use vise-grip clamps to position the metal pans precisely before we begin to fold seams. Then we start by making the first-stage lock by hand, using the first-stage locking seamer. Once a short run of the first lock is done, we position the electric seamer at that starting location and run it up or down the roof to make the 180-degree double lock. Now the joint is strong and thoroughly watertight.
My work is commercial-grade, and it is priced accordingly. For a house like this, our metal roofs typically cost somewhere from $9 to $12 a square foot. I don’t really compete with some of the other roofers in my market who are willing to incorporate cheaper details into their roofs. On the other hand, I know that my product will last for almost a hundred years.
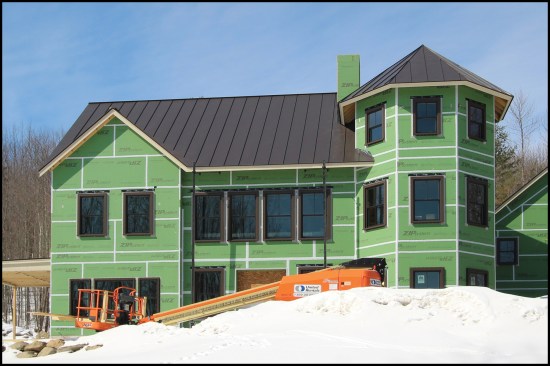
The completed roof has a neat, regular appearance and will last for many decades.
Photographs by Tim Healey and Evergreen Roofing


