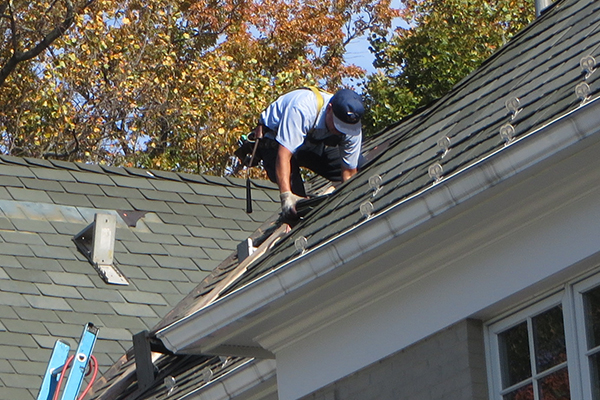
There are many ways to mess up a synthetic slate install. Most of them are similar to how to mess up any kind of roof: Leave out the kickout flashings, botch the head or side lapping, put in the ice membrane incorrectly, that sort of thing. But a few are unique to synthetic slate.
Synthetic slates have had a mixed record in the U.S. Several brands have had failures leading to class-action lawsuits and premature need for replacement. Other brands, however, have been around for quite a while with few or no problems, like Majestic EcoStar, the brand we have been using since 1999 without product failures. Still, there are tricks to installing them successfully.
If there are potential issues, why risk using synthetic slates at all? Probably the number one reason we use synthetic slates is clients want the look of slate but don’t want to reframe their entire roof to support the weight of genuine slate. Synthetic slates are also a bit less expensive than real slate—not a whole lot less, but a bit.
Read the manual. Each type of synthetic slate is different from the next. The materials may be recycled or new, and may include plastics, polymers, rubber, minerals, UV inhibitors to reduce sun damage, and a number of other ingredients, depending on the manufacturer. The installation method even varies depending on the molded shape. It’s critical to read and follow the directions carefully to avoid installing a product incorrectly. For example, one manufacturer’s slate product has interlocking channels, which, the manufacturer points out, require the starter row to be very straight; otherwise, the variation telegraphs all the way up the whole roof.
Communication. Good support and training for the installation of the material is necessary too. Not every roofing crew can easily digest written instructions in English; videos, complete and clear illustrations, or instructions in workers’ native languages are helpful. Many manufacturers, for instance, publish French and Spanish versions of their manuals; the Hungarian crews we have worked with for years have had a Spanish-speaking crew member or two use Spanish instructions to communicate to the rest of the crew. Of course, it always helps to draw out details on scraps of plywood, no matter what the crew’s native language may be.
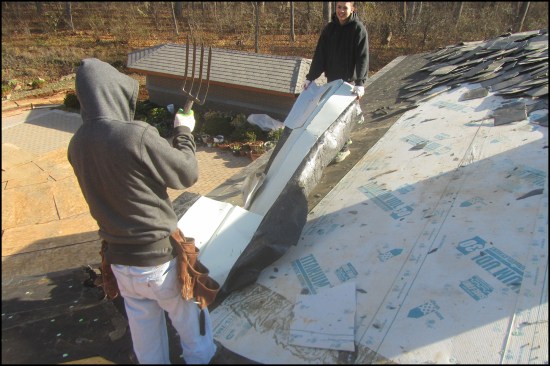
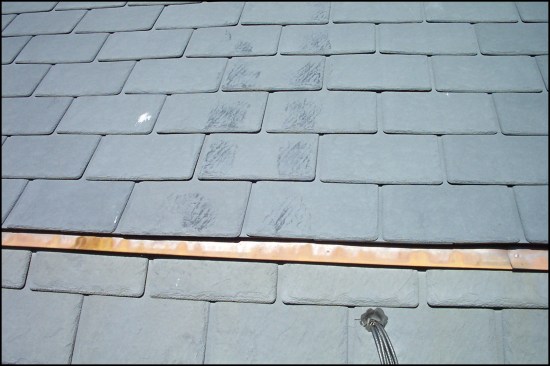
Faux slate quirks. These slates often have some surprising requirements. We once had to tear off an entire 30-square roof because the material was not approved for slopes under 6:12 without an ice-dam membrane underlayment, and it was leaking in hundreds of spots. Contributing to the problem, water had collected in large depressions molded in the shingles to designate the nailing areas and had leaked through the nail holes, causing the roof deck to swell in numerous locations. We tried to salvage the synthetic slates, but they were too brittle. (The roof had been installed by another contractor, but it was heartbreaking to see the waste involved. That product has since been discontinued.) We installed new EcoStar synthetic slates over a Carlisle ice barrier membrane underlayment rated for high temperatures.
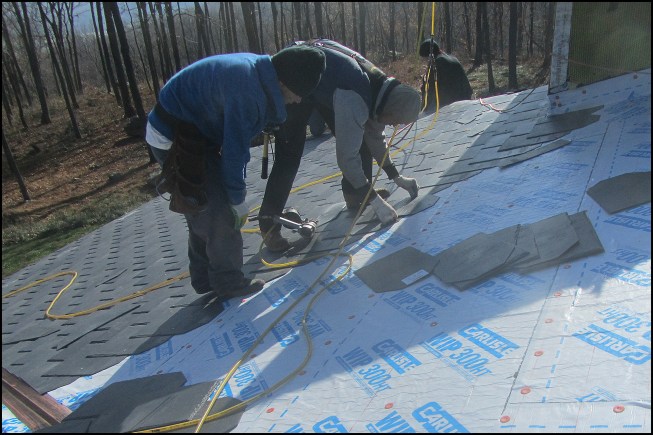
Here, a 5:12-slope synthetic slate roof that had been inappropriately installed over regular roof underlayment needed to be torn off (the manufacturer’s instructions called for full-coverage ice barrier membrane underlayment for slopes under 6:12).
Compounding problems, water had collected in depressions molded in the shingles to designate the nailing areas.
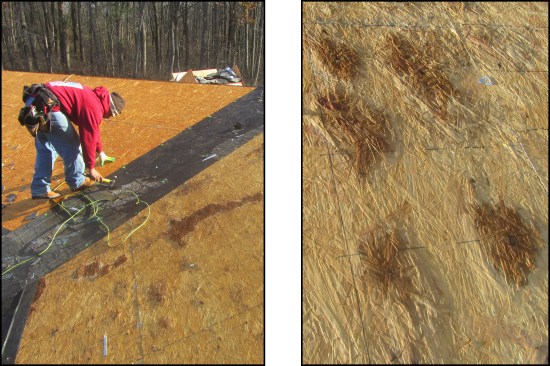
Water had leaked down through the nail holes, causing the roof deck to swell in numerous locations.
The author’s company installed new synthetic slates with proper shingle exposure over an ice barrier membrane underlayment.
Another surprise trick several manufacturers require is bending every shingle before applying it. They want the shingles all slightly curled downward so the corners don’t lift (I have seen a roof with a lot of lifted shingles). We work with crews to be sure this step is taken.
Accessories with matching life spans. The good news with the better synthetics is the materials seem to be holding up quite well. A few roofs we’ve built are about 20 years old and they look great. I wouldn’t bet my life they last to 50 or 100 years (unlike high-quality genuine slates, which can last more than a century), but it’s not out of the question. To me, that means that we should normally be using fasteners and accessories likely to last that long as well: stainless steel ring-shank nails, which are available for roofing guns (some synthetic slate manufacturers actually carry them and sell them as part of an extended warranty program), copper or stainless steel flashings and vent covers, and brand-name underlayments designed to last.
I too often encounter 10- to 15-year products, such as plastic vent boots and electro-galvanized nails, on these “50-year” roofs. Not every client wants to pay for high-quality accessories, but we price them as the default so the whole roof lasts as long as the shingles. We have struggled to find long-lasting accessories for some applications, though. In some cases, our roofers have fabricated copper covers; in others, we do the best we can. After all, a dryer vent cover can easily be replaced after 20 years if it rusts out; I feel more strongly about providing long-lasting nails and flashings.
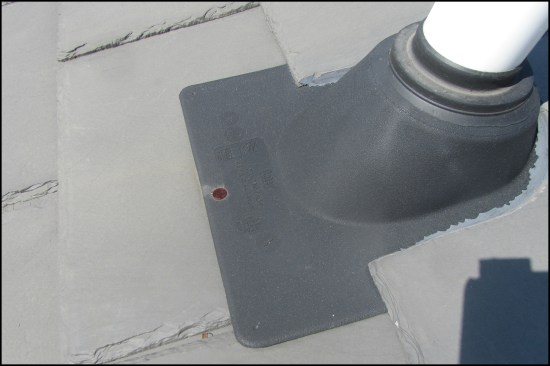
A 15-year plastic boot with a neoprene collar is installed on a “50-year” synthetic slate roof. A heavy-gauge metal flashing sleeve and cap is more appropriate for the life span of the roof.
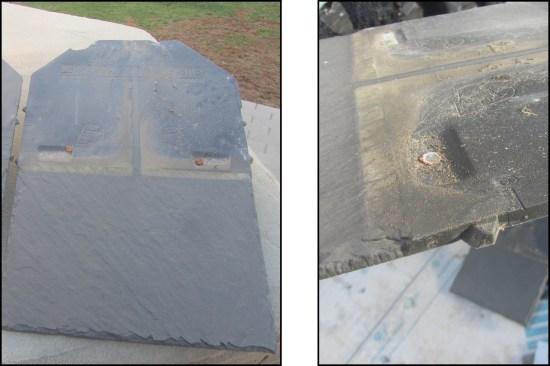
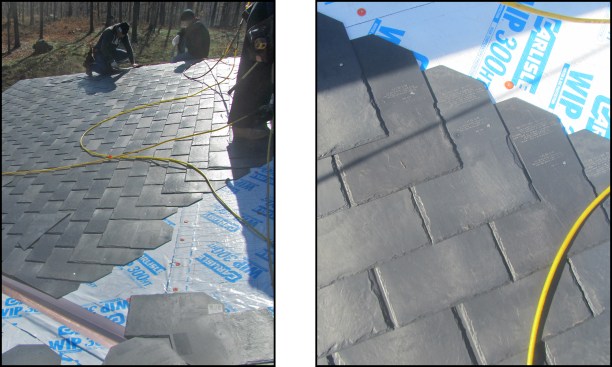
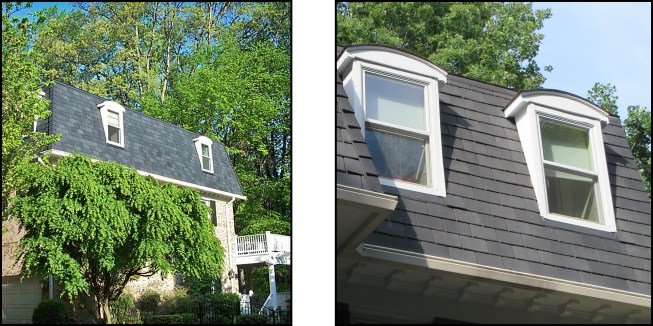
Headlap and shingle exposure. Headlap is the amount the second row above a shingle overlaps the top of that shingle (in other words, the area of double coverage between slates). For true slate shingles, code (R905.6.5) requires a 2- to 4-inch headlap depending on roof slope (4 inches for 4:12 to 8:12 slopes, 3 inches for 8:12 to 20:12 roofs, and 2 inches for steeper ones), but for synthetic slate, code gives precedence to the manufacturer’s instructions. Most of the instructions I’ve seen don’t call out a headlap; rather, they specify the exposure, or how much of the shingle is showing below the row above. But since the shingles are all the same length, it adds up to the same result: There’s a minimum required overlap, which sometimes varies with the slope of the roof. Installing slate without the correct overlap can allow water to wick under the shingles and corrode fasteners, particularly on lower-pitched roofs.

Installing slate without the correct overlap (left) can allow water to wick under the shingles and corrode fasteners, particularly on low-pitched roofs (right). Also, long-lasting fasteners should be used; electro-galvanized nails corrode quickly if they stay wet.
Snow guards. Slate roofs shed snow readily and snow guards are needed to protect the roof, gutters, and things below from avalanches. Synthetic slates seem to be even slipperier than some genuine slates, so guards are important. Designing guards is an entire practice unto itself, so I appreciate when manufacturers call out in their manuals how many are required, based on the pitch of the roof and how long each slope is from eaves to ridge. These directions seem to have disappeared from the instructions I recently checked, but we’ve also found that manufacturers and distributors of snow guards will usually help with the design.
Most clients love the look of the snow guards. With synthetic shingles, we’ve found that individually mounted snow guards manufactured by Berger Snow Guard Systems have worked the best. They have slim, sheet-metal legs that don’t lift the shingles up very high and that install more easily than the heavy bars on some traditional guards. They’re available in galvanized, stainless steel, or copper.
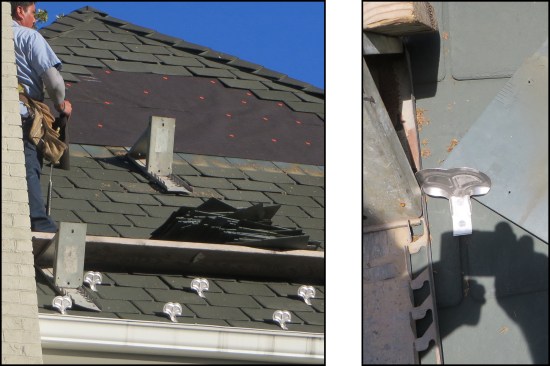
Snow guards with slim, sheet-metal legs are easier to install than traditional guards with heavy bars. Here, the individual stainless steel snow guards do not lift the shingles high (left, right).
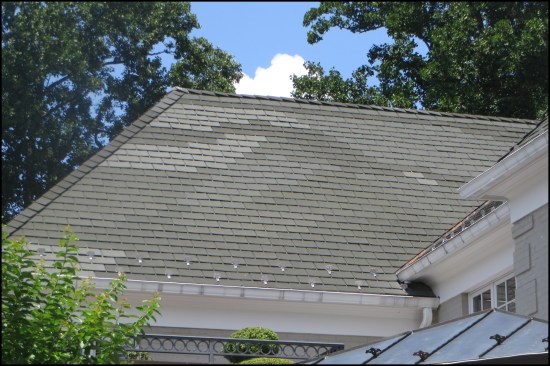
Mixing the slates. Some brands of synthetic shingles will change color after installation, and different batches will change differently. We found this out on our first synthetic install. We followed the directions to “thoroughly mix” the bundles of plastic shingles, even though they all looked to be the same color. Within a few years, the roof had a noticeable variation between slates. In a way, it looked more natural after the color change, like a genuine slate roof with different shades.
On a 10-year-old EcoStar slate installation, slates were mixed from different bundles per the manufacturer’s instructions. Although the slates all looked the same upon installation, the color varied over time, appearing more natural (left, right).
On another project, our roofer was not careful with the mixing, and the roof looked pretty odd after 10 years. The shingles were still in great shape, but the colors looked bad enough that our clients made a reasonable request that we fix them. We had a crew carefully remove, mix, and reinstall the shingles over new underlayment—lesson learned. Now when I drive around town, I notice this issue everywhere, regardless of the synthetic slate brand, color selection, or roof pitch.
On another project, the author’s roofer was not careful with mixing the bundles, and the roof looked odd after 10 years.
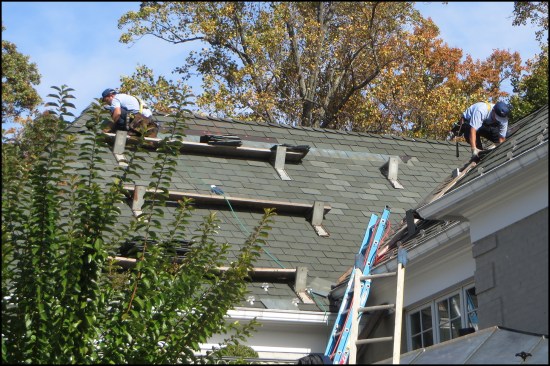
Per the client’s request, the shingles were carefully removed, mixed, and reinstalled over new underlayment.
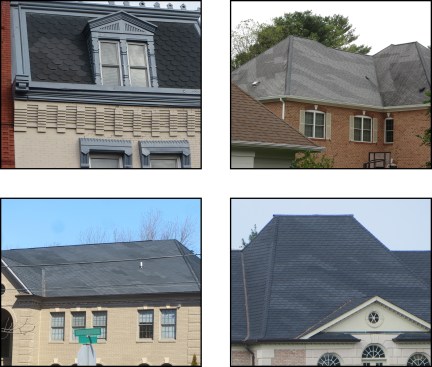
In the author’s region, inadequately mixed or blended shingles are common regardless of synthetic slate brand, color selection, or roof pitch (examples shown above). Some manufacturers have recently started premixing bundles of slate to help with this problem.
Oxidation. The top surface of some brands tends to oxidize, and I’ve seen this oxidized layer rubbed off by maintenance workers’ boots numerous times over the years. It’s best to avoid repeated travel on most types of roofing, so provide direct access to HVAC equipment or skylights that are located on upper roofs and may need regular maintenance (although keeping equipment off upper roofs is the optimal solution). Some flat roofing materials have walking pads you can add, but I don’t know of any for steep roofing.
The top surface of some brands tends to oxidize. Here, workers had rubbed off the top oxidized layer with their shoes when maintaining a skylight on an upper roof. These wear marks can be quite noticeable from the ground.
Leave some spares. It’s always good to have a couple of extra bundles in case something goes wrong—for example, you have to pull a few shingles to replace a rusty dryer vent, or a tree branch crashes through a few shingles. The question is where to hide them so the homeowners don’t end up throwing them away. Attics and other rarely accessed parts of the house seem to have a better track record than garages and basement storage areas. I’ve even seen spare materials stuffed up in joist spaces in the furnace room. Homeowners won’t often bother to remove these, but I’ve seen people throw away tile, paint, shingles, spare custom-milled trim—all kinds of stuff they may regret parting with—when they perceive it to be in their way.
Be careful with new products. While we stick with the brand we have had the best luck with, other tradespeople have told me about other brands that have been around as long and are holding up well. It’s wise to be cautious with any new product. Ask around, particularly through the material distributors. They tend to be named in litigation and they want to limit their exposure, too, so they are not likely to continue carrying products that have failed. But you do have to ask—the information is not likely to be publicly available. Last, I recommend that before installing a new product, you visit 10- to 15-year-old installations nearby to see how it will look long term.
Photos by Doug Horgan


