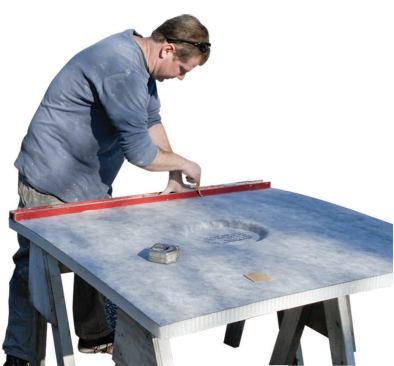
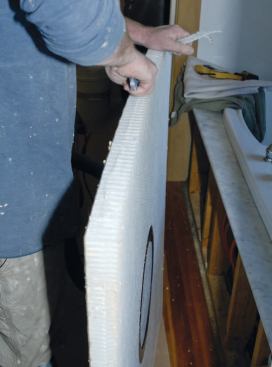
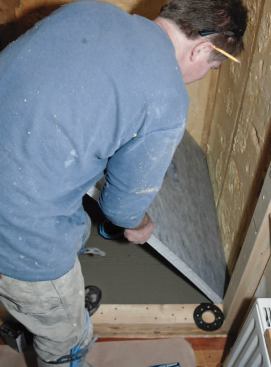
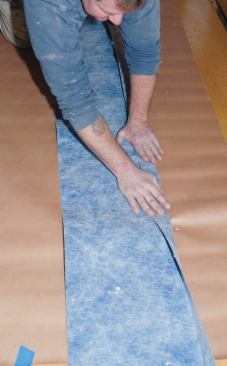
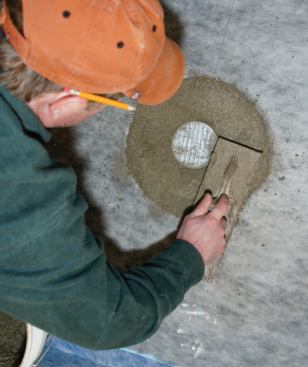
Cutting the base to size was easy. The instructions recommend sc…
Cutting the base to size was easy. The instructions recommend scoring and snapping the base, as you would do with drywall, but with a product this costly I wanted to make sure I had a clean cut. So I cut first from the top, using a utility knife.
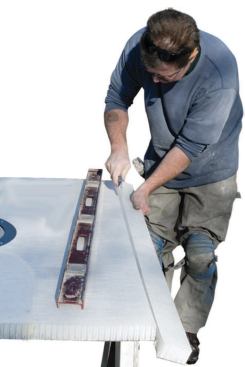
I flipped it over and finished cutting from the back.
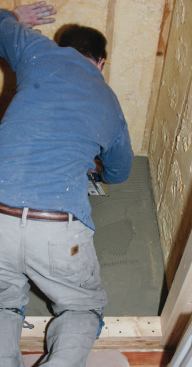
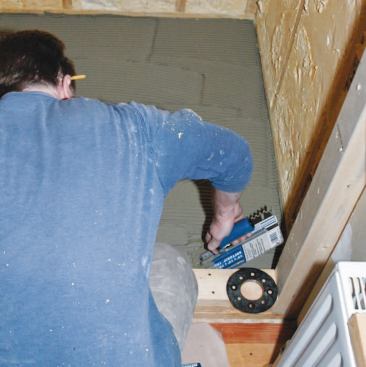
The weep drain was already in place. I checked that the floor wa…
The weep drain was already in place. I checked that the floor was level, then nailed down a piece of 1/2-inch-thick Durock cement board in a bed of thinset.
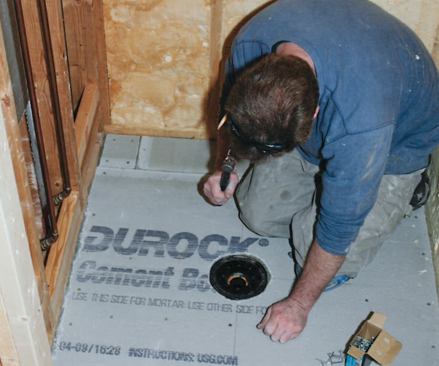
The floor sheathing brought the surface flush with the drain fla…
The floor sheathing brought the surface flush with the drain flange.
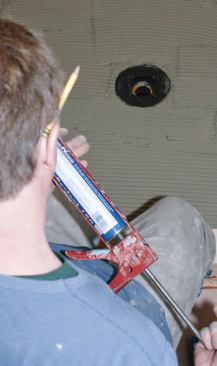
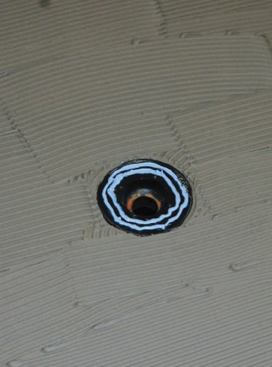
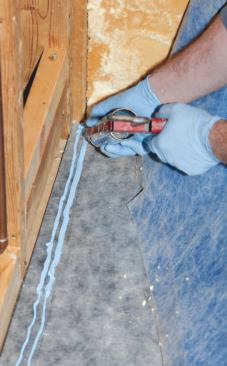
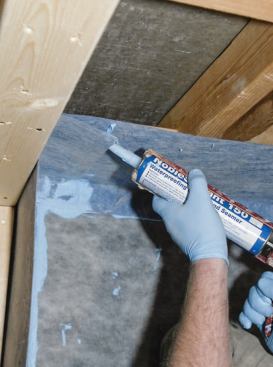
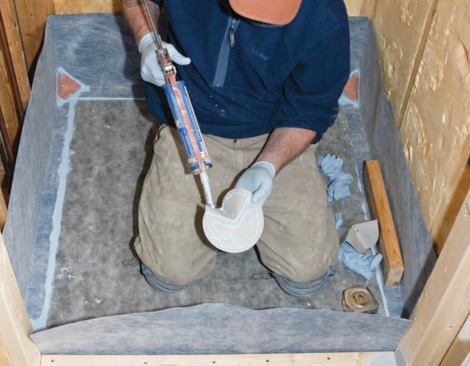
I applied a double ring of Noblesealant 150 around the drain fla…
I applied a double ring of Noblesealant 150 around the drain flange.
Sealant applied to the drain flange
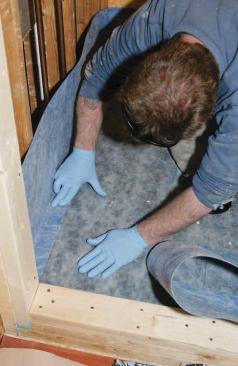
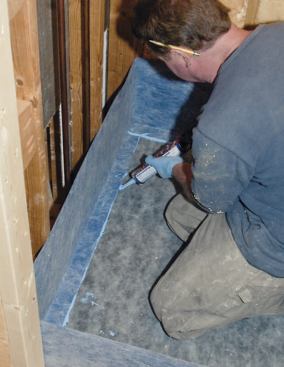
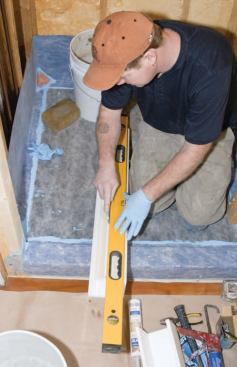
After fine-tuning the fit of the base, I prepared to bond it to …
After fine-tuning the fit of the base, I prepared to bond it to the floor.
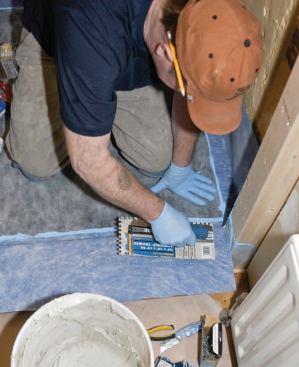
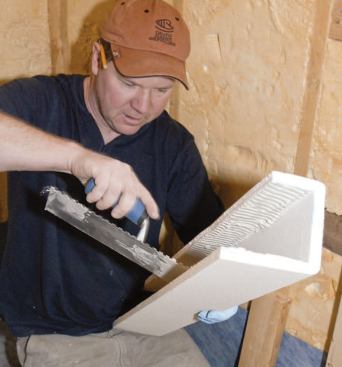
I troweled out modified thinset with a 1/4-inch-by-3/8-inch squa…
I troweled out modified thinset with a 1/4-inch-by-3/8-inch square-notch trowel.
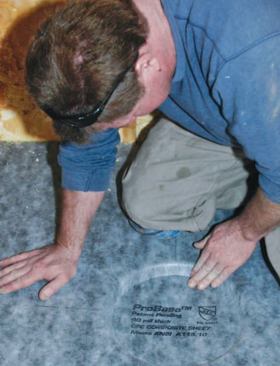
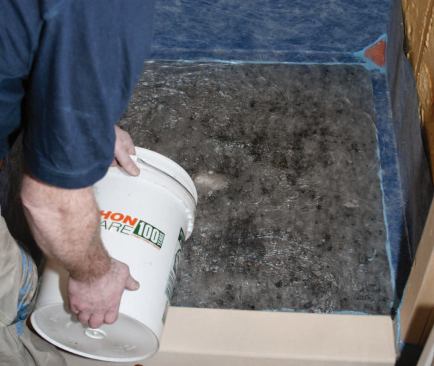
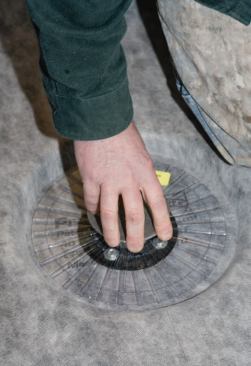
I set the base into place.
I firmly pressed the membrane into the sealant around the drain.
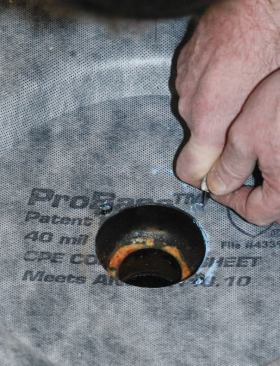
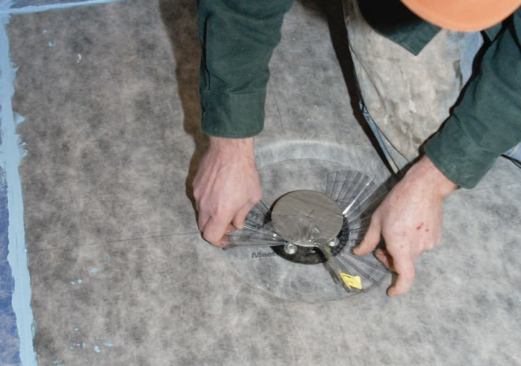
I cut out the drain center and the bolt holes around the perimet…
I cut out the drain center and the bolt holes around the perimeter so that I could install the top half of the drain while the sealant set up.
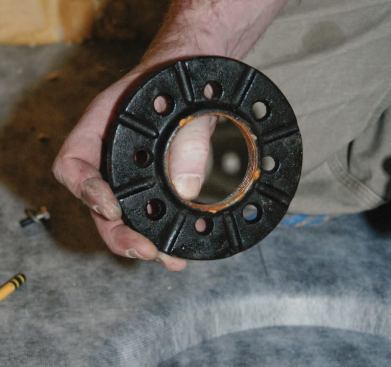
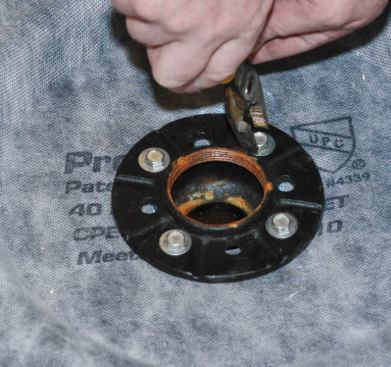
Note that the bottom of the clamping ring is grooved to allow wa…
Note that the bottom of the clamping ring is grooved to allow water to weep into the drain.
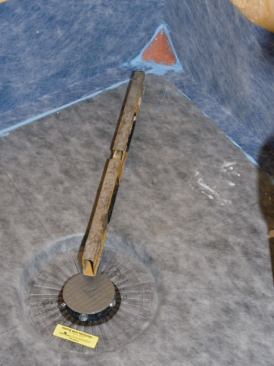
I bolted the clamp ring onto the drain upside-down, flat-side do…
I bolted the clamp ring onto the drain upside-down, flat-side down, so that the sealant and membrane fabric wouldn't squeeze up into the drainage grooves as the sealant set.
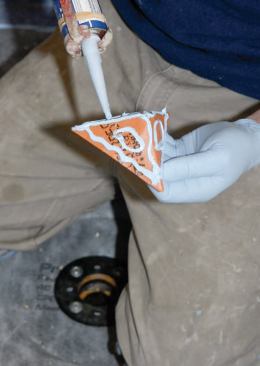
I measured and cut the 14-inch-wide perimeter membrane fabric, l…
I measured and cut the 14-inch-wide perimeter membrane fabric, leaving enough for about a 4-inch overlap. Then, following the manufacturer's instructions, I prebent a 2-inch leg along one edge.
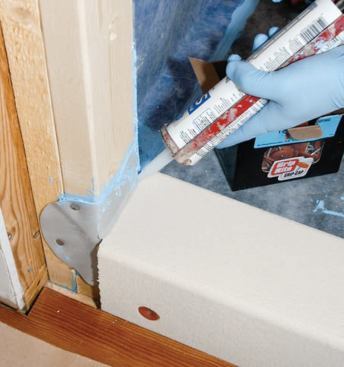
I applied a double bead of sealant around the base to create a g…
I applied a double bead of sealant around the base to create a good bond.
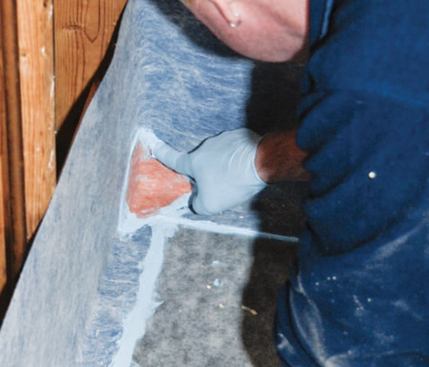
I firmly bedded the 2-inch leg into the sealant, looking for a c…
I firmly bedded the 2-inch leg into the sealant, looking for a continuous line of squeeze-out.
Sealant squeezed out of the membrane joint
After sealing the overlap in the corner, I worked back around th…
After sealing the overlap in the corner, I worked back around the perimeter with the caulk gun.
Additional sealant was used to thoroughly cover the joint betwee…
Additional sealant was used to thoroughly cover the joint between the wall membrane and the base.
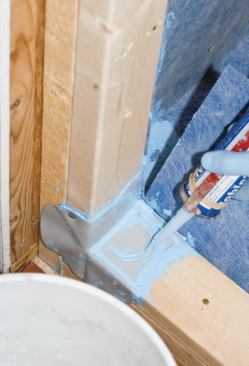
Next I installed the inside corner pieces, using two beads of ca…
Next I installed the inside corner pieces, using two beads of caulk in continuous rings so that there would be absolutely nowhere for water to seep through.
I pressed them into the corners, again looking for squeeze-out a…
I pressed them into the corners, again looking for squeeze-out and tooling the edge with my finger.
The preformed outside corners were next, two per jamb, applied d…
The preformed outside corners were next, two per jamb, applied directly to the wood with sealant.
Again, I used plenty of sealant and tooled the squeeze-out.
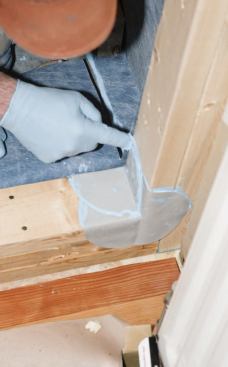
After slitting the perimeter membrane to allow it to fold over t…
After slitting the perimeter membrane to allow it to fold over the jamb, I squirted sealant onto the preformed corners.
I spread modified thinset over the exposed wood — back, top, a…
I spread modified thinset over the exposed wood — back, top, and front.
Then I bedded the membrane onto the threshold with my trowel.
I then measured the polystyrene curb cover that Noble had provid…
I then measured the polystyrene curb cover that Noble had provided (this does not come with the ProBase kit), cut it to size with a utility knife.
I thinset the curb into place, making sure to get the mortar on …
I thinset the curb into place, making sure to get the mortar on both vertical legs as well as the top so that it would have good support.
I drive a few plastic-cap roofing nails on the outside of the cu…
I drive a few plastic-cap roofing nails on the outside of the curb.
I applied silicone sealant at the joint at each end of the thres…
I applied silicone sealant at the joint at each end of the threshold, per the instructions. Noblesealant 150 is incompatible with the polystyrene.
I let the sealant and thinset set up, then plugged the drain and…
I let the sealant and thinset set up, then plugged the drain and performed a water test.
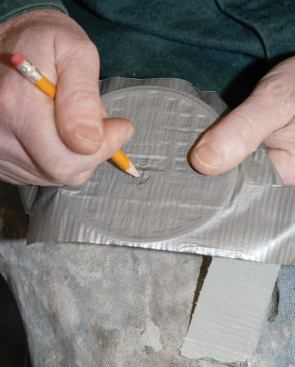
After covering the drain cap with duct tape to protect it, I mar…
After covering the drain cap with duct tape to protect it, I marked the orientation with a pencil.
I then screwed the chrome plate into the drain assembly, positio…
I then screwed the chrome plate into the drain assembly, positioned the plastic weep protector around it.
I adjusted it so that its orientation was correct.
I checking for correct tile height and slope with a level.
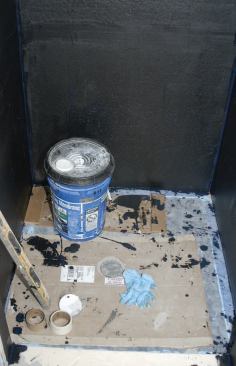
Finally, I filled the depression around the strainer with cement…
Finally, I filled the depression around the strainer with cement mortar — I use the bag form of Laticrete 3701.
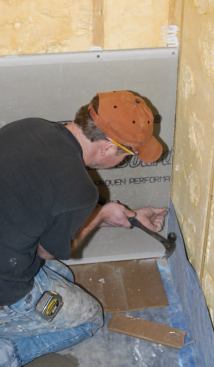
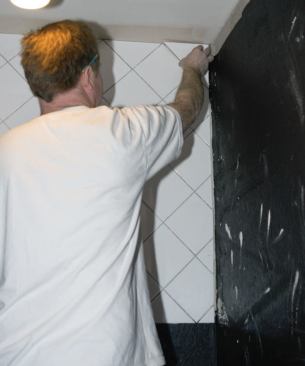
Once the mortar in the base set up, I finished the job by instal…
Once the mortar in the base set up, I finished the job by installing Durock cement board on the walls.
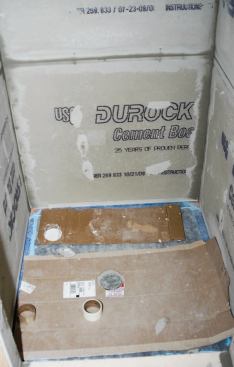
I used cardboard to protect the shower base and also to create a…
I used cardboard to protect the shower base and also to create a gap at the bottom of the cement board.
I used mastic to adhere the Durock to the studs, making sure tha…
I used mastic to adhere the Durock to the studs, making sure that the lowest nails in the cement board were no lower than the top inch of the membrane underneath.
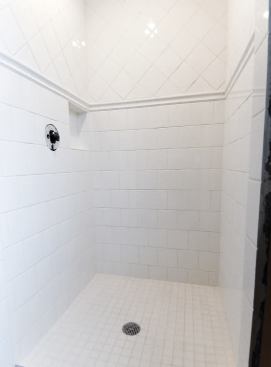
Tiling was the final step.
The finished project
As a second-generation tile setter — I started working in my father’s tile business as a teenager — I’ve installed hundreds of shower pans. Tiled shower pans are not something you want to take risks with; leaks are expensive to repair and can cause serious structural damage in wood-framed houses. Years ago we settled on a reliable installation method for tiled shower pans: Chloraloy membrane, from the Noble Co. (noblecompany.com), installed over a sloped subbase, running to a three-part weeping drain, followed by a sloped mud bed. I’ve built shower pans using this method for years and have never had a problem.
There are some new shower-pan systems available that use a surface-bonded waterproofing membrane and skip the weeping drain. I’m not a big fan of these products, though I do occasionally install them when a GC requests it. When I was asked by a local builder to try out the ProBase pan from Noble, I was interested for a couple of reasons. First, I’ve used Noble products for years, including the Chloraloy pan membrane mentioned above, and I’m familiar with their quality. Second, this preformed shower base is designed for use with a clamping drain, so it would provide the backup weep drainage I’m used to. So I accepted the opportunity to install a ProBase kit at a local job and assess it for JLC.
The Kit
The ProBase kit I installed includes the shower base itself, a plastic weep protector (a product I’ve been using for a while on all my shower pans), a tube of NobleSealant 150, a strip of membrane flashing for the edges, and eight preformed corner flashings — four for inside corners and four for outside corners. The 48-inch-square center-drain kit retails for $593 at Noble’s website; other sizes and drain placements are also available.
The base is very light. It consists of a waterproof sheet membrane laminated to a polypropylene matrix. A depression and cutout in the center allows for placement of the clamping drain.
The first thing I did was place the base on the ground and stomp on it. Reassured of its strength, I also tried to peel the membrane away from the plastic structure, but it held firm. Cutting the base to size was easy. The instructions recommend scoring and snapping the base, as you would do with drywall, but with a product this costly I wanted to make sure I had a clean cut. So I cut first from the top, using a utility knife (Slide 1), then flipped it over and finished cutting from the back (Slide 2).
Setting the Base
The weep drain was already in place. I checked that the floor was level, then nailed down a piece of 1/2-inch-thick Durock cement board in a bed of thinset (Slides 3, 4) over the floor sheathing to bring the surface flush with the drain flange. After fine-tuning the fit of the base Slide (5), I prepared to bond it to the floor, first troweling out modified thinset with a 1/4-inch-by-3/8-inch square-notch trowel (Slide 6), then applying a double ring of Noblesealant 150 (Slide 7) around the drain flange (Slide 8). I set the base into place (Slide 9) and firmly pressed the membrane into the sealant around the drain (Slide 10). Next I cut out the drain center and the bolt holes around the perimeter (Slide 11) so that I could install the top half of the drain while the sealant set up. Note that the bottom of the clamping ring is grooved to allow water to weep into the drain (Slide 12). There are eight holes; four of them are bolt holes, but the other four receive water from the grooves and pass it into the drain. It’s important for these grooves to remain unobstructed, so for now I bolted the clamp ring onto the drain upside-down, flat-side down, so that the sealant and membrane fabric wouldn’t squeeze up into the drainage grooves as the sealant set (Slide 13).