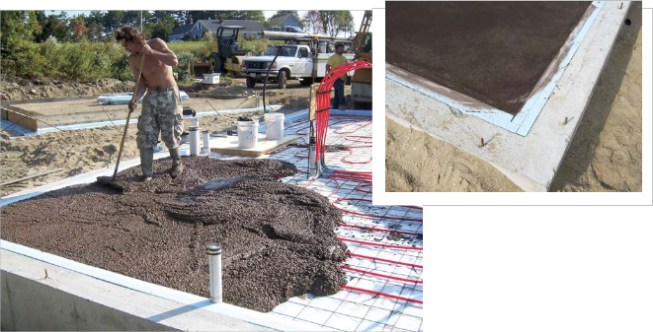
Four-inch-thick foam board provides R-20 insulation under and ar…
I’m a building contractor in southern Maine with a focus on energy- and resource-efficient homes. Our approach is to do everything we can during the design phase to minimize the heating load (cooling isn’t much of an issue in our region); then we figure out the best, most cost effective way to meet the goals we’ve set.
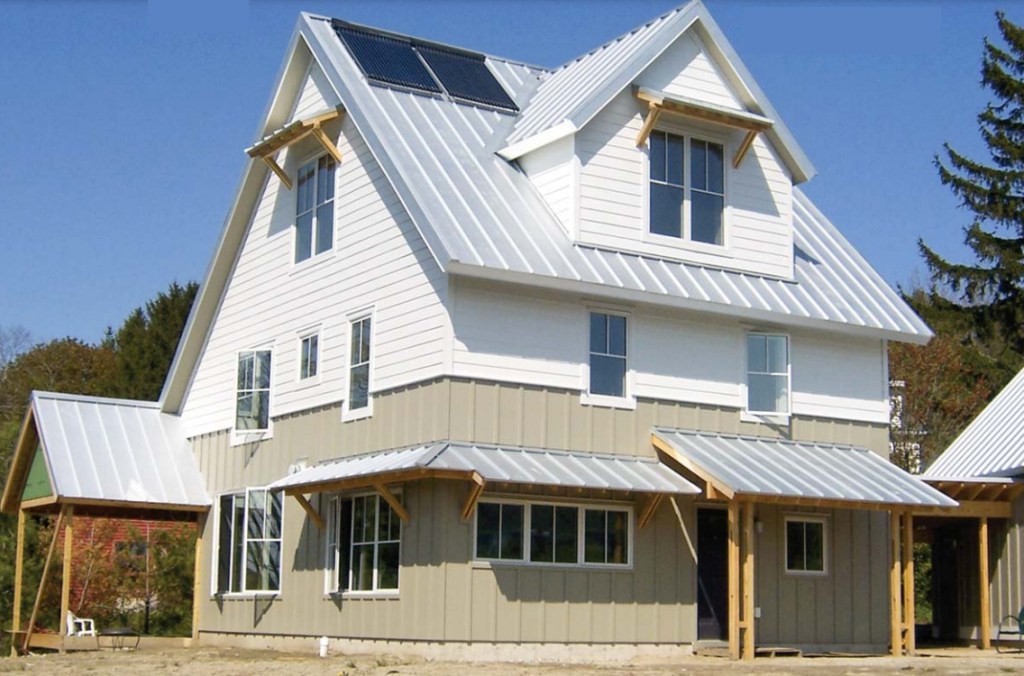
The project I’ll discuss in this article is a 2,500-square-foot house with an airtight double shell, high levels of insulation, triple-glazed windows, and a low-maintenance exterior. Roof-mounted evacuated- tube solar collectors (203/488-8215, apricus-solar.com) supply hot water to a radiant system embedded in a well-insulated slab. The solar system is designed to provide most if not all of the heat and hot water in the fall and spring. In winter, an electric on-demand heater (888/296-9293, seisco.com) will provide reliable heating, with solar offsetting its use. A propanefueled fireplace, which can operate without electricity, will furnish emergency back-up heat, along with some ambiance. Because of the high R-values in the slab, walls, and roof, there is no heating loop on the second or third floors of the simply configured home.
By keeping finishes and trim details simple (drywall returns at windows and doors, for example), we kept costs in line with those of standard custom homes while guaranteeing lower operating expenses over the building’s life.
Energy Modeling
I was brought into the project by Kaplan- Thompson Architects. They had already settled on the essential elements of the shell using REM energy modeling software (archenergy.com); their goal was to achieve an airtightness rating of 0.6 air changes per hour at 50 pascals, the standard set for a Passive House (passive house.us). This high performance level allowed us to dramatically downsize the heating system, saving money up front on equipment and long-term on fuel. Energy modeling predicts that this house will use 15.9 mm Btu per year, as opposed to the 72.9 mm Btu per year that a “standard” house of the same size would use — a 73 percent reduction.
Foundation
We poured a standard 8-inch-thick stem wall on footings set 48 inches deep, below the frost line (see illustration, page 2). After backfilling and compacting the gravel and sand subgrade, we installed two layers of 2-inch squareedge extruded polystyrene (XPS) foam board inside the stem wall and across the ground, in preparation for placing the 4-inch slab. We staggered the seams to block air paths. With an R-value of 5 per inch, the XPS provides a total of R-20 under the concrete. The slab also serves as thermal mass, storing heat on sunny winter days and releasing it at night. (Since this gain is incidental, it didn’t enter into the heat calculations.)
The 4-inch band of vertical perimeter insulation would ordinarily show in a conventionally framed wall. In this house, though, the double 2×4 walls are spaced 4 1/4 inches apart, giving an overall wall depth of 11 1/4 inches — enough to cover all but 3/4 inch of the foam, which disappeared under the drywall and baseboard trim.
We had the concrete tinted a rich chocolate brown using ColorFlo iron oxide pigment (800/624-0261, solomoncolors .com). The clients didn’t care for the look of shiny polished concrete, so we simply cleaned the slab and sealed it with Seal- Once, a multisurface waterproofing compound (603/669-8786, seal-once.com).
Framing for Thermal Efficiency
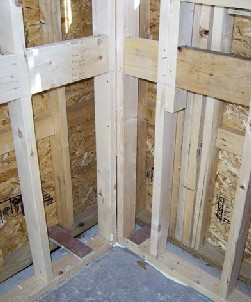
We framed the exterior walls first, completing and closing in the shell before building the interior walls. We used 2x4s at 16 inches on-center, with single studs at the corners since we only had to catch the plywood sheathing and not the drywall. Similarly, the interior walls only have to catch the drywall. Thus, the heat loss seen in typical wood-heavy corners is minimized but not eliminated (our thermal scans showed the corners somewhat colder than the general wall area, presumably because there’s still a greater concentration of studs there).
The joint between the sill plate and the foundation is the source of one of the biggest air leaks in a new home, even with conventional foam sill sealer installed. To address this area, we used a cellular EPDM structural gasket from Conservation Tech nology (800/477-7724, conservationtechnology.com) that gets stapled to the underside of the plate before installation. It stays flexible down to –60°F, effectively fills irregularities, and keeps its flexibility for the lifetime of the building, according to the manufacturer.
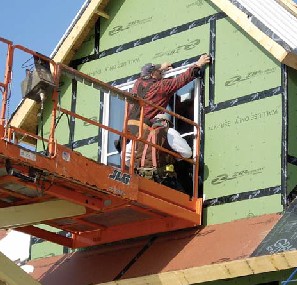
We knew that the shell had to be as airtight as we could make it. For that reason, I wanted to tape-seal all the seams in the sheathing and decided to try the relatively new Zip System sheathing (800/933-9220, huberwood.com). Relying on the proprietary seam tape made me somewhat nervous. Despite the maker’s recommendations to the contrary, I still don’t feel comfortable eliminating the roofing underlayment, so we prepared for the standing-seam metal roof with a full-coverage self-adhering underlayment membrane. But I am confident that the seam tape played a big role in the success of our blower-door test results.
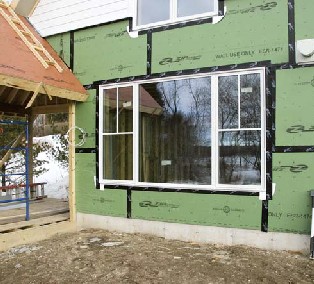
We did note minor swelling at the edges of some sheets after wetting, along with some slight original variation in thickness from one panel to the next. The Home Slicker drainage material (800/346-7655, benjaminobdyke.com) we installed behind the siding helped absorb the variations, but I’m hoping Huber will continue to improve the product.
High-Tech Windows
We installed triple-glazed Thermotech fixed and casement units (613/225-1101, thermotechwindows.com), which are fiberglass windows made in Canada. Compared with most double-glazed units, they’re expensive. Depending on the manufacturer, you’ll pay somewhere between 25 and 50 percent more for a triple-glazed unit than for double glazing. However, our energy modeling showed a 20 percent reduction in the heating load if they were used, suggesting a pretty aggressive payback over initial cost.
For budgetary reasons, we didn’t use triple-glazed exterior doors — but the house has only three and they represent a tiny percentage of the building envelope.
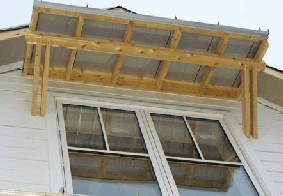
Because the water view was too good to pass up, we put more glass than prescriptively recommended — typically no more than 10 percent of the aggregate glazing area — on the west-facing wall. The architect sized south-facing window overhangs to provide shade during the summer months. We framed them using local eastern white cedar and hackmatack and topped them in steel to match the main roof.
Double Wall Details
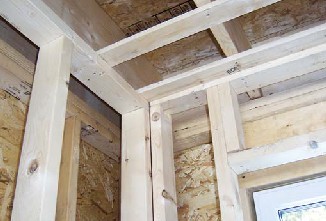
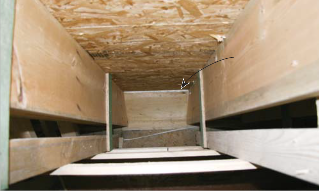
We framed the interior walls about 1/2 inch short so that we could tilt them up without hitting the ceiling joists. Since the bottom plates land over the 4-inch band of perimeter foam, we nailed the walls through the top plate into the floor joists above and used plywood standoffs bridging the exterior and interior walls to hold them in parallel alignment (Figure 5). To close the gap between the XPS and bottom plate, we injected expanding foam along the joint. The XPS has a compressive strength of 25 psi, and the thin bead of expanding foam should be adequate to distribute the load.
On the second and third floors, we used solid shims between the subfloor and bottom plates, again foaming the gap against drafts. Where the interior wall framing ran parallel to the ceiling joists, we first strapped the ceiling with 1×3 furring on 16-inch centers, then nailed the plates to the strapping.
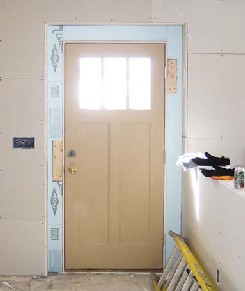
Entry door. The deep wall framing restricts the range of in-swinging doors to a roughly 95-degree arc. We accepted the restriction on the side doors, but to create a wider swing for the main entry, we enlarged the rough opening through the inside wall. We faced the exterior wall framing with 2-inch foam board and sealed all seams with expanding foam.
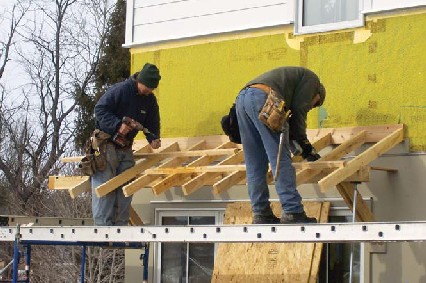
Deep Roof Build-Down
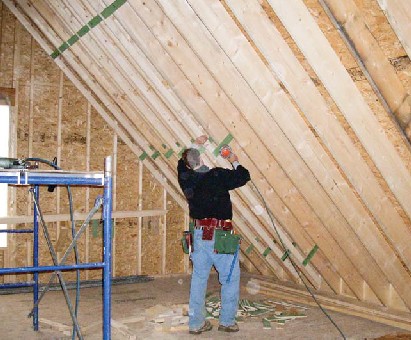
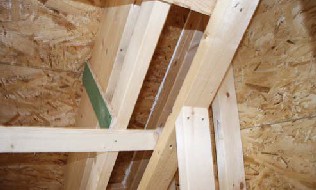
Our original roof framing detail called for standard 2x12s, cross-strapped with 2x3s set on edge on 16-inch centers. While this system would result in a nearly 14-inch deep insulation cavity with minimal thermal bridging, I was concerned that the 2x3s might twist, creating nail pops and an irregular ceiling surface. (I avoid using 2x12s whenever possible anyway, under the assumption that they come from old-growth trees better left standing.) Instead, we used 2×10 rafters and created a deep insulation cavity by nailing 14-inch-wide 1/2-inch-thick plywood gussets to 2x3s about every 3 feet, then nailed these assemblies to the sides of the rafters to create a new lower ceiling plane (Figure 7). The reduced contact between framing members — along with the 21/4- inch gap between the members — further minimizes thermal bridging. We opted for an unvented roof and installed solid blocking at the eaves between rafters, caulking all the edges for airtightness.
Air-Sealing and Insulation
Even though correctly installed sprayfoam insulation has built-in air-sealing properties, we chose cellulose for its lower installed cost — about one-third that of open-cell foam. Dense-pack cellulose can slow and even stop air movement, but leaks in the shell will definitely degrade its performance and allow moisture to enter framing cavities.
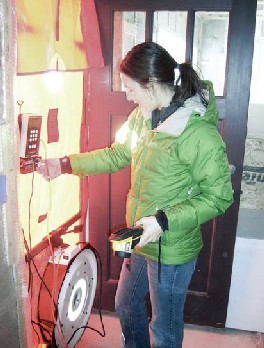
Before insulating, however, we routinely call for blower-door testing while the frame is still open and we can get to the leaky spots. It costs about $200 per test and is well worth the expense. We ran the first test after closing in the shell and making every effort to tighten it with caulk and tape. With the aid of a torpedo heater running inside the building, the infrared camera allowed us to find and caulk the few cold spots we found, mostly in the seams between built-up posts and headers on exterior walls. Our results at this stage were about 2.2 ACH at 50 pascals, a level of leakage around half that of many new homes. Not bad for an unfinished shell.
We also own a Bulldog 2K negative air machine (800/634-9091, abatement.com) that we bought to help with dust control on renovation jobs. We’ve been using it to air out the house and have discovered that its 2,000-cfm fan makes a good substitute for a blower door. It doesn’t allow us to measure the leakage, but it has shown us a couple of spots that required more caulking.
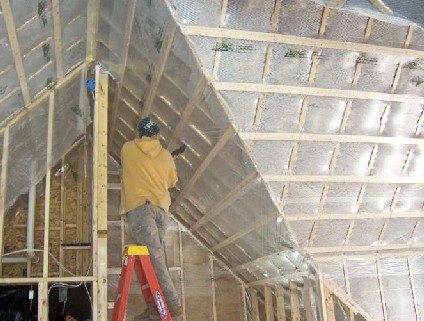
Insulating With Cellulose
In new construction, dense-pack cellulose is commonly installed behind a membrane. In this case the membrane was Par/Pac (877/937-3257, parpac.com), a stretchy, reinforced poly sheet that the installers first staple to the face of the studs, then “stitch” to the sides to keep the face from bulging beyond the wall plane. To prevent the cellulose from flowing over into interior ceilings, the installers run the wall membrane up into the joist bays and staple it to the joists and underside of the subfloor. The stapling schedule is intense, about one per inch. At doors and windows, we installed the drywall returns before blowing, to retain the insulation.
A good cellulose installation is a mix of art and science; installers develop a feel for when they’re achieving the proper density, about 3.5 pounds per cubic foot. This job was complicated by the double walls and gusseted roof. Normally, bays are filled one at a time, but here there was nothing to keep the cellulose from flowing laterally. Fortunately, our installer, Ace Insulation, had already done several double-walled houses and had a handle on the slightly different technique for ensuring complete and proper density.
Ventilation
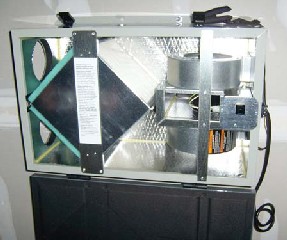
To ensure good indoor air quality and control moisture, a house as tight as this requires mechanical ventilation. My hvac contractor prefers ERVs (energy recovery ventilators) to HRVs (heat recovery ventilators) and installed an American Standard unit (Figure 10). Like an HRV, an ERV uses an air exchanger to transfer exhaust heat to the incoming air, but it also adjusts humidity levels by transferring moisture between air streams. While there have been concerns about a freezing risk to certain ERV cores in cold climates, my hvac contractor uses them exclusively and hasn’t had any problems. Since unit specifications and performance vary, it’s a good idea to check the manufacturer’s recommendations.
We installed ducting to supply fresh air to the bedrooms and to draw moisture laden return air from the bathrooms. While the ERV replaces conventional bath room fans, we still installed a conventional range hood in the kitchen.
Second Test
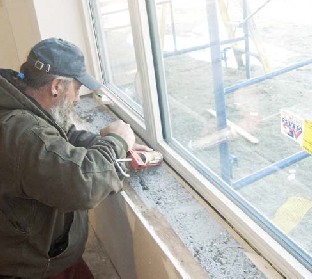
Following insulation, we ran another blower-door test. The outcome — .88 air changes per hour at a pressure of 50 pascals (ACH50) — was among the best results our energy auditors had seen anywhere. We found slight drafting under the door pans and caulked them along the interior edges. We also found that pushing the doors tight against the weatherstripping affected our results, so we’ll carefully adjust the strike plates when we install the final door hardware. Both doors and windows call for careful installation and airsealing to ensure top performance.
In fact, after we set up temporary heat to dry the drywall, the dramatic temperature difference between indoors and outdoors revealed a cold spot on a large window unit that even the blower-door tests hadn’t caught. Our rough opening was a little tight on the bottom and one side, preventing the cavity spray foam from making a tight seal. So, we stripped back the self-returning drywall and caulked the edges.
Looking Back
The extra time and material consumed in double-wall framing is somewhat offset by the relative ease and lower cost of framing with 2x4s rather than with 2x6s or some deeper system. I estimate that our framing package cost about 10 percent more on labor and about 5 percent more on materials compared with a conventionally framed house with 2×6 walls and standard 2×10 rafters. Blown with densepack cellulose insulation, double framing also produces a high R-value shell with extremely low thermal bridging, ensuring a short-term payback in lowered energy use. The final blower-door test, after drywall, came in at .77 ACH50 — not the .6 we had hoped for, but darn close.


