Chris Ermides
Position yourself beneath the sander. Stand as directly under th…
The Festool Planex Easy LHS-E 225 EQ is, as you can guess, a much simpler version of the original Planex, which was released back in 2012. Designed specifically for drywall contractors, the original Planex is a relatively complex system that is feature-packed and costs $1,200. It can be extended from the 43-inch handle to 63 inches or 83 inches with optional extensions, has an idle speed range of 340-910 rpm, and draws a little less than 5 amps. The Festool Planex Easy, which sells for $750, features a fixed 63-inch wand with a direct-drive brushless motor in the sanding head. It draws about 3 amps, weighs 8.8 pounds, and, like the Planex, has an 8 1/2-inch head diameter with a dust connection diameter capacity of 1-1/16″/1-7/16″. This simpler version is meant for drywall contractors and painters; remodeling contractors might consider it a viable investment, depending upon how much drywall you do (or how much you loath sanding). Both the Planex and Planex EZ feature impressively effective dust collection.
I’m a self-proclaimed eternal neophyte when it comes to taping drywall; I’m not terrible at it, but I’m nowhere near good, either. I personally hate all drywall work – mostly because I just don’t have the patience or the knack for producing results beyond a shoulder shrug and a “meh” when it comes to wielding a taping knife. I’ve discussed this at length with Myron Ferguson. He laughs at me and shakes his head every time it comes up. I had the pleasure of working with Myron on the renovation of my dining room ceiling a couple of years ago, which he covered in this JLC article. My work with him was relegated to running screws and drywall washers and taking pictures; I did not touch a taping knife.
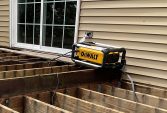
A few months ago, I hung drywall and taped a small garage, which I converted into a shop for testing tools and shooting video for Tools of the Trade. It seemed like a good opportunity to test out the Planex EZ, given how much I hate sanding (who doesn’t?). After using it briefly, I realized a couple of things. First, drywall sanders, no matter how simple, require a learning curve. And second, it was going to take me a lot longer than sanding seams on a 12×20 garage to get a real sense for how the tool performed. So, I reached out to Festool for some insight to help with the learning curve. For an in-depth review, check out my colleague Rob Robillard’s video on YouTube here.
Use the right extractor
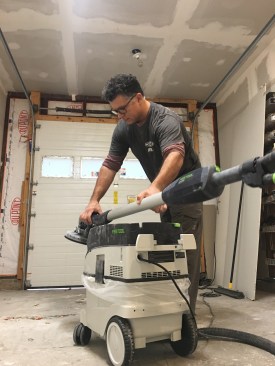
The Planex EZ creates a lot of dust, so you need to make sure you’re using an extractor that can keep up with it. Of the Festool-brand dust extractors, Festool vehemently recommends the CT36 AC, and nothing smaller. Can you use an extractor from a different manufacturer? If it has comparable amounts of suction, a good filter system, and auto-clean, you should be fine. The Festool CT36 AC has a max air flow of 138 cfm and a 96-inch static water lift.
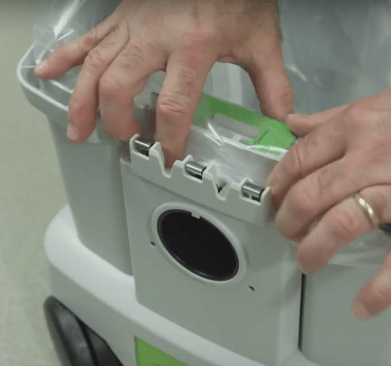
Use the clear disposable bags, not the self-clean fleece filter bag. These bags have a white box and “x” cut on the sides. Keep the bag below the white bin of the extractor (where the top clicks in). Those “x”s help the bag “breathe” during use, allowing it to fill with dust instead of air for maximum fill capacity.
Put the extractor in “Auto” then turn it to AC one time before you start sanding. Toggling to AC gives two to three bumps to the filter, helping to keep it clear of dust. There’s an optional accessory called a “blast gate,” which is supposed to help keep the filter clean and the extractor running more efficiently over time; you close it once in a while to raise the extractor’s suction level. (The Cleantec 36AC comes with a 1-micron filter, which is not suitable for RRP lead-paint work.)
Note: Although the dust extractor has an auto-clean system, it still needs to be manually cleaned once in a while. When you notice that the suction level changes as you’re sanding, it’s time to clean out the air filter. It’s easy to remove, and requires simply opening the pleats up over a garbage can and knocking loose the caked-on dust. It’s also okay to blow out with an air compressor, though be prepared for a dust storm.
Watch the grit
Festool says, “Due to the aggressive nature of sanders like these, especially compared to hand sanding with poles, we generally recommend that a user start with a higher grit than usual to compensate for the aggressive action. Then if they need to they can always go to a coarser grit. This should help to avoid issues if they start too rough.” Painter Scott Burt echoed this advice when asked how to choose sanding grit: “Err on the finer side,” he says.
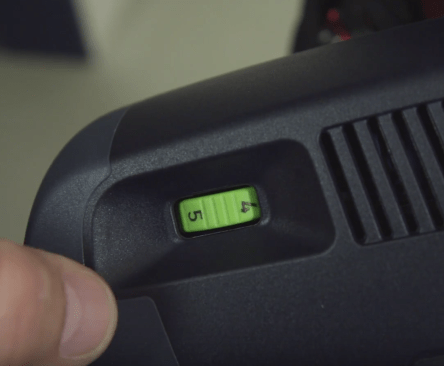
Speed selection
When I first started using the Planex EZ, I had no idea what speed setting to use. You can choose between 1 and 6, which has an rpm range of 400 – 920. Slow and a coarse grit is best for textured surfaces and popcorn ceilings. The only guidance Festool gives with respect to speed is to start at about 4.5 until you get used to the sander. Too slow and you’ll end up with swirl marks. Too fast, and you’ll tear through the finish (and maybe the paper, if you’ve never used a sander before).
Place the head, then start the machine
Always start the machine on the surface and then pull it off the surface before turning it “OFF.” It is extremely difficult to place a spinning sanding pad perfectly flat against any surface. Attempting to place a spinning pad on the surface will result in gouging. Likewise, when turning it off, abruptly stopping the pad on the surface can leave abrasive marks.
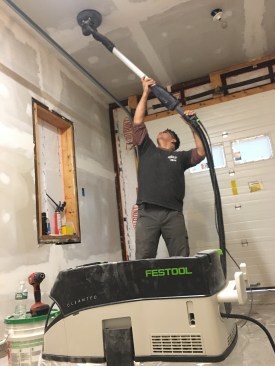
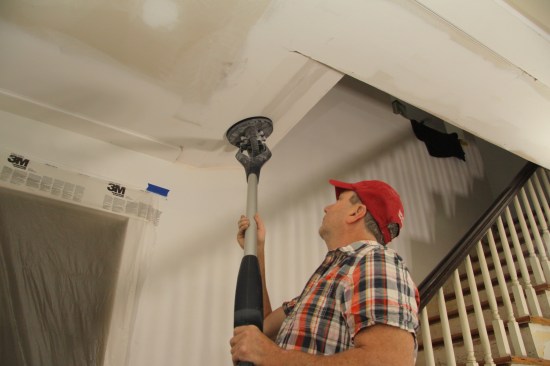
Position yourself beneath the sander
Stand as directly under the sander as possible to minimize shoulder strain. For extended overhead work, Festool sells a harness kit ($260; sold separately). The harness helps to transfer the weight from the shoulders to the hips.
Let the machine do the work
It’s a common adage in the trades, particularly with respect to saws and sanders, but it can’t be overstated here. Festool recommends to always keep the sander moving. This will help to avoid burning through compound, gouging seams and paper, and the like. Move in a uniform and symmetrical manner. If sanding a fully coated wall, overlap pad paths to ensure full coverage by the sander. Erratic sanding motions may produce irregular results.
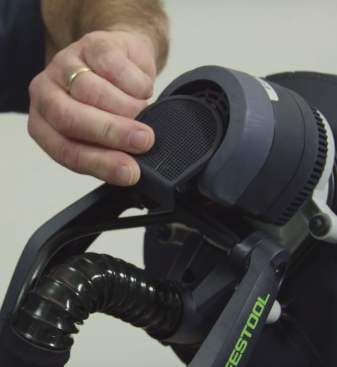
Storage and maintenance suggestions
Before you store the sander at the end of the job, Festool recommends vacuuming the backing pad of the sander. It is also a good idea to store the sander with abrasive on the pad. This keeps the pad from taking up any miscellaneous debris in storage. Also, a light puff of compressed air (low pressure) to the head and body of the sander is helpful. The motor itself has a protection screen to help keep large debris (drywall bullets) from entering. This screen may need to be removed and cleaned occasionally.