

My background is in woodworking and finish carpentry, and I get to build a few decks as well. One tool I use regularly but a lot of deck builders seem to leave behind is a router — if they do bring one along, they only profile edges with it. I use mine for a lot more than easing an edge.
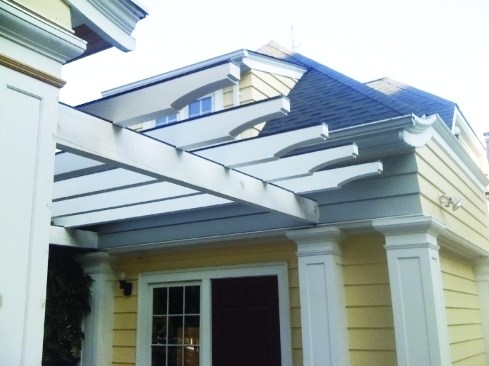
With the right combination of bits and jigs, routers are perfect for shaping repetitive patterns and for removing stock to make a variety of joints. In this article, I’ll show three ways I use them when I build decks. The first is for making decorative cuts, like those on a trellis I built of 2x8s (see photo, left). It rests on 4×8 beams, with the same decorative profile cut on both sides. I used a router to speed up all the joints as well.
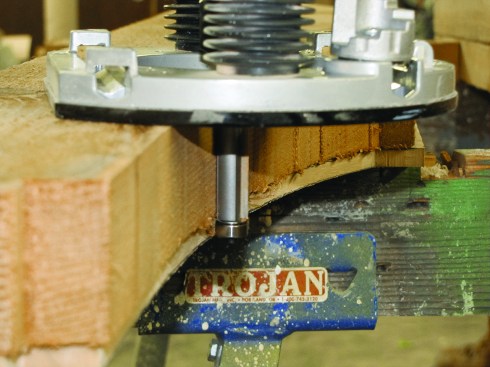
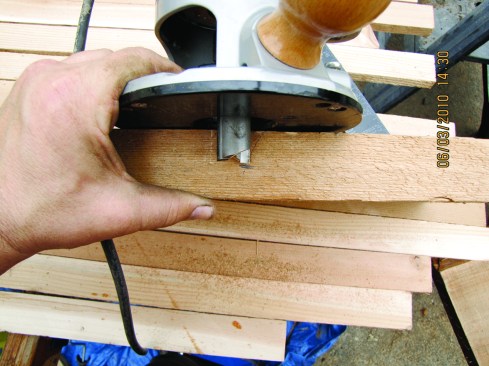
Another job routers excel at is cutting mortises, such as in a piece of decking that has to slip over a post to reach its place (see bottom left photo, facing page). If you routinely use the same size posts, you can make a single jig that will save you time on every deck you build.
Finally, routers are particularly good at creating half-lap joints. Half-laps are great for railing and for corners on caps, and they’re one of the few methods for making an exterior miter that won’t gap.
Before I get into specific applications, though, here is some general information about routers and jigs.
Router Basics
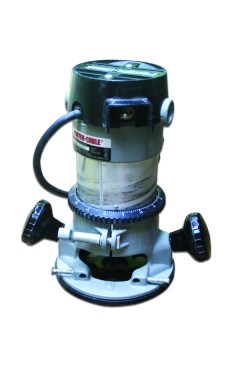
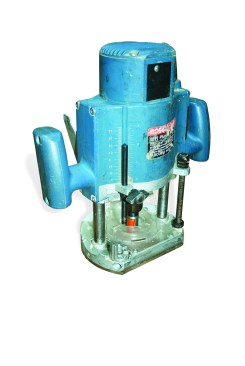
There are three principal types of routers. The router that most carpenters start with is a fixed-base machine (Figure 1). The base clamps tight to the motor, allowing the bit to be set at a specific depth. Raising or lowering the depth of the bit requires unclamping the base from the motor and moving the motor up or down in the base.
Fixed-base routers are great at running profile bits. They can be used for mortising and for cutting lap joints, but changing the depth of cut is a little tedious. (Deep cuts are almost never made in one pass; the bit is lowered incrementally into the work over several passes to avoid damaging the router or the work.) By changing the collet, most fixed-base routers can accommodate bits with 1⁄4-inch and 1⁄2-inch shanks.
On plunge routers, the motor and bit can be raised and lowered in the base easily by depressing a lever (Figure 2). Plunge routers can also be locked at a certain depth of cut and used like a fixed-base router. However, they shine in cutting mortises and lap joints, where successive cuts of increasing depth are made. And because the bit can be retracted so it’s above the base and then plunged down while the motor is running, plunge routers are the ideal tool for making cuts in the middle of a board. Plunge routers typically are used with 1⁄2-inch shank bits, but many can take 1⁄4-inch shanks too.
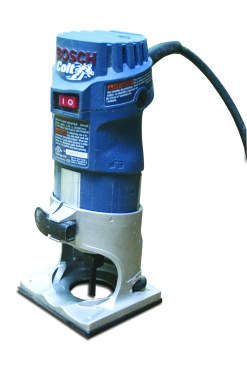
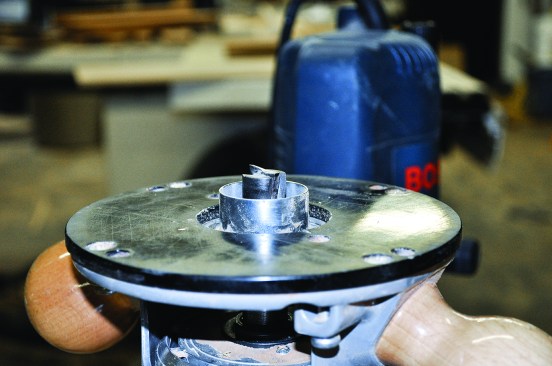
Laminate routers, or laminate trimmers, are small machines that were originally designed for trimming plastic laminate on countertops (Figure 3). They handle only 1⁄4-inch shank bits, and their small size makes them handy for light work, like easing the edge of decking or freehanding a hinge mortise. They sometimes come in kits with a variety of different bases and are even available with plunge bases that allow them to be used as plunge routers.
Once you get the hang of working with routers, it’s likely they’ll become an integral part of your tool arsenal. They certainly are an important part of mine.
Router Bits
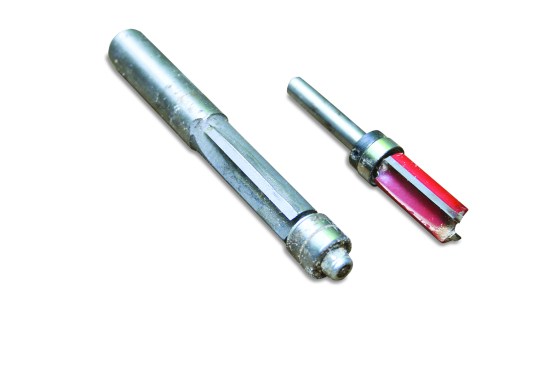
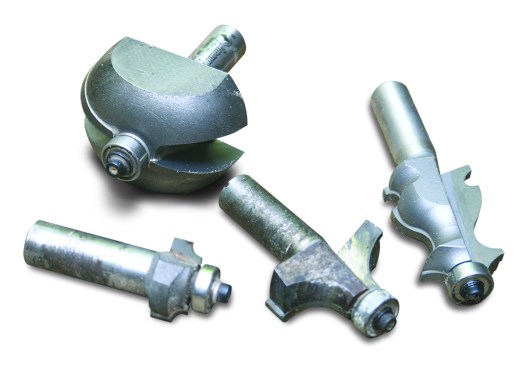
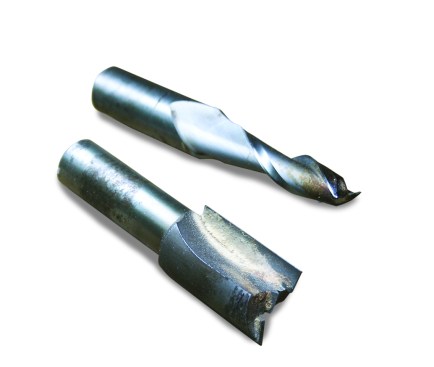
Routers spin bits, which can take many shapes. Bearing guided bits will probably make up most of the bits in your arsenal. On this kind of bit, the bearing is mounted directly to the cutter; when you fix a jig or pattern to a workpiece, the bearing can ride on the pattern, allowing you to replicate its shape. Bits used in this way are called flush cutting, and their cutters are the same diameter as the bearing (Figure 4).
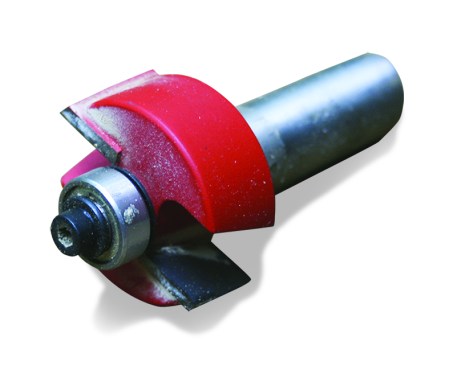
Other bearing guided bits include rabbeting bits (Figure 5) and profile bits, used to shape the edges of stock (Figure 6). The bearing of both rabbeting and profile bits rides on the workpiece.
Straight bits have no guide bearings and are generally used in a router that’s set up with either an edge guide or a guide bushing (Figure 7).
Except those used for the lightest work, professional bits have 1⁄2-inch shanks. Even if the cutter is the same profile, a 1⁄2-inch shank bit will do a better job than a 1⁄4-inch shank bit because it has more mass and it vibrates less.
Jigs
A router is a tough tool to use freehand, and in the end, using routers effectively is about learning how to design and use jigs. Some can be purchased, but most are made from plywood for the job at hand. Jigs are not difficult to build, and they make routers (and many other tools) safer and easier to use. I use three basic types of jigs. Which kind you use will be dictated by the bit you have and the job you are trying to do, as some part of the router or bit — the bearing on the bit, the guide bushing that fits around the bit in the base of the router, or the edge of the router — will ride against the jig.
One of the simplest jigs is an edge guide, which can be just a board you clamp to the workpiece so you can rout a straight dado across it. It can also be a shaped piece, like the profile jig I used for the decorative ends of the trellis pictured on page 40.
Slightly more complex are the inlay jigs that you use when you need to create a shape in a piece of wood for something to fit into. One example would be a mortise jig, but inlay jigs can be just about any shape — I’ve made them to create butterfly wedges, random shapes to cover blemishes, and even leaf and flower shapes for furniture.
The third type is what I call a cradle jig. This holds a profiled workpiece while a separate jig guides the router.
Decorative End Cuts
It’s a lot faster to make repetitive decorative cuts, such as on the trellis shown earlier, with a jig and a router than it is with a jigsaw, like many deck builders use.
Before you cut out your jig, you’ll need to know whether you’ll be using it with a bearing guided bit, or a guide bushing and a straight bit. Either way works, but for decorative end cuts I usually use bearing guided bits; they recreate exactly the shape of the jig because the bearing is the same diameter as the cutter. If you plan to use a guide bushing and a straight bit, your jig will have to be slightly smaller than the size you want the final product to be, as the edge of the bit will be spaced away from the jig by the distance between the bit and the outside of the guide bushing. The bit and guide bushing will also round over any square corners.
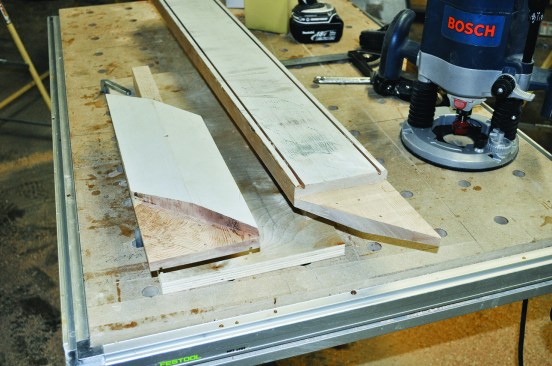
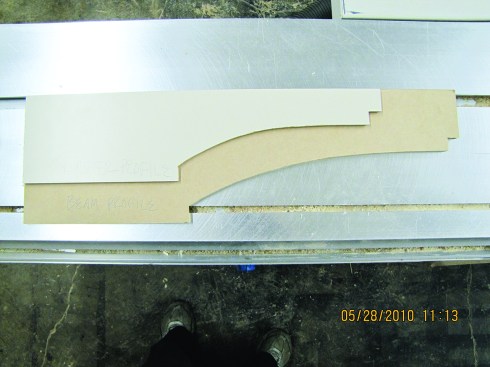
To make the jig, draw the shape you want on void-free plywood or MDF (Figure 8, page 42). Cut it out with a jigsaw and clean it up with a sanding block or files. Whatever you do here will transfer to the workpiece, so spend the time to make sure the line and shape are clean.
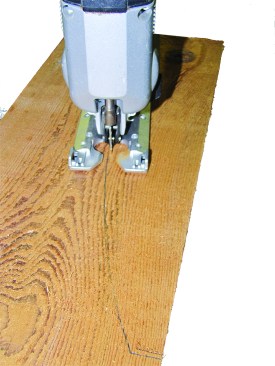
Next, place the jig on the workpiece and scribe a line around it. On thicker material, it’s best to rough-cut the shape with a jigsaw to minimize the wear and tear on the router and bit (Figure 9). Then re-attach the jig with clamps or screws and make the final cut with a flush-cut bit (Figure 10).
Mortises
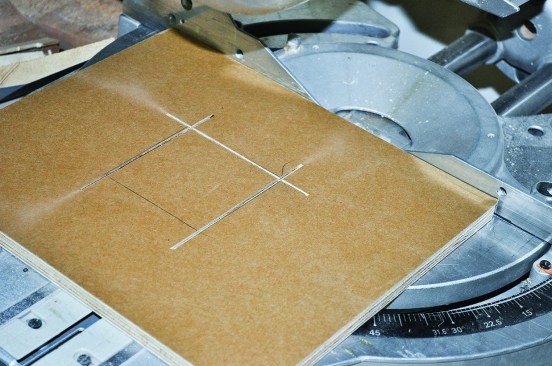
Making a mortise with a router is easier, cleaner, and more accurate than using a chisel and a hammer, or a jigsaw and a drill. For the jig, start with a piece of plywood large enough to encompass the router base plus the width and length of the mortise. I use a guide bushing for mortises because it allows me to use a plunge router (Figure 11). The bushing diameter is the outside diameter, so with a 1⁄2-inch bit and a 3⁄4-inch guide bushing, the hole in the jig will have to be 1⁄4 inch longer and wider than the mortise you want to make.
Most of the time I cut the hole with a sliding compound miter saw (Figure 12). It’s okay to overcut the corners. Cut to the line, and remember, you can always cut the opening a little bigger.
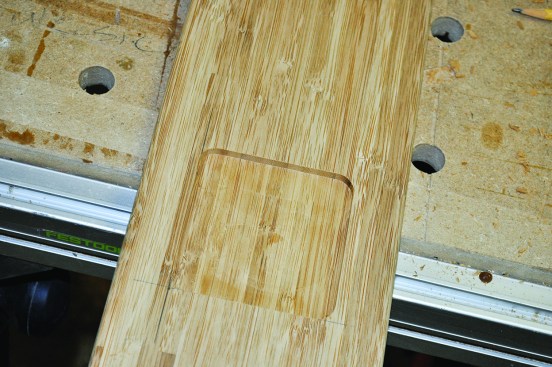
Clamp the jig to the workpiece where you want the mortise. Set the router in place with the guide bushing inside the jig, turn the machine on, and make your first cut, usually 1⁄4 inch to 3⁄8 inch deep. Moving the router inside the jig in a counterclockwise direction will help you control it. Once you’ve completed the first pass, plunge a little deeper, and repeat until the mortise is through.
Because router bits are round, they leave round inside corners (Figure 13). Square them with a jigsaw or a chisel.
Half-Lapped Miters
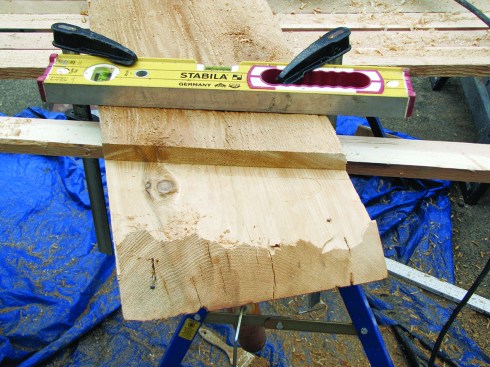
Depending on the material you’re working with, cutting a half lap can require only a simple straightedge as a jig (Figure 14). In the case illustrated by these photos, though, a planter box required a curved cap. To make the curve, I segmented several pieces of 2-by cedar, joining the segments with half laps.
Start by setting the router at half the depth of the material (Figure 15). The bit I used was a 3⁄4-inch straight cutter. Lay out the miter angle on the stock. Clamp a straightedge to the stock at that angle; the distance between the straightedge and the desired line of cut should be the same as the distance between the bit and edge of the router base.
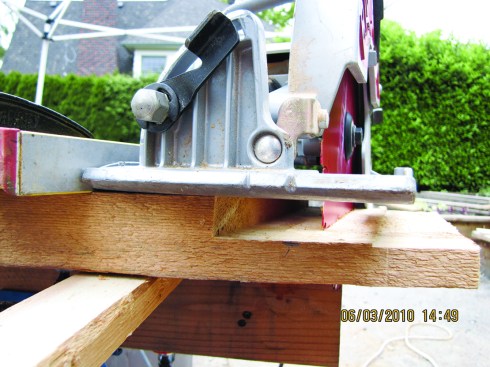
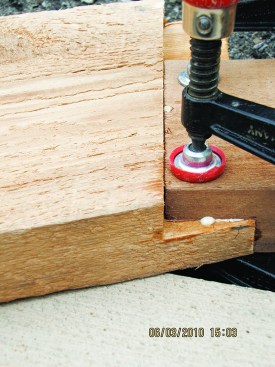
Make a couple of passes with the router until the lap joint is cut (Figure 16). Trim the stock to length (and the correct angle) using a circular saw guided by the straightedge (Figure 17). Glue and clamp the pieces together (Figure 18); when the glue has cured, lay out and cut the curves.
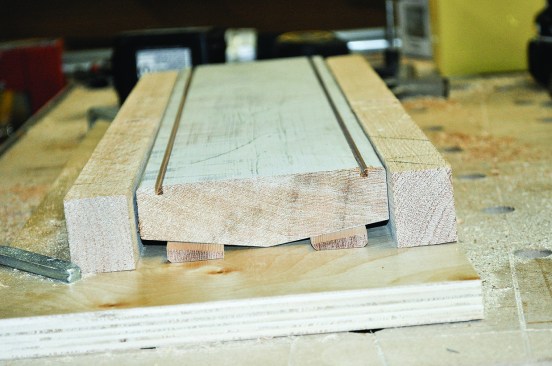
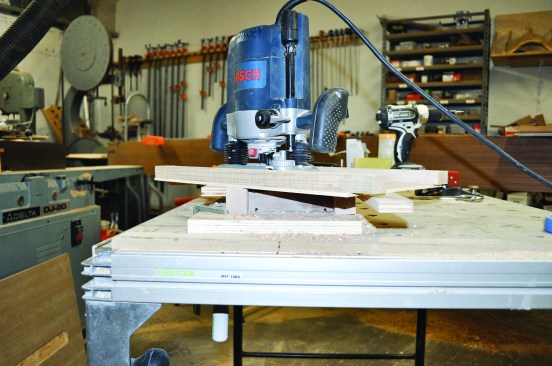
Profiled handrail stock is a little more complicated. Because the joining pieces are lapped on opposite sides, one of the cuts will have to be made with the profiled side down. I make one jig to hold the stock, which I stabilize with wedges to prevent it from rocking (Figure 19). A second jig — simply two straight pieces screwed to a plywood base — guides the router (Figure 20). The edge of the router bears on the straight pieces, which are set apart twice the distance that’s between the bit and the edge of the router base, plus the width of the lap.