Water-Managed Systems
An alternative to barrier EIFS is a water-managed system. In a water-managed system, it’s assumed that the installation will not be perfect and that some water will eventually penetrate the building’s skin. A managed system directs that water back to daylight, and allows the wall system to dry out before damage can occur. Some EIFS manufacturers — Senergy and Sto, for example — now offer a managed drainable EIFS, which has great potential. In North Carolina, however, where failures have been rampant, builders and homeowners are still dubious about all foam systems. For my EIFS replacement work, I need a non-EIFS alternative, and USG’s Duro-Screen 1000 system fits the bill (see Figure 1).
Drainage Plane Details |
Figure 1. USG’s water-managed system uses Durock cement board over a moisture-resistant drainage plane. Any water leaking past the stucco skin is directed to weep holes at the bottom of the wall. Instead of rigid foam board, DuroScreen uses Durock cement board and other components to create a drainage plane between the sheathing and the stucco skin, allowing any water that penetrates to escape.
Assessing the Damage
After fixing more than 40 of these EIFS-clad homes in the Greensboro, N.C., area, I’ve concluded that all EIFS replacement projects have one thing in common: The total damage can’t be determined until the house is stripped of the EIFS, so there is no way to price the job ahead of time. The most vulnerable places are always around windows and doors, and where first floor roofs meet second floor sidewalls. After a visual inspection, we can use a hand-held moisture meter with long probes to determine how much of a given wall is involved. We’ll do three “snake bites,” penetrating the foam first directly below the problem area, and then down the wall in 1-foot increments. Moisture content above 19% in the underlying structure spells trouble. I charge by the hour to do the initial investigation, then provide a fixed price per square foot to remove and replace the EIFS with a water-managed system. All repairs to the structure are handled separately on a case-by-case basis, and the scope of work and cost can vary wildly, depending on the extent of the damage.
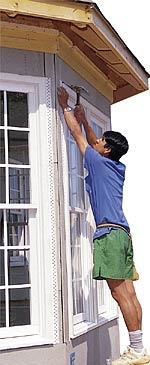
Preconstruction Meeting
A week or so before the work starts, I schedule a meeting with the homeowner, architect or building designer, the engineer if there is one involved, a USG field representative, and any other subcontractors who will be involved on the job. My main goal is to acquaint everyone with the proper details of the system, particularly the flashing details that will be necessary for the finished product, such as the roof-to-sidewall “kick-out” flashings. Much of the water damage I’ve seen on EIFS as well as traditional stucco could have been avoided if the various parties had met first to coordinate the details. Next, I inspect the house to locate as many water damaged areas as possible. In areas around windows, it’s important to get underneath the cladding to assess the carpentry work that will be needed. At this point, I get the subtrades involved, because their repairs could hold up the rest of the process.
Case In Point
One of the tear-off and replacement jobs I recently completed was on a 7,000-square-foot home in an upscale subdivision of Greensboro, N.C. The $1.7 million home was only three years old when the owners discovered extensive water damage behind the barrier EIFS exterior (Figure 2).
Figure 2. This three-year-old Greensboro, N.C., home was damaged when water leaks around windows and poorly-flashed roof-wall connections became trapped behind the EIFS cladding (left). Even window trim, jambs, and sills were rotted (rifht) and had to be replaced. Whole sections of the OSB sheathing were blackened and rotting. Both the sheathing and the fiberglass insulation in the wall cavities were still wet and moldy. Most of the home’s 40-plus windows had rotting sills and mullions — in fact, mushrooms were growing out of some of the sills. We discovered a colony of carpenter ants in the structure, and shelf fungi were growing inside the wall cavities. The home required the replacement of all windows, all the OSB sheathing and insulation, some door frames, much flashing, and many of the studs, as well as the entire barrier EIFS stucco system.


