I’m the shop manager at Kurzhaus Designs, a design-build company with an office in Dennis, Mass., where we also have our cabinet shop. To complement the custom work we do — both new construction and remodeling — we design and build our own kitchen and bathroom cabinets. In our area of New England, there’s little demand for clear finishes, so for the most part we build traditional painted face-frame cabinets with frame-and-panel doors. We use soft maple for the frames, and MDF and plywood for panels and carcass parts.
Design and Layout
Occasionally a client will come to us with a kitchen designer in tow. We’ll work with outside designers, but to control quality and fit, we still prefer to build the kitchen ourselves. In our experience, most designers work from manufactured cabinet catalogs: They put a kitchen together by joining a bunch of individual cabinets under a common countertop and call it a day. One problem with joining boxes together is that you end up with double internal partitions that waste perfectly good storage space, not to mention plywood. Plus visually you’re stuck with double stiles and seams between every two cabinets.
We prefer to build entire runs of cabinets as a unit, which allows us to get rid of double partitions and to maintain an equal reveal between every door and drawer, top to bottom and side to side. Also, building cabinets to fit a specific space gets rid of scribe strips, bolt-on end panels, and various gap moldings — all of which make the cabinets look blocky and take up space that could have been used for storage.
On a new kitchen, I begin by reviewing design ideas with our clients. We look at their magazine clippings and at photos of our completed work to determine the overall look they’re after, including door and drawer styles and paint color. We then talk about function. Where do they want food storage, pots and pans, utensils, containers, appliances, and lighting? Together we outline their dream kitchen. We find that clients tend to be most specific about what they don’t want, having lived with it for so long.
I then head back to the shop, armed with the list of dos and don’ts and a few nice-to-haves. At this point, I draw the kitchen in plan view with a few elevations and renderings, using KCDw software (508/760-1140, kcdw.com), which is intended specifically for designing kitchen cabinets and closet storage. The version I use costs $4,995. If you’ve worked with CAD, the program is easy to learn; it takes about two kitchens to get used to its ins and outs and customize the reporting tools. The program yields not only cut lists and assembly drawings for the shop, but also highly realistic 3-D renderings that can help the clients visualize their new kitchen before committing.
Storage Where It Makes Sense
I make sure appliances are paired with the appropriate storage. For example, under a cooktop I’ll put two 12-inch-tall pot drawers as wide as the unit (see sidebar, below). Because we bump the cooktop cabinet depth out as far as 30 inches, these drawers are extra deep.
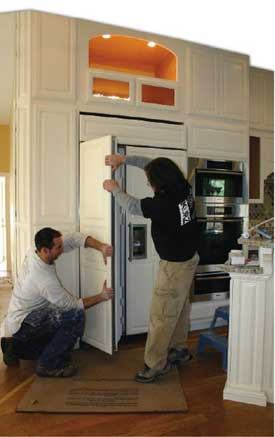
I also try to bring all dish storage within arm’s reach of the dishwasher. Stock upper cabinets are typically 12 inches deep, leaving a scant 11 inches inside for storage. Dinner plates larger than that have to be leaned upright or stored somewhere less convenient. So I make my upper cabinets 14 inches deep and keep them free of inside partitions. If the wall run is 8 feet, I build an 8-foot cabinet with no interior walls and no stiles between door pairs. The only reason I will interrupt a cabinet run is for an appliance, or because a larger cabinet simply won’t fit through the doorway.
Cabinet heights. Stock wall cabinets usually come in heights ranging from 30 to 42 inches and typically get installed 54 inches above the floor (or 18 inches above a standard 36-inch-high counter). While 42-inch cabinets work fine with 8-foot ceilings, with higher ceilings you either have to build a soffit — a space-wasting detail — or leave a gap at the top. In my kitchens, I keep the 54-inch baseline but build the upper cabinets to suit the ceiling height, leaving only enough room for crown molding. One recent kitchen had 64-inch-tall uppers under a 10-foot-8-inch ceiling.
I also build tall floor cabinets in one piece, fitted to the ceiling and ready for crown molding. We vary the crown height according to the height of the ceiling. For ceilings under 9 feet, we install a stock crown of up to 5 inches tall. Any ceiling over 9 feet deserves a tall, built-up crown, which we mill using a mix of stock and custom profiles.
There are places where the height above the counter must change — such as over the stove — but otherwise, I don’t vary the 54-inch elevation. Some designers feel that varying the baseline height adds visual interest, but I think it spoils an eye-soothing horizontal line.
Base cabinets are a different story. I vary the heights and depths of base cabinets to suit the application. I also bump out my stove and sink bases by as much as 6 inches. That way I have plenty of room for mounting fixtures behind the sink, and the homeowner has a place to put cooking condiments behind the stove. Varying countertop depths breaks up the otherwise flat surface of a line of cabinets, and also provides a natural place to divide a long run. I often add bun feet or column legs to these bumped-out cabinets to give them a furniture-like look.
Cabinet Construction
I make the face frames first using pocket-screw joinery, which allows us to assemble large, remarkably strong face frames without interlocking profiles or tenons. I used to bore the pocket holes with a simple manual Kreg jig (800/447-8638, kregtool.com), but this proved way too time-consuming. I now use Kreg’s three-head tub-boring machine, which makes short work of this part of the job. A companion tool, the face-frame assembly table, clamps and holds multiple frame parts in alignment for screwing. Together, the two items cost about $6,800.
I also use pocket-screws for gussets, back rails, stretchers, and other internal structural members, including sides and bottoms. For finished partitions and bottoms, we use 3/4-inch furniture-grade maple plywood; for horizontal and vertical bracing, we use 3-inch-wide 3/4-inch Arctic birch, glued and pocket-screwed. This plywood is strong and takes cabinet screws well. The bracing squares the cabinet and provides mounting for drawer runners and attachment points for the countertop.
Our cabinets are built to stand on their own and support heavy stone or concrete tops and commercial appliances. I don’t add backs to base units or uppers that don’t have glass doors. I just make sure that the finish wall color is in place before I install, or paint it later. I also don’t use solid bottoms in my drawer bases when an open frame serves just as well.
Finished ends. I build finished end panels to match the door style or as a beadboard frame-and-panel. Either way, I attach the panel to the face frame so that the cabinet looks like one seamless, integrated unit. This is particularly important for freestanding island cabinets, which need to look good from every angle.
My base cabinets don’t have integrated toekicks. Instead, I rip 33/4-inch plywood strips in the shop and build separate “ladders” on site. I set these on the floor first, shim or scribe them level, secure them with screws, then attach the cabinets on top. This simple approach works just as well for island cabinets — and the reduced cabinet height makes it more likely that we’ll be able to get the units through the kitchen door.


