by Tom O’Brien
(Photo by Vince Lupo)
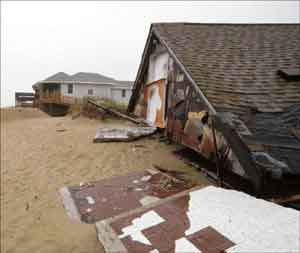
Veteran roofers often urge their apprentices to “think like a raindrop” when installing roof membranes and flashings. In most places, this means understanding that water obeys the law of gravity. But in a coastal environment, that raindrop is likely to behave like a speeding bullet when it’s carried on a gusting wind. The very best of roofs have little defense from a direct assault by a hurricane, and wind-driven rain isn’t the only hazard. On sunny days, intense ultra-violet light wreaks havoc on roof coverings. For many coastal roofers, protection against these elements lies in a two-pronged strategy: Install the most durable roofing materials possible, but back them up with secondary barriers to help prevent water from pouring into the house if the big one strikes.
FIRST LINE OF DEFENSE
No roof covering will offer much protection if the underlying sheathing is blown off. In high-wind zones, the sheathing material should be plywood or a premium grade of OSB, such as AdvanTech (Huber Engineered Woods; www.huberwood.com). Half-inch panels are acceptable for 16-inch o.c. rafters, but 5/8-inch panels should be used to span 24-inch o.c. trusses.
The edges of a roof — eaves, rakes, and ridges — are the most susceptible to wind damage. It is vital that these locations be tied securely to the framing.
Run full sheets along the eaves and along the ridge, stagger the seams, and don’t use anything smaller than a half-sheet (4×4 feet) along rake edges.
Fasten sheathing with full-head, ring-shank, or screw-shank 8d nails, or 2-inch-long, #8 screws driven with an auto-feed screw gun.
Follow a tight nailing pattern: 4 inches o.c. along edges, 6 inches o.c. in the field.
For additional peace of mind: Install blocking along the edges of all perimeter sheets and nail securely.
After he’s finished nailing the sheathing, builder Mike Guertin of East Greenwich, R.I. (author of Roofing with Asphalt Shingles, Taunton Press, 2002), always crawls into the attic to verify that all the nails have hit their mark. Any misses he discovers are driven back out and re-nailed into framing. “If you miss one nail, you’ve probably missed the whole row,” Guertin says.
SEALING THE SHEATHING
If high-quality sheathing is securely fastened, it may survive a direct hit from Bertha even if the shingles don’t, but the driven rain will flow into the house through the joints between panels. The most efficient protection is to cover every seam with a narrow strip of self-adhering underlayment or a 4-inch strip of peel-and-stick flashing tape (Figure 1).
FIGURE 1.In the event a wind storm rips the roof covering off a house, peel-and-stick flashing tape applied to sheathing joints provides a secondary moisture barrier. (Photo courtesy Institute for Business & Home Safety, Fortified Builder’s Guide)
Like many roofers, builder Guertin covers vertical sidewall intersections (Figure 2) and valleys with wider strips of Ice & Water-shield. In addition to storm protection, self-adhering flashing membranes serve as a backstop to catch wind-driven rain that might get past the flashing. Guertin’s practice of taping all possible entry points for moisture has an added advantage: “Once the peel-and-stick is in place,” he says, “the roof is dried in.”
FIGURE 2. SIDEWALL FLASHING
Sidewalls should be protected with liberal amounts of a peel-and-stick roofing membrane, applied in the numbered order shown. In addition, oversized step flashing will help block wind-driven rain, and a “kicker” at the lowest step flashing will divert water from soaking the sidewall as it drains. (Illustration by Rick Vitullo)
Over a sealed sheathing, every coastal roofer I talked to still relies on 30-pound felt secured with galvanized roofing nails as the underlayment of choice. Recently, however, a number of housewrap manufacturers have introduced “roof wraps,” but it’s still too soon to say how useful these products are going to be (see “Housewraps for the Roof,” below).
HOUSEWRAPS FOR THE ROOFNow roofers can join the debate about which is better — housewrap or felt. A number of synthetic underlayments have been introduced in the last few years. Like Tyvek and other breathable plastic housewraps, the new “roof wraps” are thin but sturdy polypropylene membranes. They cost significantly more than 30-pound felt, but the manufacturers claim that the extra cost buys a product that is slip-resistant, tear-resistant, easier to install, and that can be left uncovered longer than felt. While these benefits sound promising, check with roofing manufacturers to make sure the use of one of these new products will not void the shingle warranty. (Photo courtesy Flexia Corp.)SYNTHETIC UNDERLAYMENT SOURCES OF SUPPLY: Roof Top Guard II Sharkskin Titanium-UDL Tri-Flex 30 Typar RoofWrap30 |
Regardless of the material, overlaps should be 6 inches all the way around and nail spacing should be 6 inches along the edges and 12 inches in the field. Capped head nails are better than standard roofing nails or staples, especially if the felt will be exposed for more than a day or two.
WIND-RATED SHINGLES
For roofing applications in areas where the “Basic Wind Speed” is 110 mph or greater — which amounts to almost any place that’s within 50 miles of the shoreline — the 2000 IRC requires nothing more than six fasteners per shingle and corrosion-resistant fasteners for the underlayment (Figure 3).
FIGURE 3. HIGH-WIND SHINGLE NAILING
The 2000 IRC requires a six-nail pattern for asphalt shingles. The more stringent 2003 IRC has eliminated this requirement in favor of wind-rated shingles with stronger adhesive sealing strips. Whatever shingle is used, be sure to read the wrapper for specific nailing recommendations, as they do vary by make and model. (Illustration by Rick Vitullo)
Things get a bit tougher in the 2003 IRC. This latest version of the code drops the six fasteners requirement in favor of shingles that are tested and approved under the ASTM D3161 standard (modified to 110 mph) for use in wind zones of 110 mph or greater. Many roofing manufacturers now offer a line of these “high-wind” shingles (see “For More Information”), and they tend to cost about $15 to $20 dollars more per square than a comparable standard variety. According to R. Allan Snyder, Manager of Product Compliance for CertainTeed Corporation, what sets this type of shingle apart is not its weight or thickness, but the quality of the sealant that sticks the overlapping tabs together. “Even the lightest of shingles can pass the 110-mph test if the sealant is formulated correctly,” says Snyder. However, he points out there is a big difference between surviving a big gust and surviving years of wind and sun. For the best performance in coastal environments over time, Snyder urges builders to choose a premium laminated shingle from their supplier’s high-wind line. “Heavier and stiffer is better,” he says.
Nail placement is critical to maximize the chemical adhesion between overlapping shingles as well as to prevent leaks. Manufacturers have very strict stipulations for nail placement and those requirements can vary between makes and models of shingles. Even veteran roofers should make a habit of reading the manufacturer’s instructions, especially if they’re using an unfamiliar shingle.
To maximize the mechanical adhesion, shingles should be nailed, not stapled. The nail head must be driven perpendicular to the surface of the shingle and the nail head must be flush. Hand-nailing is the most accurate way to ensure that shingles are fastened properly. Roofers who prefer pneumatic fastening systems should choose nail guns that have a depth-of-drive adjustment — instead of adjusting the air output from the compressor. Also, since a shingle offers less resistance to penetration as it warms up, it’s important to monitor the depth of drive on air guns throughout the day.
HIGH-END, HIGH-WIND ROOFSWhen money’s not the issue, Block Island roofer Joe Filippone prefers to install cedar shingles in high-wind areas. He claims cedar will outlast any asphalt roof — if it’s installed properly. Filippone insists that the keys to a long-lasting cedar roof are top-quality shingles and plenty of ventilation. Filippone uses only Certigrade No. 1, 5/8-in. butt, red cedar shingles (he relies on those from Watkins Sawmills; (www.watkinsawmills.com); and he places the shingles over skip sheathing or Cedar Breather (www.benjaminobdyke.com). Stainless-steel ring-shank nails and copper or lead-coated copper flashing complete the list of mandatory ingredients. Since they are rigid, they are much less likely to ever catch the wind — if nailed securely in the first place. And, over the long haul, cedar shingles resist harsh UV light better than asphalt. (Photo courtesy JLC and Boardwalk Builders) |
ROOF EDGES
As with sheathing, the shingles that lie along the edges of the roof take the most abuse from the wind. If one or two start to peel up and offer the wind some leverage, the entire roof could open up like a zipper. Professional roofers have different strategies for adding fastening strength to these vulnerable areas:
John Criner, a roofing contractor in Kitty Hawk, N.C., applies a line of starter strip up the rake edges, as well as along the eaves.
Instead of starter strip, Jimmy Waller of Goff-Waller Roofing in Lakeland, Fla., runs a bead of roofing cement under the outside edges of the rake shingles.
Joe Filippone, a roofer who has spent his entire career on wind-swept Block Island, R.I., firmly believes in “sticking” each and every shingle. Filippone’s technique is to apply a quarter-sized dollop of Geocel Roof Patch (www.geocelusa.com) beneath both corners of each tab. On a typical (20 square) roof, he’ll go through six to eight cases of Geocel. “Yes, it’s a hassle,” he admits, “but it’s a lot easier to ‘stick’ it than to go back and fix a big chunk that’s blown off.”
ROOF FLASHING TIPS
Although they can be tedious to assemble because both sides must be shingled at the same time, woven valleys are worth the trouble in high-wind zones (Figure 4). The interlocking weave not only shields the valley with a double layer of shingles, but the alternating tabs work like step-flashing to ensure that wind-driven rain has nowhere to go but out.
FIGURE 4. WOVEN VALLEY
Woven valleys work best in high-wind regions. The interlocking tabs shield the valley with a double layer of shingles and prevent water from working its way into the roof. (Illustration by Rick Vitullo)
A woven valley can be difficult to create where roofs of radically different pitches meet. In those instances, a closed-cut valley is the best second choice. An open valley should be avoided because it’s the least wind-resistant of all.
Roofer John Criner believes that pre-manufactured step flashing cards are too small to offer adequate protection from coastal wind-driven rain, so he bends his own. Criner’s 8x 8-inch steps allow for overlaps on all sides that are at least an inch longer than what he could get from pre-made flashing. Copper, lead-coated copper, and stainless steel are more durable flashing materials than aluminum or galvanized steel.
SEASONAL CAUTIONS
Today’s asphalt shingles rely on sealant as much as on nails — or more than they do on nails — to resist high winds, but the sealant won’t activate in cold temperatures. On winter days, don’t apply roofing if the air temperature is below freezing. Work on the sunny side of the roof as much as possible and check the first shingle to verify that its sealant is sticking. If the sealant isn’t activating, you must hand-tab each shingle with plastic roof cement. Also, if the shingles are applied to a beach house on a windy day, sand may stick to the sealant, also preventing a good bond. The only solution in this case is to wait for a calmer day.
Tom O’Brien is a carpenter and writer in New Milford, Conn.
FOR MORE INFORMATIONHURRICANE-RESISTANT BUILDING PUBLICATIONSBlueprint for Safety (Federal Alliance for Safe Homes; www.flash.org) Improving the Wind Resistance of Roof Systems: Asphalt Shingle Roofs (Blue Sky Foundation of North Carolina; www.bluesky-foundation.net) Fortified Builders Guide (Institute for Business and Home Safety; www.ibhs.org) HIGH-WIND SHINGLE SUPPLIERS Atlas Roofing,www.atlasroofing.com CertainTeed, www.certainteed.com GAF, www.gaf.com Malarkey Roofing Products,www.malarkey-rfg.com/residential.htm Owens-Corning,www.owenscorning.com |


