by Bill Robinson
During a hurricane, homes are subjected to flying debris that can easily shatter standard windows. Once the glass is broken, wind can blow into the home and pressurize the structure enough to literally blow the roof off. And once the roof is compromised, the building and its contents are at severe risk of loss.
For a building to have a chance of surviving such storms, the windows must be fortified to withstand hits of flying debris. That’s why, beginning with the 2003 model building code, a growing number of state and local codes have required impact zone, or IZ, windows in high-wind zones. Made with shatterproof laminated glass, these windows are now offered by most of the major window manufacturers.
IZ windows come with different ratings that determine where they can be installed, with “where” defined by the code’s wind-speed zones. The closer to the coast, the stronger the window needs to be. Window manufacturers provide detailed labeling and test results to help designers specify appropriate windows for their customer’s zone. (For more information, see “Speccing Windows in High-Wind Zones,” Winter 2005; at coastalcontractor.net.)
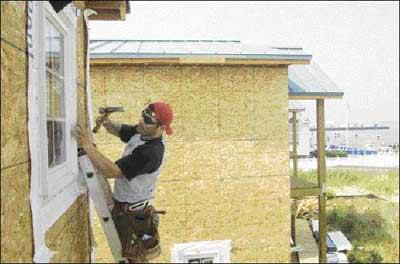
A carpenter installs a StormBreaker impact zone window on the New Jersey shore. While these windows are engineered to withstand the impact of flying debris without shattering, if not correctly installed, they can be blown out of the opening.
But how an IZ window performs depends as much on proper installation as on window construction, and installation details can vary by zone as well.
As a consultant to the building industry, I teach job foremen, project managers, and lead carpenters how to properly install IZ windows. That includes how to follow code-mandated structural requirements as well as weatherproofing details in published industry standards.
While it’s important to carefully read and follow codes and standards, a basic grasp of a few key points will make these documents easier to decipher and will help the installer understand which details are most appropriate.
Structural Requirements
Codes and manufacturers alike base their structural requirements on standardized testing procedures. The aim of these requirements is to ensure that IZ windows get installed so that they transfer the stresses of impact and pressure-cycling from high winds to the rough framing around the window. This will lessen the forces acting on the window frame and hardware. Otherwise, these forces would be likely to blow the sash out of the jamb or the window out of the opening, even while the glass itself remains undamaged.
Structural installation details can generally be found on the window manufacturer’s website. Manufacturers provide installation sheets for each different window they make, with specifications for fastener type and fastening schedule.
It’s also important to compare the manufacturers’ details to state and local codes, as the codes may have additional requirements. These requirements can vary in part by the wind zone where the window is being installed.
The problem is that these details are often presented in a way that is hard to decipher. Manufacturers invest millions in devising state-of-the-art windows, but the installation details provided are so cryptic, vague, or hard to find that they are rarely followed. It’s a serious problem: in nearly all post-incident assessments, incorrect installation was a significant factor in causing building enclosure failure.
The details will be easier to understand if you remember that they are variations of two basic themes. In the first, the windows are secured in place with metal hurricane clips fastened to the window and the framing (Figures 1 and 2). In the second, approved fasteners are driven through the window jamb into the structure (Figure 3). In the case of masonry walls, that usually means driving Tapcon screws through the window jamb and wood buck, and into the masonry. In general, the higher the wind zone, the larger the clips or fasteners, and the closer together they must be placed.
Structural Requirements
Figure 1. Many IZ windows come with hurricane clips that are designed to transfer the force of impact, and of pressure-cycling from high winds, to the surrounding structure. Some windows use screws instead of clips (see Figure 3). There are no rules of thumb for fastening IZ windows. Each window will have a set of fastening schedules that depend on the design pressure where the window will be installed. For example in Zone 4 (closest to the beach), windows in one building may have to meet a 30 psf design pressure requirement, while the windows in a nearby building in the same zone may have to meet a 60 psf design pressure requirement. A good generalization would be that as the design pressures for the opening go up, the clips or screws get larger and are spaced more closely together, but there’s no hard and fast rule here, either. In Zone 4, a window from one manufacturer might require a spacing of 8 inches on center, while similar windows from different manufacturers, installed in the same opening, would have a spacing requirement of 12 inches or even 15 inches on center. It depends on the size of the window, as well as when it was constructed and tested. The only way to find the correct spacing is to study the manufacturer’s installation instructions.
Keep in mind that the structural fastening system is designed to transfer the force of impact to the surrounding wall. Even the best window, installed perfectly, will do little good in a weak wall. This fact was driven home to me on a recent visit to the University of Florida’s testing facility in Gainesville, where I observed tests of how various wood and masonry wall systems stood up to hurricane-force winds. During these tests, I could actually see the glass bulge in and out as the wind speed was varied. The walls and windows held firm because they were built to the highest standards by proficient craftsmen. Installers in the field need to be capable of meeting these high standards as well.
Figure 2. As these detail drawings from Andersen show, code-compliant clips can be supplied to meet the needs of different window types installed in different situations.
Figure 3. In lieu of clips, some manufacturers specify that screws be driven through the window jamb into the framing. Masonry walls call for Tapcon screws to be driven through the jamb and window buck into the framing.
Fortunately, building inspectors are becoming more knowledgeable on the structural requirements for IZ windows — and they are getting better at checking the installation details and calling for corrections when the installation doesn’t meet code requirements. Understanding these details is the first step toward avoiding do-overs, but it’s also a good idea to consult with the inspector or plan department before installing the window, or even before starting construction. (Links to the Florida code are available online. See sidebar on page 6.) Should you and the inspector disagree on the window installation details, it helps to have construction documents on hand and a good working relationship with the building department to support your case.
Proper Weatherproofing
While manufacturers are required by code to provide structural installation details, the code does not put much emphasis on managing moisture. The result is that moisture management details often get left to the installer. The few companies that do address the issue do so in a way that’s generic enough to be nearly useless. In my trainings along the Southeast and Gulf coasts, I find poorly weatherproofed windows in hurricane zones a common occurrence. And even without a hurricane, coastal areas have sufficient day-to-day wind and water exposure to cause premature failure if good moisture management details are not followed.
The three systems the installer needs to get right when weatherproofing a window are the sealant, the housewrap or water-resistant barrier (WRB), and the flashing. Within each of these systems are two basic approaches to choose from. Each of these approaches is laid out in published industry standards (see sidebar on page 6). In order to protect themselves from liability, I recommend builders and remodelers reference those standards in their job specifications.
Sealant system. Sealant must be applied around the window perimeter to keep water out of the framing, and can consist of a tube-applied caulking or a liquid waterproofing membrane (Figure 4).
Waterproofing Details
Figure 4. Exterior sealant is important for keeping wind-driven rain out of the window assembly. The seal can be provided by a traditional, tube-applied sealant or a liquid membrane, as shown in this drawing. Liquid membranes include W.R. Grace’s Bututhene Liquid Membrane (www.graceconstruction.com) or Protecto Wrap’s Liquid Waterproofing Membrane (www.protectowrap.com).
Sealant can be applied using the barrier approach or the drainage approach. The barrier approach has as its premise that a window should be installed as a barrier before any flashing is put in place, and the entire perimeter of the window sealed from the exterior to prevent moisture intrusion. This isn’t my favorite approach because it doesn’t provide a way for the assembly to dry. If water does get driven into the framing around the window, there is nowhere for it to go except into the wall cavity.
The drainage approach, as its name implies, solves this problem. In the drainage approach, a sill pan is installed in the opening before the window gets put in place (Figure 5). Water that sneaks by the sealant can drain down to the sill pan and then to the outside. The seal at the sill in the drainage application is at the back of the window where the window contacts the upturned leg of the sill pan. This seal needs to be secure enough to withstand the pressure of wind-driven rain. And the sealant must be compatible with the pan material.
Figure 5. The drainage approach requires that a sill pan be installed in the opening before the window, and that sealant be placed between the pan and the windowsill. If the fastening schedule requires that a fastener be driven through the pan into the framing, then sealant will also be needed where the fastener penetrates the pan.
Some manufacturers’ structural requirements specify that fasteners be driven through the windowsill and sill pan to the framing. While moisture must be able to drain from the sill pan, these penetrations have to be sealed to prevent leakage of incidental water into the wall cavity while still letting moisture drain from the sill pan to the outside. One way to address this is to place a strip of peel- and-stick, self-sealing membrane under the pan. Another is to predrill the hole and inject sealant into the predrilled hole.
WRB details. The installer also has two basic approaches to choose from when installing the WRB. The basic difference is whether the WRB is put on the house before or after the windows (Figure 6).
Figure 6. The WRB can be installed before or after the window, depending on contractor preference. If put on afterward, the sill must be lined with a water-resistant barrier before the window gets hung. Although few manufacturers provide clear guidance on flashing, appropriate systems are documented in industry standards.
The first approach is probably the most common one. The WRB is rolled out over the entire face of the house before window installation, modified I-shaped cuts are made in each window opening, and the pieces are folded back and stapled in place. The windows are then installed, followed by the sill, jamb, and head flashings.
In the second approach, a skirt of WRB is placed at the base of each window opening, and left loose at the bottom. The windows are then installed and the sill, jamb, and head flashings put in place. Finally, the WRB is installed on the entire house.
Industry standards have tested and certified both of these approaches, so the builder can direct installers to use either one. The first approach is more common along the eastern seaboard and Gulf Coast, while the second tends to be more common in California. There’s actually a rational reason for the difference in techniques used: installers are more likely to put the WRB on first in places where they are worried about keeping the house dry during construction, which is often the case on the shore from Texas and Louisiana all the way up to Rhode Island and Maine. California is dry most of the time, so carpenters install the windows and leave the WRB for the stucco guy to worry about.
However, both approaches are used along both coasts. The important point is that either approach, if done correctly, will perform equally well in the face of a storm. ~
Bill Robinson is an Installation Masters trainer and building consultant currently working in New Orleans and the Gulf Coast region to help with rebuilding efforts. For more information, contact him at www.train2build.com or [email protected].
Weatherproofing and Structural Installation Standards Available OnlineWeatherproofing details for all windows, including IZ windows, are spelled out in two documents: the American Society for Testing Materials’ ASTM E-2112-07, and the American Architectural Manufacturers Association’s FMA/AMAA 100-07. Following these standards – and referencing them in your construction documents – could help minimize your liability exposure if a window fails and the installation is questioned. They are available for purchase at the following links: FMA/AAMA 100-07 (choose “windows and doors” in the category drop-down menu, and put “100-07” in the keyword box) The ASTM document costs $67 and is 87 pages long. It’s a comprehensive standard that covers doors, windows, and skylights in residential and light commercial construction. It tends to tout the barrier method of sealant, and is taught during a 2-day course called Installation Masters for which I am an instructor. The FMA/AAMA document can be downloaded for $15 or $35, depending on whether you’re a member. It’s a much more focused and shorter document, covering only windows. It recommends the drainage method of sealing. As for structural requirements, the State of Florida has taken the lead in making them available online. Florida builders can find code-approved structural installation details on the Florida Building Code website. Go to www.floridabuilding.org. Click on “Product Approval” then on “Find Product or Application”. The fields include places to enter the product manufacturer, window type, and even the specific model if you know it. Search results will display the selected products. The individual product then must be selected from the left hand, and a .pdf file with code-compliant installation instructions for that specific window downloaded to your computer. Miami-Dade County also posts installation details on its website. Choose “High velocity hurricane zone” in the File Classification field. If you have a particular window in mind, choose the manufacturer’s name in the Applicant field. Or you can select “Windows” from the Category field, choose the appropriate window type from the Subcategory field if you want (Casement, for example), and choose “large and small missile impact” from the Impact Rating field. Clicking on Go will bring you to a list of products. Clicking the link in the NOA column will open a .pdf of the installation instructions and code acceptance documents. |


