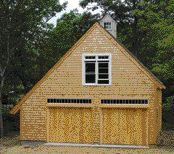
I built my first timber-frame barn in 1986 at the request of a homeowner who wanted to replicate the style of an existing barn in town, which dated from the early 1800s. With permission, I photographed and examined the details of that building, noting both its structural details and the aesthetic considerations that went into its construction. The barn was smaller and simpler than barns intended to house livestock and tons of feed, which were often built with massive timbers and pegged mortise-and-tenon joinery. But with its exposed framing, solid plank sheathing, and balanced proportions, it still had tremendous visual appeal. Once I built that one, a steady stream of barn clients seemed to spring out of the woodwork. I’ve specialized ever since, building barns at a rate of eight to ten each year (along with some barn rehab work and an addition here and there when the weather turns bad). The form varies, but the method is pretty constant. In this article, I’ll cover the essential elements.
What’s Wrong with Nails?
The availability of mass-produced nails and bolts in the 19th century freed up old constraints in framing and house carpentry, turning joined and pegged timber-frame structures into quaint relics practically overnight. Liberated from labor-intensive overlapping and interlocking timber joints, builders began producing buildings with unheard-of speed. But the timeless look of a timber-frame building remains popular. And none of my customers care how their barn is held together as long as it’s strong and looks good. So, in the tradition of our times, I happily spike butted and mitered framing members together with common nails and use nail guns to apply planking and trim. Wherever possible, we conceal the fasteners. I appreciate and respect traditional post-and-beam framing methods, but if customers want a barn built purely that way, I tell them I’m not their guy. My main goal is that the only wood seen in the final product is solid full-dimension lumber.
Foundations
The underpinnings of the barn vary, depending on the desired application of the building. Eighty percent of our buildings serve at least partly for garaging a vehicle or two and, more often than not, we build on a poured-concrete stem wall and pour the slab last. In other cases, we build on a monolithic slab or a wood deck supported on poured-concrete piers. We recently built a barn over a full basement foundation with a wood I-joist deck that ultimately received a poured-concrete cap and supported two cars. My clients always have a specific purpose in mind for their barn beyond protecting their cars, whether it’s a place to build boats, exercise, or run a home business, so our methods have to be adaptable.
Design
A barn’s layout and design are based more on the builder’s seat-of-the-pants sense of proportion than any prescriptive formula. They’re also driven by practical considerations. With a particular post spacing in mind, I may ask for 28-foot-long 6×6 lintels, but sometimes the mill cuts and ships what’s available. So we may end up with a stack of 14- and 18-footers instead. For this reason I don’t try to fine-tune the lumber list down to the last board, but buy extra footage instead. My lead carpenter, Alan Dunham, develops the specific layout on the first day of construction, and it’s different for every job. While the other crew members sort the lumber drop into specific lengths, square-cut every piece on one end, and cut rafters to a pattern, Alan decides how best to use the beam pile delivered.
Framing layout. While the economy of building on modules based on plywood dimensions doesn’t pertain to traditional barn construction using lumber sheathing, there are a couple of reasons for sticking with the typical light-framing layout. First, a 24-inch-on-center joist layout gives the inspector something familiar to evaluate. Second, we often use plywood and OSB in my buildings but only where it doesn’t ultimately show. For example, when the building department decides to designate the upstairs over a barn garage as habitable space (usually triggered by a bathroom in the plans), we’re forced to hang gypsum firewall downstairs in the car bays. In that case, I’ll use a plywood subfloor overhead because it will be covered. I’ll also use plywood for a first-floor subfloor when we build on piers or a full foundation.


