There’s plenty of material available about how to flash windows and patio doors, but most of it seems to cover flanged units. Nearly every house I build, though, includes at least one “flangeless” unit — typically a standard entrance door with an applied brick-mold casing. The tricky part about flashing cased units is sealing the area where the back of the casing meets the housewrap. And door units present an added challenge: Since there’s no sill flange, wind-driven rain has a straight shot at penetrating the area immediately below the threshold.
In this article, I’ll explain how I use self-healing membrane to fabricate flashing flanges for the jambs and heads of cased units, and a flexible membrane to form a one-piece sill pan.
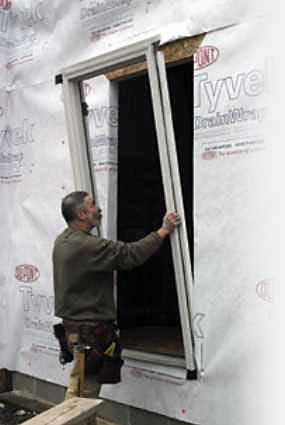
Prepping the Opening
The days of X-cutting housewrap openings are long gone. The proper method is first to make a level cut at the door head, followed by two 45-degree cuts at the corners, creating a head flap that is folded up and out of the way. An inverted Y-cut is used to prepare the remainder of the opening.
As with most flashing details, I start at the lowest point and work my way uphill, making sure each layer overlaps the previous one and avoiding any reverse laps. In the case of an entrance door, this means I start with the sill flashing.
Self-Healing Sill Pan
To prevent moisture from working its way under the door threshold to the framing, I fabricate a sill pan using Tyvek FlexWrap, a flexible self-healing membrane that can be stretched to form seamless sill corners.
In the past, I’ve tried both metal and plastic sill pans, but the upturned rear flange always made for nasty trim details, because the rear flange never fit snug against the back of the threshold. Also, I always felt that any fasteners I drove through those pans were potential leaks. Plus the fabrication lead times for metal pans were a pain.
I cut a length of FlexWrap one foot longer than the rough-opening width, and with the piece upside-down on my sawhorses, I measure in 1/2 inch from the edge and carefully score the release paper with my utility knife. I make sure I’ve got a brand-new blade in the knife, and I score only the paper, being careful to avoid cutting into the membrane itself. (Before I developed the feel required to cut freehand, I found that I could create an effective blade-depth stop by pinching the end of the knife blade with a pair of small vise grips.)
After I score the release paper, I fold the FlexWrap back on itself, creasing the cut and finishing off any areas where I may not have cut completely through the paper.
I snap a line on the subfloor 1/2 inch behind where the interior edge of the threshold will rest; this marks the back (or inside) edge of the sill-pan material. I pull the release paper off the FlexWrap, leaving the 1/2-inch strip I scored. I center the membrane above the door opening and lower it into place, making sure the back edge lands on my layout line.
I use a J-roller to apply pressure and ensure a good bond between the flashing and the housewrap. At the outside corners, I carefully push the flashing out to form a seamless corner. The flashing has a memory, so to prevent it from curling back I drive a cap nail at the outer edge; that holds it in place until the adhesive achieves its full grab (24 to 48 hours).
Finally, I smooth the vertical portion of the flashing against the housewrap, and again use the J-roller to press things tightly in place.
Site-Applied Flanges
At this point, the opening is ready for the door. My next step is to apply peel-and-stick membrane (I typically use DuPont StraightFlash) to the back of the door casing and frame, creating my own sealed flanges to prevent moisture from working its way behind the brick molding. I stick the membrane to both the back of the casing and the side of the door jamb.


