The company I work for builds seven to ten spec and custom homes per year on the Kitsap Peninsula, just west of Seattle. Our crew frames and does most of the siding and exterior finish work. Wood siding is popular in this area, but it’s too expensive for spec houses. We used to side with L-P’s Inner-Seal, an engineered wood product with an OSB-like substrate. We switched to fiber cement in 1996, when Inner-Seal became the subject of a class-action lawsuit. Although improved versions of engineered-wood sidings are available, we now side almost exclusively with fiber cement. Our customers like it because it looks like wood, and they are reassured by the fact that it comes with a 50-year warranty. We happen to use James Hardie’s lap siding (Hardiplank), but I’ve talked to carpenters who use other brands and hear they have similar results.
It wasn’t easy switching to fiber cement. We had gotten used to engineered siding, which is light, cuts like wood, and comes in 16-foot lengths. Fiber cement, on the other hand, is heavy and creates a lot of obnoxious dust when you cut it with a saw. It also takes more pieces to cover a building because it only comes in 12-foot lengths.
Cutting
There are a number of ways to cut fiber-cement siding, but the most common ones are with electric shears or circular saws equipped with fiber-cement blades. Regular carbide blades will cut fiber cement, but they dull quickly and overheat and warp when you gang-cut. We also tried diamond abrasive blades; they lasted longer than carbide but put a real strain on our saw. Lately, we’ve been using Hitachi’s Hardiblade. It’s a four-tooth polycrystalline diamond-tipped blade that’s designed specifically for fiber cement. These blades are expensive — about $65 apiece. But they’ll last for five or six 2,500-square-foot houses. They make smooth cuts, don’t strain the saw, and can gang-cut seven pieces of siding at a time (see Figure 1).
Figure 1.The author’s crew gang-cuts as many as seven pieces at a time using a wormdrive saw (left). In contrast with a regular carbide blade, which would be dull after a single day of cutting, this dedicated fiber-cement blade from James Hardie has cut the siding for five 2,500-square-foot houses (right).
We also use a set of Snapper shears, basically an electric drill motor with a special cutter head attached. The shears cut fiber cement the same way double-action metal shears cut sheet metal. A narrow strip of waste curls up between the knives as the shears make their way through the material. We cut most of our siding with shears. It’s slower than using a saw, but it’s worth the time because the shears don’t produce dust (Figure 2).
Figure 2.Electric shears, like this Snapper model, will cut fiber cement without producing dust. The downside is that they’re slower than a circular saw and can cut only one piece at a time.
I’ve heard of crews using miter saws to cut fiber cement, but I can’t see doing that to an expensive saw. The dust is very abrasive, which is why we set aside our oldest wormdrive for cutting the material. Also, circular saws work better for gang-cutting because you can cut the siding right on the pile rather than having to position the heavy material on the miter saw bed.
Dust. Dust is a big problem when you cut fiber cement with a saw. The dust contains silica, which can cause silicosis or lung cancer if you breathe too much of it. The manufacturers tell you to wear a dust mask or respirator and to cut outdoors or use some kind of mechanical ventilation.
We’ve tried wearing dust masks, but they’re uncomfortable to wear all day, especially when it’s hot. We’ve also tried setting up fans to blow the dust away and have even held our breath while cutting, but neither method works that well. The best solution we’ve found is to avoid making dust in the first place by using electric shears.
Makita makes a saw (5057KB) that’s specifically designed to cut fiber cement. It has a built-in dust collection container and can also be connected to a shop vac. We’ve used this saw, and it does a pretty good job capturing dust. We didn’t stick with it because we’re diehard left-blade users, and it’s awkward for us to switch to a saw with the blade on the right. We’d probably use this saw if there was a model with the blade on the left.
Fastening
When fiber cement first hit the market, Hardie recommended fastening it with roofing nails. You’re also permitted to use certain types of common nails, siding nails, and screws. According to Hardie, hot-dipped galvanized and stainless-steel fasteners are preferred, but electro-plated fasteners are permitted. Be sure to read the installation instructions because each manufacturer has its own list of approved fasteners. You’ll void the warranty if you use the wrong ones.
We still prefer roofing nails. It sounds kind of strange until you realize that most people blind-nail this kind of siding. When blind-nailing, you nail only the top edge, so the heads are hidden by the course above. Check with your local inspector before you do this, because blind-nailing is not permitted for every siding pattern or in every wind or exposure zone. In some cases, you may be required to fasten the bottom edge. Wherever you nail, you have to hit the studs (Figure 3).
Figure 3.Blind-nailing is common with fiber-cement siding; the standard lap is 1 1/4 inches.
Another reason we like roofing nails is that the nailers are shorter and more compact than stick nailers, so it’s easier to fit them under the eaves. We have two Bostitch roofing guns. Anywhere they don’t fit we drive nails with a hammer or palm nailer (Figure 4). We use 2-inch galvanized roofing nails for any hand nailing. On a few occasions, we’ve fastened siding with 8d galvanized nails. The siding came out fine, but we prefer to use roofing nails because they seem to hold the siding flatter and are less likely to be overdriven. You don’t want to overdrive fasteners because it will void the warranty.
Figure 4.The author typically uses a roofing nailer because it fits easily under the eaves and in tight spots. Also, the large nail heads are hard to over-drive and hold siding flatter than nails with smaller heads.
A problem with blind-nailing is that it doesn’t always pull the siding snug to the house at the bottom edge. If there’s a bow in the framing, that can leave a gap between the bottom edge of one piece of siding and the face of the piece below. We have two ways to deal with this. If the gap is less than 1/8 inch wide, we’ll caulk it. For larger gaps, we bottom-nail at that location. If the gap is well above eye level, we might use a roofing nail to fasten the bottom edge; if it’s lower, we’ll use a smaller-head nail (Figure 5).
Figure 5.Wherever a butt joint doesn’t lie flush because of irregular framing, the head of a single nail will close the gap and pull the pieces snug. This is less obtrusive than putting a nail in the corner of each piece.
Handling
Fiber-cement siding is a lot more difficult to handle than other siding materials. For one thing, it’s very heavy. A 12-foot piece of Hardie’s 8 1/4-inch lap siding weighs 19 pounds. Wider material weighs more. Fiber cement is also so floppy that you need to carry lap siding on edge. It’s liable to break if you carry it on the flat or throw it over your shoulder, like you’re used to doing with other materials. It’s important to tarp the pile, because fiber cement is more prone to break when it’s wet.
I’m a pretty strong guy, and I won’t carry more than three 12-foot lengths of fiber cement at one time. I used to carry three or four pieces in the crook of my arm but ended up with bruises where the siding rested.
When you take delivery, make sure they drop it close to where you’ll be working but out of the way (Figure 6). Depending on the product, a unit of lap siding can contain 13 to 18 squares of material and weigh somewhere around 5,000 pounds. You don’t want to move it any farther or handle it any more than necessary.
Figure 6.Have fiber-cement siding delivered to a spot where it’s out of the way and won’t have to be moved. This load weighed more than 4,000 pounds.
Our company recently bought a used all-terrain forklift, which has been invaluable on siding jobs. It allows us to drive a pallet of material around the job and lift material to carpenters who are siding the second story.
Layout
Layout and installation are about the same as for any kind of manufactured lap siding. It’s great when the siding runs full length, but you’re going to have joints if the wall is more than 12 feet long. Because the siding is all the same length, we have the cut-man start by cutting random lengths of siding in 32- and 48-inch increments to avoid creating a pattern. The installers combine the shorts with full-length pieces to produce a random joint pattern.
Coursing
Hardiplank isn’t beveled and is designed for a standard 1 1/4-inch overlap. Layout is easy because you can’t really cheat the coursing. We typically use 8 1/4-inch-wide material, so we end up with a 7-inch reveal. We start at the mudsill and use the same coursing all the way up the building. We hook the tape on the mudsill and mark 7 inches, 14 inches, 21 inches, and so on all the way to the frieze. We’re usually framing 8-foot walls, so the top piece of siding is a 4- or 5-inch rip. Since the siding isn’t beveled, you have to shim behind narrow rips. If you don’t, the top tips in too far, leaving a big gap under the lap. We avoid this by nailing short scraps to the wall above the last full course of siding.
Jigs
Given its weight, you’ll need some kind of installation jig if you want to install fiber cement by yourself. One of our carpenters made a sheet-metal jig to support the far end of the material. His jig hooks over one course of siding and has a lip to support the next course up. The problem is, the jig attaches to the existing siding, so you have to walk down the wall to put it on and then back to lift up the siding.
We recently tried out an inexpensive (about $30) ready-made jig called the Labor Saver from Indian Valley Innovation. It consists of a pair of metal clips that attach to the bottom edge of the piece you’re about to install. The clips catch the top edge of the course below and support the siding while you nail it off. There’s no need to do layout for every course of siding because the jig automatically gives you a 1 1/4-inch lap. Malco makes a similar device called a fiber-cement siding panel gauge (Figure 7). When there’s no one there to support the other end of the piece, either of these jigs would make it much easier to install siding.
Figure 7.Because of its weight, fiber-cement siding is trickier to install when working alone than wood clapboards. Site-made or manufactured jigs, like the panel gauges shown here, are helpful. The gauges catch the upper edge of the previous course and hold the next piece in place while the carpenter nails it off.
Raw, Primed, or Prefinished
Fiber-cement siding is available raw, primed, or prefinished. We used to side with raw material but switched to primed when our lumberyard started stocking it. This was definitely a change for the better: I’ve compared houses we built in the past, and the paint jobs on the ones sided with primed material look better. We’ve chosen not to use prefinished siding, because it limits color selection, and I can’t imagine being able to install it without scratching the finish.
Now that we’re used to siding with fiber cement, we can install it faster than OSB siding. This is partly because we don’t have to prime the cut ends of fiber cement, which you’re required to do with OSB material. This makes the work go much faster, and you don’t have to worry about getting paint all over everything.
Joints and Caulking
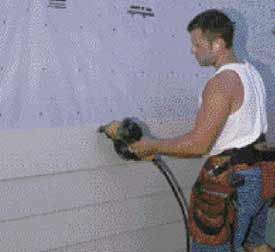
According to Hardie, end joints can be lightly butted or left 1/8 inch open and caulked. We leave a gap at every butt and wherever the siding hits window trim, door trim, or corner boards. We apply caulk as we go, because it rains a lot around here and mud gets splattered on the lower courses. It’s a lot easier to apply sealant while the siding is still clean (Figure 8).
Figure 8.The author’s crew always caulk as they go, so they won’t have to clean the siding if it gets splattered with mud. Here, a carpenter uses a foam shipping block from a window to smooth the caulking at a butt.
We save the 1×1 foam squares that manufacturers stick on the corners of windows to protect them during transport. We use them to smear caulking over face nails and butt joints. They do a good job smoothing out the caulk, and it makes the paint job look better.
The installation instructions say you should use paintable caulk that complies with ASTM C 834 or ASTM C 920 — basically, a paintable caulk that remains permanently flexible. If you’re not sure about a particular caulk, check the label; the ASTM rating should be on it. It’s so rainy here in the Pacific Northwest that we can’t use acrylics like Dynaflex or Big Stretch because they’ll wash off before they have time to set. We’ve had good success with OSI Quad, which is one of the recommended brands on Hardie’s website.


