As a sweep and masonry chimney relining contractor in eastern North Carolina, I’m constantly amazed at the misconceptions people have about older chimneys. Many people imagine that they’re impervious masonry structures that don’t require any maintenance and never wear out, while others are convinced that the only way to “restore” an aging chimney is to tear it down and build a new one.
Both are wrong. Chimneys definitely wear over time, but even a badly deteriorated chimney can often be completely restored by adding a poured liner. In most cases, the result will be better than new — combining the original appearance with modern standards of safety, efficiency, and structural strength.
Limitations of Older Chimneys
Chimneys built before the early 1900s seldom have tile liners, and many of the clay liners found in newer chimneys are badly broken up from the intense heat of past chimney fires (see Figure 1).
Figure 1.A badly damaged tile flue liner like this one — which shows the effects of repeated chimney fires — leaves the brick and mortar beneath exposed to rain and to the acidic byproducts of combustion.
In both cases, the interior brick and mortar are exposed to the residue of combustion gases, which mixes with rainwater to form acidic compounds that gradually eat away at the mortar joints. Not only does this weaken the chimney structurally, but the eroded joints also allow more heat to escape the chimney and threaten surrounding combustibles.
To make matters worse, old-time builders often left framing in direct contact with the masonry, while most current codes require a 1-inch to 2-inch clearance to combustibles. Over the years of exposure to heat, the wood dries out and its ignition temperature is lowered through a chemical process called pyrolysis. This can eventually allow the wood to ignite even under fairly normal operating conditions.
Because such points of contact between the masonry and the framing are often concealed between floors and within walls, they can be difficult to find and correct. In most cases, it’s more practical to install an approved “zero clearance” liner system that allows for contact between the chimney and combustibles such as framing. The insulating value of this sort of liner also helps keep the flue itself warm, greatly improving the draft.
Chimney Relining Systems
In general, there are two types of cast-in-place liners. In one system, a zero-slump mix is poured around an electrically powered vibrating bell, which is raised by a winch at the top of the chimney to form a smooth flue. The operator controls the position of the flue by adjusting the placement of the mix. Pouring additional mix on one side of the bell, for example, will cause it to move sideways in the other direction. The stiff flue-liner mix used with this system exerts a minimum of hydraulic pressure on the sides of the chimney, which makes it possible to gain height relatively quickly.
On the other hand, this method is labor intensive because all of the mix has to be carried to the rooftop in buckets. That’s not a problem with a small single-flue chimney, but for larger multi-flue jobs — which may take 100 cubic feet of mix or more — that’s just not practical.
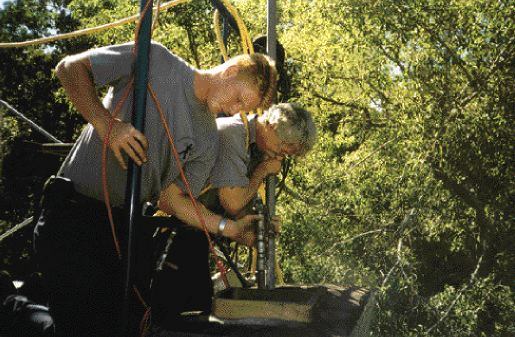
The other approach uses tubular inflatable formers that are centered in the chimney before a more fluid flue-liner mix is pumped into place around them (Figure 2).
Figure 2.Relining a chimney with inflatable formers and pumped liner mix is a cost-effective way to provide safe, properly sized flues for existing fireplaces, wood- or coal-burning stoves, and oil or gas appliances. The poured liners are rated for direct contact with combustibles, eliminating the need for costly framing modifications.
The formers are vibrated as the mix is poured, causing the mix to fill voids and gaps in the masonry. Once the mix has set up, the formers are deflated and withdrawn. The smooth-surfaced round flues that result are much more efficient than the typical square or rectangular tile-lined flue.
This is the method we use, because it’s the best option for the large, multi-flue chimneys common in our area. The system I use is called Golden Flue, which is based in Rutherford, Va. (800/446-5354, www.chimneys.com). I like this system because the company is based relatively close to my area, which simplifies getting technical and logistical support, and because I feel that the mix-pumping system is better than others I have looked at.


