Materials
Authenticity is important, but not as important as stability. Given my preference, I’ll use 3/4-inch lumber-core birch plywood for the cabinet base and sides and 3/4-inch MDF (medium-density fiberboard) for the raised door panels. I also use 1/4-inch MDF for drawer bottoms. It’s stable, smoother than lauan plywood, and sufficiently strong for the job. I prefer solid 5/4 (1 inch dressed) maple for the face and door frames because it’s stable, durable, and it takes paint beautifully. I do meet some resistance, however, when I recommend pricey maple face frames for a paint-grade cabinet. I can substitute a less expensive material, like poplar or pine, but pine isn’t as stable as maple, and darkly striped poplar tends to bleed through a painted finish. For the kitchen described here, we knocked maple out of the budget and worked exclusively with 5/4 sugar pine for the exposed surfaces (see Figure 1).
Figure 1. To match the budget, the author used clear, 5/4 sugar pine for the face frames on this job, although he prefers maple for its hardness, stability, and paintability.
Wide end panels are best made of stable, engineered material to avoid warps and splits. Unless the cabinets are to receive a clear finish, I’ll simply use birch plywood for the end panels. For a clear finish, I’ll overlay the plywood with the lumber of choice. The pine we purchased for this job came from a reliable source with a warranted maximum 6% to 8% moisture content on delivery. I carefully went through the select-grade lumber and selected the best, flattest stock for wide pieces, setting aside less desirable boards for rips and narrower components.
Layout
Rather than using an absolute, final design, I work from a general layout, some detail views, and on-the-spot input from my client. I want the appliances purchased and delivered so that I can work with precise dimensions. This also eliminates scheduling snafus down the line when we’re ready to template the countertops, because we already have our hands on the drop-in cooktop, sinks, deck-mount faucets, and any other items that might require a cutout or accommodation. Moreover, this allows me to make final layout decisions as the job progresses. I draw the full-size cabinet plan on the floor and wall and walk my client through the design. At actual size, we can go through the motions of using the sink and appliances, reach for upper and lower shelves, and generally troubleshoot the layout. With this kind of participation, I always have happy customers at the end of the job because the kitchen has truly been customized for them. The process requires a good deal of flexibility and creativity on both our parts, but it’s how I like to work.
Solid Backing
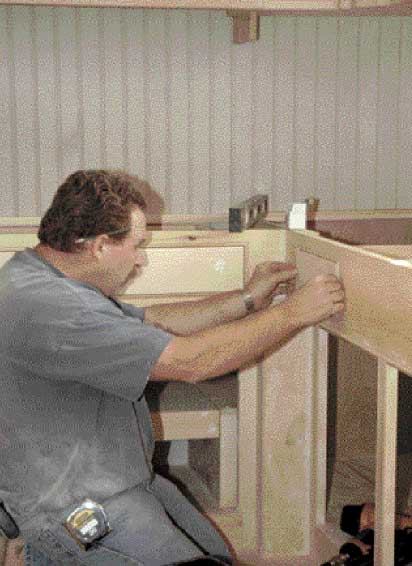
In the job shown here, cabinet construction began with the back wall. To provide a solid, universal attachment surface, I removed the drywall from the cabinet areas and replaced it with 5/8-inch AC plywood (Figure 2). In old homes like this one, framing centers are wide, eccentric, and insufficient for countertop cleats, cabinet spreaders, or the 51/4-inch tongue-and-groove center-bead pine I use to cover the finished wall surface and cabinet backs.
Figure 2. AC plywood replaces the drywall behind the cabinets to provide uninterrupted fastening for the cabinets and beaded wall paneling.
Other quirks you can count on are an out-of-level floor and out-of-plumb walls. I use a laser level to establish my horizontal lines, and, in this case, found discrepancies as great as 11/2 inches in the floor plane and a 7/8-inch lean to the walls.
Shimless Construction
Uneven floors are a challenge. I find the highest point in the layout and establish my finished countertop height (36 inches) there. I cut and install the cabinet sides first, so I can size the panel accordingly when I encounter a low spot in the floor — a simpler and neater solution than shimming a standard-length panel. I also scribe the panel to the wall, having allowed extra width for that purpose. The scribe removes the eccentric difference between the panel’s projection when held plumb against the wall and the predetermined face line. Rather than using a compass, which can be tricky to hold absolutely parallel, I use a small wood block, ripped to the maximum width of the scribe, and trace it along the panel edge for perfect results.
Figure 3. The author installs the beaded paneling after fitting the cabinets to the wall, letting the beaded profile die neatly into the carcase. The wall cabinet sides drop beyond the bottom by 2 inches, forming stops for an undercabinet lighting valance.
All of these cabinets were built backless, relying on the wall for a finished surface. Even though the interior and back of a door-base cabinet gets little scrutiny and could be left as raw plywood, it’s the little things that make a difference, so I paneled the wall below the countertop cleat line with the 1×6 beaded pine. When I built the wall cabinets, I carefully fit the beaded board around them, inside and out (Figure 3), taking care to keep the pattern aligned. Because the walls were far from plumb, I also scribed these cabinet sides to compensate for any unevenness. Applying the beaded board after the cabinets are in place lets the bead profiles die into a solid edge and makes the cabinets look truly built in, not hung there like pictures on the wall. I let the sides run long, 2 inches below the bottom, and notched them back to serve as stops for a dropped, recessed valance that would conceal undercabinet lighting. Instead of crowding the window, I held the cabinets back about 10 inches and made a nice transition from cabinet to window casing with quarter-round, open shelves (Figure 4). I continued the valance strip all the way around to the wall, band-sawing the radius sections from a wide block of pine.
Figure 4. Wall cabinet sides run long to support an undercabinet light valance, which returns around curved open shelving to the wall.


