
A little mold can go a long way toward wrecking a job.
If you want to fight or — even better — prevent a mold problem, it helps to know the enemy. So let’s start there.
Molds are part of the fungal kingdom, which also includes mushrooms, wood rots, and yeasts. Although many have a physical resemblance, fungi aren’t plants. They don’t use photosynthesis to make food out of sunshine. Instead, fungi are decomposers, turning used-up living material into dirt. When the job is done, they leave few traces of their own presence, but the stuff they have digested winds up as fertile ground for new life to grow out of.
Fungal growth usually begins with a fertile fungal spore on a damp, digestible surface. The spore absorbs moisture, then secretes it back out as a liquid solution loaded with digestive enzymes. These enzymes transform the surrounding environment into a meal. The nutrients are then absorbed back into the spore, which begins to grow by extending feeding tubes called hyphae. Filamentous fungi like molds and rots build a network of these feeding tubes called a mycelium. The mycelium will continue to expand as long as food and water are available. Once the colony is mature it can produce spores.
Fungal spores are usually produced in fantastic numbers. A thriving mold colony can be covered with millions of spores per square inch. Wood rots produce their spores in fruiting bodies, commonly called mushrooms. A hand-sized portobello mushroom in the produce section of the grocery store may contain billions of spores. When the spores are disturbed, they are released into the air. Once airborne, they are small enough to remain suspended for hours before settling. They surf along on any moving air. Mold spores growing outdoors can rise a mile into the sky in a matter of minutes in warm summer updrafts.
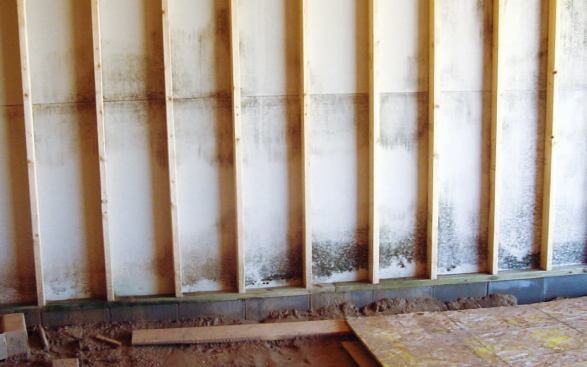
It is the mobility of fungal spores that makes them such pesky indoor air contaminants. Careless handling of moldy material can release clouds of particles into the air, rapidly converting a local mold growth into a widespread general problem as the spores land and become a potentially irritating component of the settled dust.
The health effects of exposure to fungal spores depend on how sensitive the exposed person is. People who have allergies to mold can be truly miserable inside a moldy building, while nonallergic individuals may feel nothing at all. Toxic mold scares have gotten lots of coverage in the media, but most of the poisonous properties of the fungi have been discovered in animal feeding studies.
Whether toxic mold can poison occupants or not, one sure thing is that mold growth is deadly poisonous to property values. When mold problems come to light a property is typically rendered unsellable. Mortgage payers are therefore, by definition, “sensitive” to mold.
What follows are some mold cases that caused serious aggravation — though not necessarily to anyone’s health. Each of these situations was entirely preventable. And needless to say, in each case the cost of doing things properly in the first place would have been a small fraction of the repair cost.
Why You Shouldn’t Exhaust the Bath Fan into the Attic
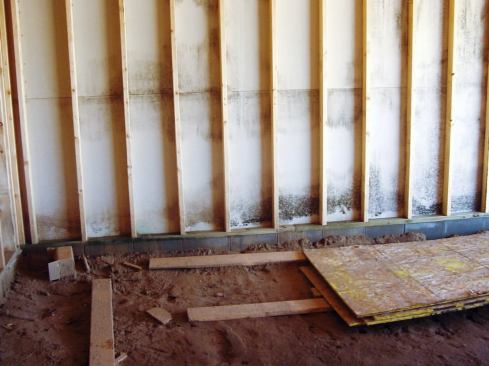
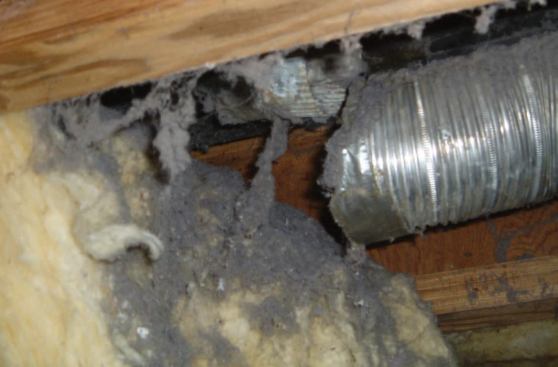
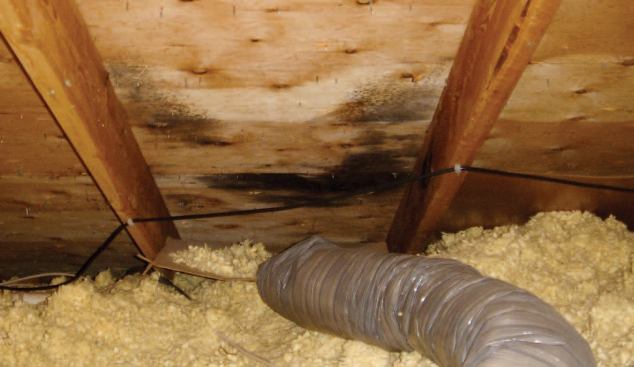
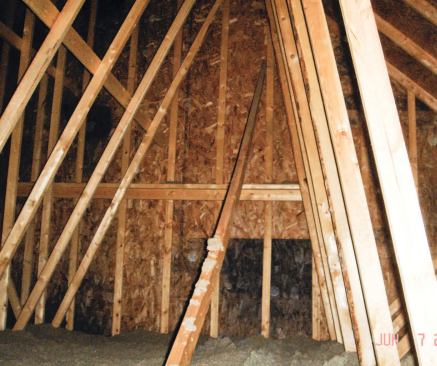
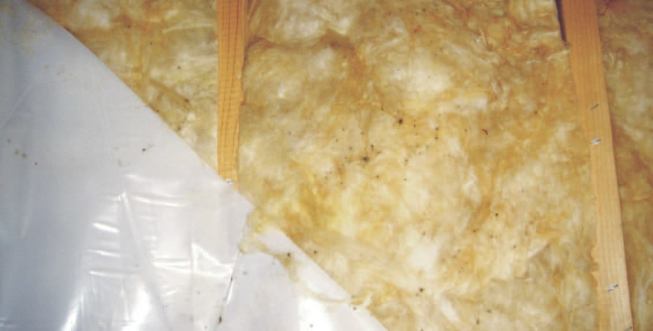
A plumber stuck his head up through an attic hatch and saw a disconnected flex duct — a bath exhaust pipe — lying in a bed of fiberglass insulation. Immediately downstream from the duct was a small patch of blackened roof sheathing. So he closed the hatch, climbed down the stepladder, and announced that there was a mold problem in the attic and that he wouldn’t do any work until the problem had been resolved.
The homeowner called his insurance company, who hired a local environmental firm to send out a certified industrial hygienist to assess the problem. He collected a sample from the moldy wood and identified it as Stachybotrys chartarum, the infamous “toxic black mold.” To correct the problem, the hygienist recommended that all the wood framing and decking in the attic be abrasive-blasted with dry ice and all the loose-fill fiberglass insulation be removed and replaced. The homeowner received an estimate of more than $20,000 to have the work done. Frightened, he called his builder, who contacted our state builders association, who referred the homeowner to me. The owner called and described the problem, noting that all he could see was a small patch of mold and wondering if the recommended repairs might be a bit over the top. He asked me to come down and take a look.
I arrived early in the morning, before the day got too hot (attic work in the summer can be unbearable). As the owner had said, there was only one visibly moldy spot in the attic, where the bath vent had been pointing. I collected tape lifts and contact plate samples from the suspicious black spot, and from unstained wood framing and sheathing a few feet away from the problem area and at several other locations around the attic. I also collected samples of insulation from directly under the mold spot and other areas.
I examined the samples in my lab and discovered that the only measurably moldy area in that attic was the one little black patch; the rest of the samples were clean. I happened to be acquainted with the CEO of the involved environmental firm, so I called him to discuss my findings and suggested that he ask his guy to consider modifying his recommendations. He wrote back to say that his man “stood by his report” — making me think the industrial hygienist was more certifiable than certified.
In the end, the homeowner decided to follow my recommendation: He scrubbed off the moldy patch with a sponge full of bleach and that was the end of the matter. He spent 50 cents instead of 20,000 dollars.
The fact is, environmental reports can cause as many problems as they solve. It’s important to sort out opinions from facts. A negative mold report can be the kiss of death to a property sale, particularly since disclosure rules require that such reports be shared, even if the conclusions are ridiculous. Don’t be afraid to ask for a second opinion if you think the opinions of the “expert” are questionable.
As a final thought, always make it a point on your jobs to get up into the attic and confirm that all the exhaust ducts are properly connected.
More Moldy Roof Sheathing
The deal was done: A 5-year-old house was being sold to a second owner for $600,000 — contingent upon a home inspection. The buyer’s expert climbed up into the attic, shined his flashlight at the gable end, and saw a stained area. He cried “Mold!” and the deal was canceled. The seller was saddled with a damning report that rendered his property unsellable. He called and asked me to come out and take a look.
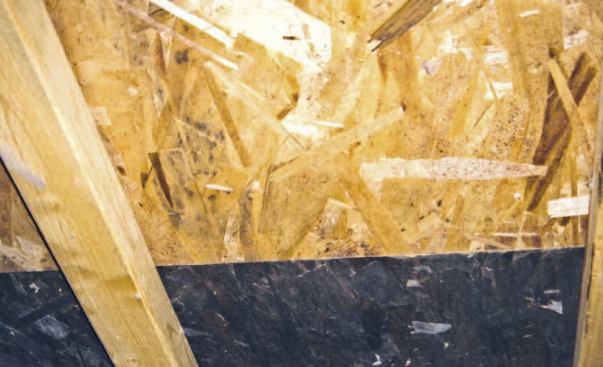
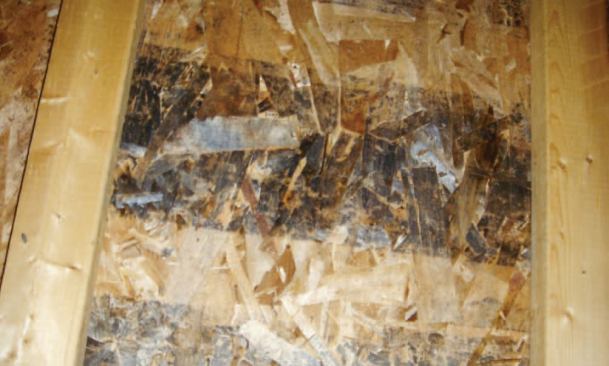
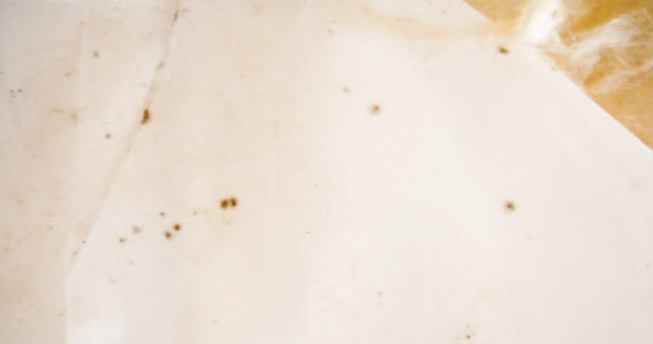
This time there was no avoiding an August afternoon visit. I climbed up into the attic, which I measured at 140°F. I teetered across the trusses, pouring sweat and getting groggy. When I reached the stained gable end, I observed a couple of neat, 2-by-4-foot rectangular patches of discolored OSB sheathing. Again I collected tape lifts and contact plates from the stains and from adjoining sheathing and framing, and took lots of digital photos.
It is said that nature abhors a straight line, and in this case the shape of the dark patch was an important clue. What would make fungus grow in such a neat shape? The explanation was simple: It wasn’t mold at all. My friends at the wood products lab at the University of Minnesota readily identified the growth as sap-stain fungus, a common cosmetic blight on OSB, especially when the wood mix is rich in birch and poplar.
There was in fact no way that a fungus could have grown in this area of a blazing hot attic. The neat straight borders told the tale: The panel had gotten wet while sitting outdoors in the lumber pile, partially covered by other pieces of wood. It was installed with the stain already on it — evidence of a careless carpenter, not a moisture or mold problem in the home.
My culture showed the fungus to be dead, no doubt cooked long ago by the searing attic heat. There certainly was no indoor air quality problem related to this stuff. There was no blanket of spores waiting to be released, just a small patch of slightly flaky OSB that still maintained its structural strength. The needed repair was to apply a quart of antimicrobial white paint — not to “cure” the problem, but to avoid panicking the next inspector.
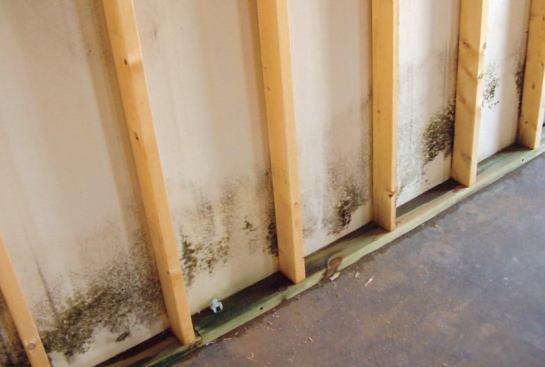
The take-home message is that you need to avoid installing moldy materials. I have had similar cases involving moldy dimension lumber. In one episode, the customer came by the job site and found green spots all over the framing. The lumber had been shipped damp, wrapped in vapor-retardent plastic, and had gotten moldy on the train ride to the lumberyard. The customer wanted everything removed. The builder balked at the cost of disassembly and suggested a bleach treatment instead. In the end, no matter how it turns out, no one is really happy.
I recall once following a truck loaded with pallets of unprotected gypsum board, roaring down the highway in a driving rainstorm. When materials like that arrive on a job site, someone should take time to inspect them for mold and moisture damage. Use a simple, inexpensive hand-held pin moisture meter to evaluate the moisture content of both lumber and drywall; if the stuff is wet, send it back. No one likes delays, and no one likes returning products, but in the end it’s quicker and cheaper to make sure that you are receiving good-quality materials.


