In cost, reliability, and ease of installation, PEX tubing is poised to compete with copper
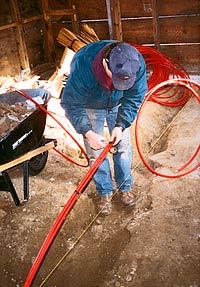
Lightweight, tough, and flexible, PEX tubing is ideal for sub-slab jobs (left) and messy retrofits. At right, the author connects a home-run supply line to a basement manifold. If your plumber is up-to-date, you may have heard of a new product for potable water piping — , tubing. In fact, this product is not so new: PEX has been available for potable water piping in Europe since 1971, and the tubing has been used for heating in the United States since 1980. With polybutylene (PB) off the market, many U.S. plumbers who had been using PB for domestic water piping are switching to PEX.


