Where I live, outdoor showers are a common after-beach amenity. Real estate agents highlight them in property listings. Plumbers routinely include an exterior rough-in in their bids. And local builders have devised a slew of methods to enclose an outdoor shower, from plain-but-economical stockade fence sections butted against the house siding, to more elaborate, custom structures.
I built many enclosures in my day, often replacing the sagging remains of one assembled from standard, 6-foot-high stockade fence sections. These sections are typically crudely assembled and tend to be wobbly when used in an enclosure, especially when called upon to support a swinging door. Such doors rarely close, or open, without a struggle. And the posts usually rot through after a few seasons in the ground, probably hastened along by the extra watering.
The design I like has evolved over the years. I use pressure-treated 2x4s to outline the structure, and western red cedar 1-bys for the walls. Instead of nailing or screwing the boards to the 2x4s, I float them in a groove dadoed in the edge of the framing, frame-and-panel style. To eliminate “peepholes” between boards, I cut a shiplap on the edges.
To assemble the individual panel frames, I use 6-inch, hex-head TimberLok fasteners (Olympic Manufacturing Group, 800/633-3800, www.fastenmaster.com). Although TimberLoks generally don’t require predrilling, a pilot hole keeps the screws from going astray in narrow stock. I clamp the 2×4 frame components between temporary cauls for alignment and use a 12-inch-long, 3/16-inch-diameter electrician’s twist bit to make the pilot holes (see Figure 1).
Figure 1.The author’s frame-and-panel method simplifies enclosure assembly. Edge-dadoed frame members are butt-joined on the flat, held in alignment with cauls and clamps (top), and lag-bolted together (bottom).
The latest, dollar-driven evolution of my design was to use T1-11 channel siding instead of the costlier 1-by cedar boards. Each sheet yields two solid, 4×4-foot panels. Four feet may seem too short to screen a body, but there’s no compelling reason to start the enclosure sides at grade, or to make the panels more than 5 1/2 to 6 feet tall. I start the panels about 16 inches off the ground, which provides users with a full torso block.
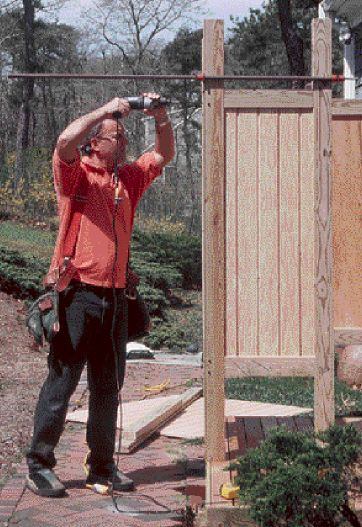
The backside of T1-11 is nothing special, but it readily accepts paint, providing an opportunity to introduce some color inside the enclosure with a couple of coats of glossy trim paint or exterior stain (Figure 2). I let the “outside” surface weather naturally.
Figure 2.The exterior T1-11 plywood siding has one “good” face, left to weather on the public side. The rough backing veneer within the enclosure is painted with gloss-finish latex trim paint.


