Our company builds custom homes along Maine’s Midcoast. Over the last few years, this scenic area between Searsport and Brunswick has become popular with retirees and second-home buyers.
One of our current projects is a large beachfront home with two round towers, each with a conical roof. Trimming out the exterior of a tower can be slow and tedious, but with thorough planning, a skilled crew, and a good millwork shop, a job like this can be manageable and — if the weather is good — fun.
Preparation
Precise roof framing is always important, but it’s especially crucial with a tower, because any inconsistencies with the framing will create humps or flat spots in the trim. Therefore, as we set the rafters, we double-checked the overhangs to keep the variance to within 1/8 inch.
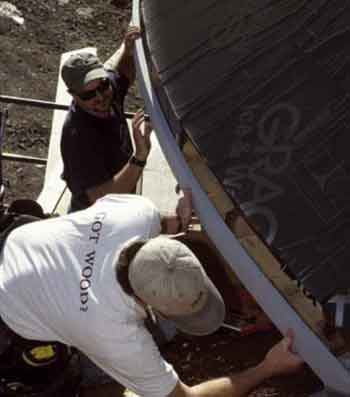
We used pie-shaped pieces of 1/2-inch fir plywood for the roof sheathing and covered the whole roof with a layer of Grace Ice & Water Shield. Roofing felt doesn’t stand up for long to coastal winds, and the lengthy construction on this job made the self-adhering eaves membrane a good choice for a temporary roof.
We’ve found that good staging is critical to making tricky work like this go smoothly, so when we got to the point of sheathing the roof, we set up pipe scaffolding. We kept the scaffolding in place until the tower’s cedar shingles were installed and the trim had a second coat of paint.
Soffits
The architect’s design called for tongue-and-groove beaded fir soffits arranged in a diagonal pattern. The soffits butt to a square-edged piece of mahogany, where a decorative knee bracket would be attached later.
As with the framing, we spent some extra time laying out soffit bays so that they’d all be exactly the same size. We marked the inside curve on the first soffit board by holding it in place and scribing it with a compass. We worked our way out toward the fascia, blind nailing through the tongue with a trim nailer. Running the soffit 3/8 inch past the rafter tail allowed us to slip it into a dado on the back of the curved fascia. At the last course, we used a 3/8-inch-thick piece of stock held against the plumb cut on the rafter tails to scribe a fair curve.
Templating
The next step was to make 1/4-inch-thick plywood templates of the curved fascia and the curving frieze board that would circle the top of the tower below the soffit. Using the soffits, we scribed the 8-foot sheets in place and then sent them to the millwork shop that supplied the trim, Tidewater Millwork of Woolwich, Maine.
Tidewater determined the radius from our original templates and, using 1/4-inch laminations of mahogany, made the fascia and frieze boards to match. The radius of the decorative crown applied to the fascia was determined by adding its thickness to our original templates. For the frieze and other components with a smaller radius than the fascia, we subtracted the width of the overhang from the original template.


