Stucco is especially common in the Western states and Florida, but exists in all regions of the U.S. It’s a great material — until doors and windows need to be replaced. Then it becomes a problem, because the contractor must remove it from around the openings without damaging the remaining material or the building paper behind it. That can be particularly difficult on older homes, because the building paper — which serves as the code-required “weather-resistive barrier” (WRB) — is often as brittle as the parchment in King Tut’s tomb.
The traditional way to replace a door or window in stucco is to break out the old stucco, install the unit, and then restucco around it (see “Replacing Windows in Stucco Walls“). The problem is that not everyone has access to a plasterer who’s both skilled enough to make inconspicuous patches and willing to do small repair jobs. Sometimes the only way to hide the patch is by finish-coating the entire wall.
No Need to Restucco
As a carpenter, I don’t have the plastering skill to make patches that won’t show. However, I do know how to make clean cuts in stucco without damaging the WRB; with this approach I can replace the door or window, flash it so it doesn’t leak, and then fill in around it with trim. I don’t have to hire a stucco contractor, and the trim adds visual interest to what might otherwise be a very plain-looking wall.
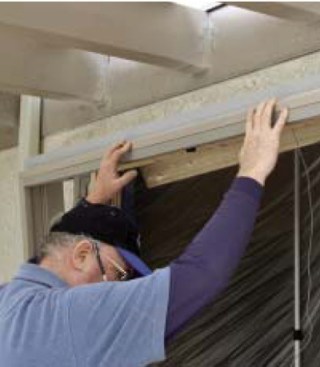
What follows is a description of how I used this method to replace the exterior doors in an older stucco home. Although I replaced all four of the house’s doors, the explanation and photos focus on a single opening in the back of the building.
The existing doors stuck in damp weather and leaked air, and their hardware had rusted from coastal exposure.
Existing Conditions
The clients’ 25-year-old house was on its second set of exterior doors. I never saw the originals, but the wood replacements were in poor shape: They got stuck in rainy weather, leaked air, and had faded from the sun. Since they opened out, the hinges were exposed and had rusted badly in the coastal air. None of these problems were the previous contractor’s fault — the owners had purchased cheap doors.
Having learned their lesson, they were willing to pay for better quality. They wanted the interior of the doors to match their maple cabinetry and the exterior to be durable and maintain its color. They opted for a high-quality door that offered stain-grade interior options and a glass fiber reinforced composite exterior for durability. They also opted for hardware that offered a lifetime-warranted finish.
Like so many stucco homes from the ’80s, this one was built with little or no trim. The first time the owners replaced the doors, they’d wanted to add visual interest, so the contractor had used a crude form of plant-on trim — wood casings installed over the stucco and screwed through to the framing. This is not a good way to add detail: Wood casings can rot, and when they’re installed in this manner the wall may leak.
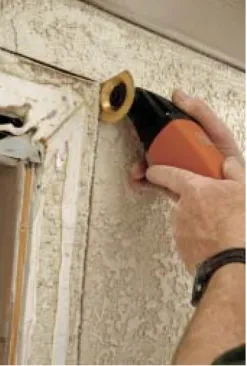
My plan was to cut the stucco just far enough back to replace the doors and install rotproof trim, but not far enough to risk creating any leaks in the watertight wall. The key was finding a way to make a straight, clean cut in the stucco without going so deep I hit the building paper.
The author attaches a saw guide to the wall at a plumb layout line.
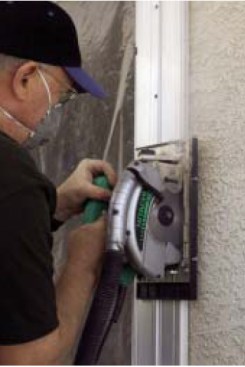
He uses a circular saw and diamond blade to make stopped cuts.
He finishes the ends of the cuts with a multitool equipped with a masonry blade, keeping the cuts shallow enough to avoid hitting the building paper.
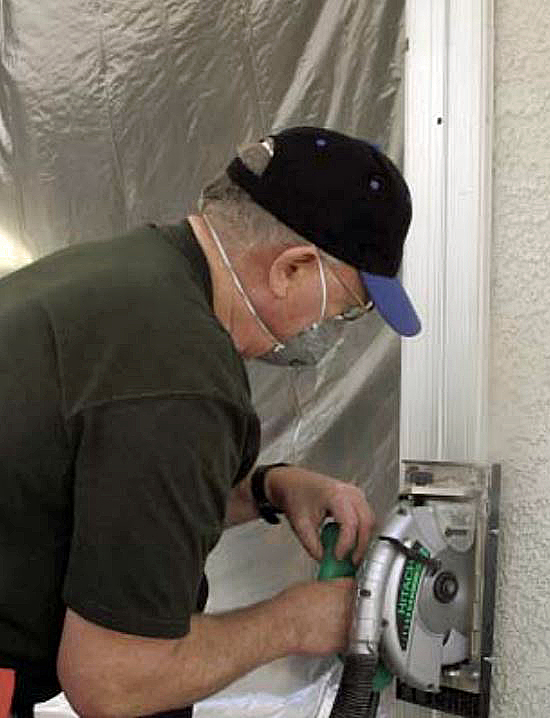
Cutting Stucco
We waited for the new doors to arrive on site before cutting any stucco. This job is very dirty, so we created a dust barrier by taping a sheet of plastic across the inside of the opening.
We did the cutting with a circular saw with a dust-collection port that connects to a vacuum hose, and a dry-cut diamond blade. Our goal was to cut the stucco back to where the edges of the new exterior casings would be. Since the casings were not supposed to lap onto the stucco, the cuts had to be plumb at the sides, level at the head, and perfectly straight and clean.
Saw Guide. To achieve that level of accuracy, we used an EZ Smart Guide (Eurekazone www.eurekazone.com); it comes with a baseplate that attaches to any saw and fits over a rib on the provided fence. The guide prevents the saw from wandering, so cuts are perfectly straight and of a consistent depth.
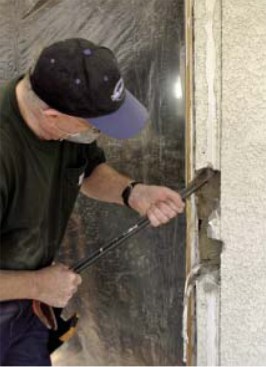
Three-coat stucco is supposed to be 7/8 inch thick, but in this case it was closer to 11/8 inches thick. The guide is 1/2 inch thick and the saw rides on top, so I set the depth-of-cut to just under 15/8 inches deep and did a test cut. The blade went most of the way through the stucco but did not hit the building paper — which meant we were good to go.
I lined up the guide to cut where the outer edges of the new casings would be and cut end to end with the saw.
Stopped cuts. The saw base prevented me from cutting all the way to the bottom of the wall and I didn’t want to overcut the corners, so I finished the ends of the cuts with a multitool equipped with a masonry blade. Although the vibrating blade doesn’t cut quickly, it allowed me to cut through to the ends without hitting building paper.
Once the stucco, wire lath, and staples have been removed …
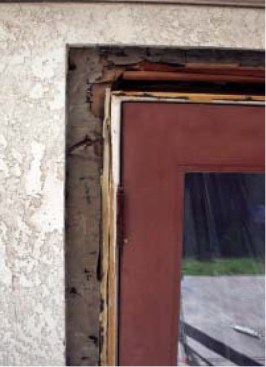
… only a straight cut edge and a small flap of intact building paper remain.
When the cuts were done, I carefully pried out the stucco and used the multitool to trim back any protruding edges. Then I pulled the staples and cut back the metal lath.
Now we could remove the old door frame and fur the opening to the proper size.
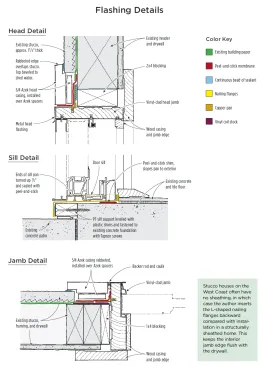
Sill Pan
Exterior doors and windows should always be installed in sill pans. You can buy these pans or have them made; I fabricate mine on site with a portable brake.
On this job I used YorkShield 106 HP (York Flashings www.yorkmfg.com), a composite flashing product made of 7-ounce copper bonded to a fiberglass reinforced polypropylene backer sheet. I chose this material because it has the look and durability of copper but — unlike 16-ounce copper sheeting — can be easily bent in a light-duty brake.
Since the flashing material came in a 20-foot roll, I could have made a single-piece pan. However, the brake I was using was shorter than the door, so I made the pan in two pieces and waterproofed the lap with a neutral-cure silicone sealant, which is extremely durable and won’t react to copper. (Most other silicones are acetoxy sealants; the acetic acid they release can react with and discolor copper.)
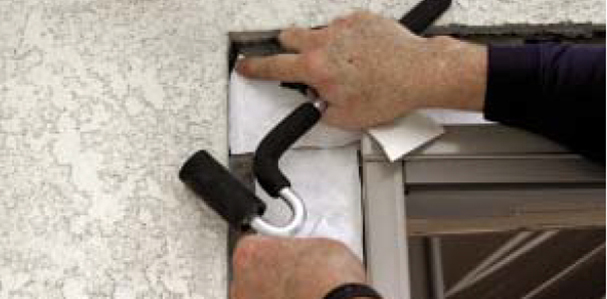
To support the sill, the author fastens a piece of PT lumber to the foundation over plastic shims.

With a small portable brake, he fashions a two-piece sill pan from a plastic backed copper flashing material.
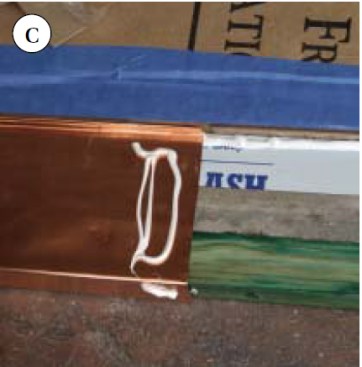
Then he seals the lap between pieces with silicone.
He laps onto the lip at the end of the pan with a peeland- stick membrane.
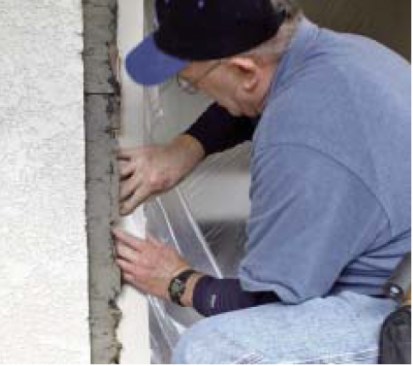
Sill support. According to the installation instructions (and common sense), the door sill should be fully supported. To provide that support, I ripped a piece of PT lumber, leveled it with plastic shims, and fastened it to the foundation with concrete screws
When I made the pan, I’d turned up its inside edge and ends 1/2 inch, creating a lip that would stop any water that got under the sill. And I’d turned down the outboard edge of the pan to cover the edges of the sill support. To ensure that the pan would drain to the exterior, I shimmed up the inside edge by installing it over a couple of layers of peel-and-stick membrane.
Installing the Jamb
The jamb unit shipped in pieces and had to be assembled before installation. The mounting flanges — or fins — fit into grooves in the jamb. In most parts of the country you’d install the flanges 4 9/16 inches out from the face of drywall; that way, when they lap over the sheathing, the jamb is flush with the drywall. But in this part of the country, older stucco houses don’t have sheathing, so we install the flanges backward. This puts them 4 1/8 inches away from the inside edge of the jamb, which is the distance between the drywall and the face of the frame when there is no sheathing.
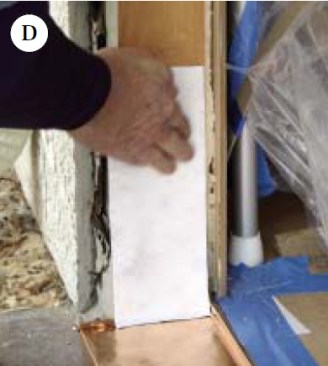
The author backs up the old building paper around the opening with vinyl coil stock, slipping it in behind the paper and underneath the stucco edge.
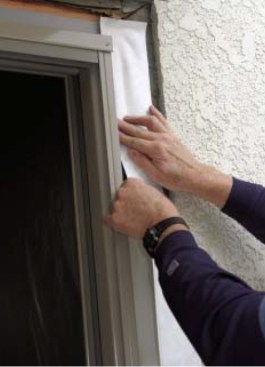
Added flashing. Before I could install the jamb, I had to give some attention to the remaining building paper at the sides of the opening. Luckily, it was intact where it came out from under the stucco — but there were still enough holes in it that I decided to back it up with a piece of flashing.
I could have tucked a piece of paper flashing or peel-and-stick membrane behind the paper, but that would have meant folding it back. Instead, I slipped in a piece of bendable vinyl coil stock (we used ProTrim from Alum-A-Pole Corp. www.alumapole.com). The coil stock was stiff enough to push all the way back to the fasteners behind the stucco. After I pushed it back as far as it would go, I used a knife to trim it flush with the edge of the opening.
On some jobs — though not this one — I’ve run into a problem with the building paper: Either it breaks where it emerges from under the stucco or it’s in such bad shape there’s nothing left to tie into. In those cases, the best I can do is make sure there’s no bare wood showing and that the new protective layer is detailed shingle-style to drain down and out.
In preparation for the jamb, beads of sealant are applied to the pan …
… and the back of the flanges where they butt the wall.
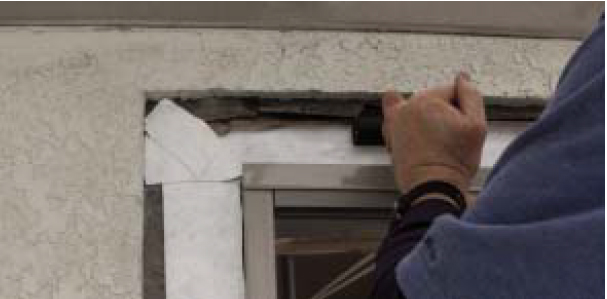
Next, I applied continuous beads of an exterior-grade sealant to the back of the mounting flanges and to the upturn in the pan where the sill would hit. I applied another bead down the center of the bottom of the sill, but didn’t make it continuous; if water did manage to get into the pan, I wanted there to be escape paths.
Then I stood the jamb unit in the opening, shimmed it plumb, and fastened it in place by driving screws through holes provided by the manufacturer.
To integrate the door into the weather-resistive barrier, the author adheres peel-and-stick flashing to the side jamb and then runs it over the flange and onto the building paper.
At the head, he attaches a horizontal membrane to the metal head flashing, tucks it under the building paper, and laps it over the side flashings.
He then runs a J-Roller over the membrane to ensure good adhesion.
Flashing in the Jamb
Now I had to integrate the jamb and head flanges into the WRB. The field-applied mounting flanges were not watertight, so I covered them with a self-sealing peel-and-stick flashing membrane. A number of companies make these flashings; I used StraightFlash (Dupont www2.dupont.com).
I adhered a 4-inch strip of peel-and-stick to the outside of each side jamb and then ran it across the flange and as far as it would go onto the existing paper. These side flashings ran top to bottom and tucked under the building paper at the head.
I flashed the head differently from the sides. I attached the peel-and-stick flashing to the metal head flashing that came with the door, lapped it over the side flashings, and tucked it under the building paper above. I had to make diagonal cuts in the paper at the corners so I could lift it to tuck flashing underneath. I patched these cuts by covering them with short pieces of peel-and-stick.
Once all the flashings were on, I ran a J-Roller roller across them to make sure they were fully adhered.
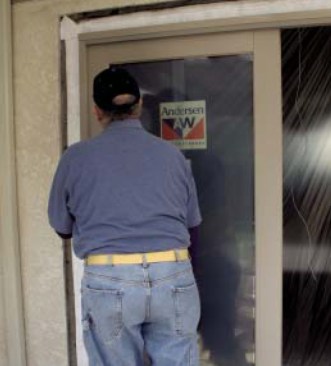
Installing Doors and Casings
The final step was to put in the doors and casings. I installed the fixed and operable panels and hardware according to the manufacturer’s instructions. Although the casings were aesthetically important and would provide additional protection against the weather, the installation would have been waterproof even without them, thanks to the pan and flashings.
Composite trim.
In keeping with the owners’ desire for a durable installation, we cased the exterior with Azek (azekexteriors.com), a cellular PVC trim. Other composite trim materials would have worked, too, but my lumberyard carries Azek and I’m familiar with it.
The recommended exterior casing detail for a vinyl-clad jamb like this one is to bring the casings to the sides of the jamb. The casings don’t quite butt the jamb; a quarter-inch gap provides room for backer rod and caulk. This is a different detail than is used with traditional wood jambs; with them, the exterior casings lap over. Since we wanted the face of our exterior casings to flush out with the jamb, we spaced them off the frame by installing them over thin rips of Azek.
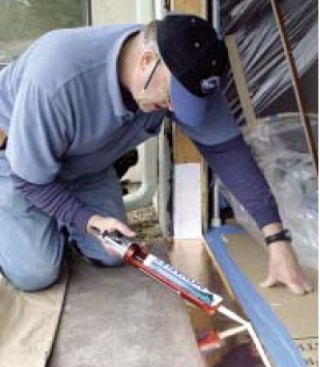
We preassembled the casings from behind with pocket screws and glue, then fastened them to the building with composite trim screws. We ran the screws at a slight upward angle so that gravity would keep water from traveling along them and draining into the wall.
Originally we’d planned to butt the casings to the cut edge of the stucco. Unfortunately, it turned out that previous owners had painted the house with an elastomeric coating, and even though our cuts through the stucco were very straight and clean, the coating came loose in a few places. (It’s best not to paint stucco at all; if it needs to be colored it should have a color coat.)
Because of the way the door is flashed, the installation is waterproof even before casings are added.
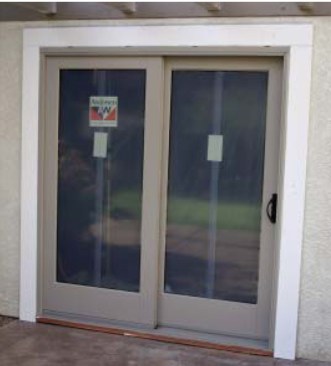
The casings are sealed to the wall with a fillet joint and — where they butt to the jamb — with backer rod and caulk. Gaps in the joint above the metal head flashing (above) will serve as weeps if water gets inside.
To hide the damaged coating we increased the width of the casings and rabbeted them to overlap the stucco slightly. This improved the look of the side casings; now the caulked joint between trim and stucco could be seen only from the side. But it created a potential problem at the head, because the trim lapped the stucco instead of the other way around.
However, it wasn’t a major concern. Our climate is relatively dry, and even if the joint did leak, the membrane flashings would direct the water out through the weep screed at the bottom of the wall or through gaps left in the caulk joint between the head casing and metal head flashing.
Still, to make leaks in the joint between the head casing and wall even less likely, I beveled the head casing so that it would drain and installed it over a bead of polyurethane sealant thick enough to form a fillet where the two surfaces met. And I caulked the joints where the side casings hit the jamb and wall — not for waterproofing, but for looks.


