As a finish carpentry subcontractor, I’ve been thrown a lot of curves lately by the builders in my area. Curved walls, turret entries, and oval hallway soffits are becoming the norm. A few years ago, our crew might have used flexible baseboard a couple of times a year, but now we see curves and use all types of flexible moldings on about half the houses we trim.
When I first used flexible baseboard about 12 years ago, on a cold day it was about as pliable as a frozen garden hose. It had to be warmed up before installation on a cold job site, and even then it was difficult to nail and would sometimes crack. Though it’s still stiffer in the cold and more flexible in a warmer environment, the material now available is much better.
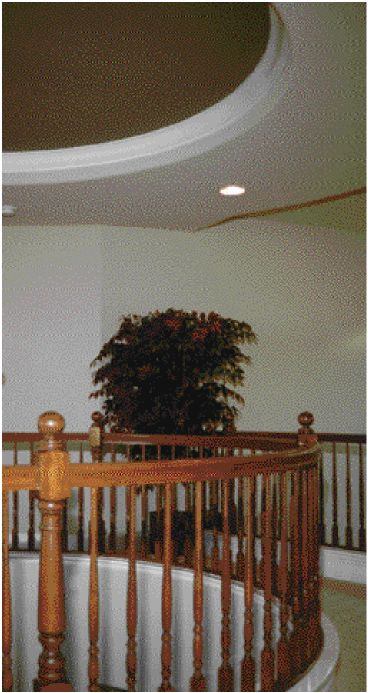
Flexible baseboard is easily site-bent to almost any required curve, but most crown molding and casing must be custom made to fit the situation.
Ordering Flexible Trim
There are three major manufacturers of flexible polyester-resin moldings similar to what I use: ResinArt, Flex Trim, and Flex Moulding (see “Sources of Supply,” page two of article). All three supply molding profiles in a large variety of patterns and sizes to match common wood moldings. In general, I think of flexible molding as a generic product and order it through my regular millwork suppliers. Most of my experience has been with ResinArt because it has the shortest lead time at my supplier.
Stain grade available. So far, I’ve worked only with paint-grade flexible molding, but grain-embossed stain-grade material is also available. Most makers offer a single style of grain-embossed material, but DuraFlex offers a choice of smooth, oak, and pine surfaces.
According to the manufacturers, staining requires a heavily pigmented gel-type stain and a protective topcoat with a clear finish. Unlike the process with wood molding, finishing must take place after installation; otherwise, the finish will peel and distort as the material is handled.
Manufacturers also offer accessories like simulated carvings, capitals, medallions, and other appliqués. My work is strictly indoors, but these flexible products can also be used outside. I haven’t seen any claims made about UV resistance, but manufacturers say they are insect-proof, moisture-proof, and resistant to extreme heat and cold.
When I’m ordering flexible moldings, I always tell my supplier whether I’ll be matching MDF or finger-jointed trim. The MDF trim is a hair thicker, and, because the flexible moldings are made to order, the manufacturer can account for that. This means I can avoid a lot of laborious sanding or shimming on site to get the profiles to match.
Flex Moulding offers Superflex, a very supple material for tight bends, though we’ve found that it bends too easily for most applications. In situations where the framing or drywall work is irregular, it actually conforms to dips and bumps. The standard-flex products bridge such inconsistencies, producing a more uniform curve along the wall. Although the standard products we use all have similar flexibility, temperature can affect how easy they are to work with. On cool mornings, I’ll place the stiff material in the sunny driveway for a couple of hours to soften it up.
Cutting, Finishing, and Fastening
Flexible molding cuts easily with regular woodworking equipment, but positioning and handling the material can be a challenge. It takes a little time to get used to, but we’ve found a few techniques that help. Basically, it comes down to extra support, sometimes in the form of continuous support at your miter saw station or provided by a jig.
When it comes to installation, the consensus among the various manufacturers is that gluing is the way to go and that nails and screws should be kept to a minimum. To prevent distortion along the material’s edge caused by fasteners, manufacturers suggest using super-type glues with a set time of about two minutes and even a spray accelerator. So far, I’ve had good luck with construction adhesive and pneumatic finish nails and brads. It’s important to nail carefully, however. Nailing too close to an edge can cause a bump along the edge, and hitting the hollow of the crown can collapse the material. After establishing the proper nailing pattern, I rely heavily on pneumatic fasteners and use construction adhesive only at joints. I haven’t tried hand nailing, but it seems like it would require a lot of predrilling and patience. I suppose the fast-setting glues would help a lot if you don’t have access to air tools.
Baseboard and Chair Rail
Flexible baseboard is an off-the-shelf material at most dedicated millwork suppliers, but you probably won’t find it at the home center or standard lumberyard. My supplier carries it in three styles for matching the most common baseboard profiles in my area. My supplier also stocks chair rail, which we find useful for many trim details, in two or three styles. One of our projects used flexible chair rail for simulated wainscoting with arch-topped panels. But chair rail like that requires a special order, because the molding is curved on the wider, flat side, like casing.
Flexible baseboard is the simplest product to use. Because it’s no more than 3/4 inch thick, it can bend to all the wall contours we routinely see, down to inside and outside radii of less than a foot. Although Flex Trim claims it can provide endless lengths by special order, the boxes we get from ResinArt contain rolls from about 7 feet to 12 feet long; I think anything longer would be too unwieldy.
Square cuts and miters. A square cut on baseboard can be made by simply laying it flat on your miter saw and letting the far end fall where it may. You can cut miters in the same position using the bevel feature of a compound saw, but we usually cut baseboard miters in the normal upright position with the flexible material sandwiched between two pieces of scrap similar in height. The scrap prevents saw pressure from collapsing or distorting the material as it’s cut. Odd angles are the norm when working with curves, so test fitting and recuts are part of the routine. Once I’ve cut one end, I hold the piece in place and mark the next cut. Trying to measure along a curve is generally awkward and inaccurate.
Curves and straight runs. Of course, flexible baseboard can also make a straight run, so we sometimes avoid a splice by continuing the material along a straight section to the next curve. Flex costs nearly ten times the price of the MDF trim material we commonly use, so we try to limit this practice. Most inside-radius situations allow me to snap a slightly long, square-cut flex piece into place between the two square cuts at each end for a tight fit. Most outside-radius situations require using more traditional scarf joint, but we like 30-degree joints instead of 45 degrees. The more acute angle matches up better.
Unlike crown, where we use brads, on baseboard we use heavier, 15-gauge finish nails. The sturdier nails hold better, and baseboard doesn’t have the delicate edges of crown molding. But we still keep nails away from the edges, and nail top and bottom for adequate holding.
Casing
Because curved casings for doors and windows are bent on the wider flat side, they are typically made to order. We order our flexible moldings through our millwork supplier, who can usually get custom orders in about a week.
Custom curves. Ordering flexible casing in a quarter, half, or full circle is a fairly straightforward process. The Flex Trim website gives information on ordering and also explains how much a curved molding can deviate from its designed radius. Wider patterns and smaller radii are less forgiving than narrower patterns and larger radii. What I find interesting are the possibilities with ovals, ellipses, and other irregular radii. If you can describe your project with a good drawing or template, it can be made to order.
Fitting curved casings. Installing a half-circle of casing over an arched opening is fairly simple because the side casing is cut square at the top. To start, I lay out the inside line of the arch from leg to leg with a set of trammel points. Along that line I then set a series of finish nails on which the flexible casing can rest. With the casing hanging from the nails and draped over the side casings, I mark its length. The first cut is laid out by simply marking where the flex and rigid casing meet on the inside and outside edges. I usually make the first cut with a handsaw or small circular saw. When I’m happy with the first cut, and have the material back in position, I mark the second cut. Thinking slightly long is good in a situation like this. Although most of our jobs use MDF casing, we use the same process for stain-grade material.
Crown
It’s a good thing I like working with crown, because installing crown molding on curved surfaces has proven to be a big challenge. I recently finished a small task where the framer didn’t follow the plans and the millwork salesman’s measurement of the subsequent “custom” work — an oval ceiling soffit — was off just enough to create a problem. It turned out that I was trying to work with material made to a radius of 1 1/2 inches less than I needed. As I attempted to position the crown along the wall, the top edge would pull away from the ceiling. By the time the new material arrived, installation seemed easy. The lesson is that flexible crown is not very forgiving and must be ordered accurately. Because we work in production housing, ordering in advance from the plans is a necessary part of the process. As long as everyone builds to the plans, there’s no need to field-measure, but double-checking can prevent time-consuming and expensive mistakes.
The radii on the plans we get are called out as a rough measure, so we compensate for drywall thickness to make our orders more accurate. The drywallers in our area bend two layers of 1/4-inch gypsum board to make the curves, so adjusting the radius 1/2 inch makes the pieces fit better. It’s important to remember that you subtract 1/2 inch for inside curves, but add 1/2 inch for outside curves.
Flexible crown molding can be manufactured with an irregular radius (as in ovals and ellipses, for example), and the profile can be oriented upside down from standard if desired. But irregular radii will require a template or drawing, and upside-down profiles require special instructions on the supplier’s order sheet.


