Waterborne finishes have been around for decades now, but they still don’t seem to have caught on with painters in parts of the country where regulatory rules don’t mandate their use. Early formulations are partly to blame for this lack of popularity: Temperature sensitivity, incompatibility with additives like tints and flow enhancers, sanding problems, and unfamiliar application methods have all made waterbornes unattractive to production-oriented painters. However, the good news is that the technology has evolved, driven in part by the EPA and states like California that place restrictions on VOCs (volatile organic compounds) in paints and stains. Waterborne finishes are now in their fourth generation — at least — and have reached a point where their advantages could make them attractive to even the most production-minded contractor.
Disadvantages of Solvents
I’m a remodeling contractor who prefers to do his own painting. My own move to waterborne lacquers, specifically for finishing interior trim on remodeling jobs, was driven not by state environmental regulations, but by the desire to cure the headaches — both figurative and literal — that other products were giving me. Solvent-based lacquers, for all their advantages, aren’t high on my list of favorite things.
For example, spraying lacquer in a basement during winter presents some real difficulties. The furnace can’t be on, because it poses a safety hazard — one spark amid all those volatile fumes could spell disaster. The same goes for a gas-fired water heater.
And those fumes — isobutyl acetate, naphtha, xylene, methyl ethyl ketone, and toluene are all common lacquer solvents — migrate throughout the house no matter how well you mask and tarp the job, and tend to linger for days. This drives live-in remodel clients to various degrees of discomfort and dissatisfaction, depending on their age and health. I don’t like working in the leftover fumes myself, and neither do the subcontractors on my jobs — which is why I decided to find a better way.
I began by discussing my concerns about spray-applied waterborne finishes with my Sherwin-Williams sales rep. He’s used to working with painting contractors whose bottom line is time and money, so initially he tried to discourage me from spraying the product I chose, Sher-Wood Kem Aqua Lacquer, because it’s not as familiar or as simple to work with as other finishes. But he agreed to assist me and showed up the first time I sprayed a remodeled basement to see for himself and formulate his own opinions.
Since that trial run, I’ve decided that waterborne lacquer is a good fit for my business. It applies easily, albeit a little differently than a solvent-borne lacquer. The cure time doesn’t affect job progress, the dried finish is very abrasion-resistant and bonds to virtually everything (you can’t get it off your watch face or glasses to save your life), and its low odor dissipates rapidly. Furthermore, the fumes and overspray don’t present a fire hazard.
Preparation
As with any finish, working successfully with a waterborne lacquer depends a great deal on the amount of time spent in preparation; fortunately, preparing for a waterborne lacquer is not very different from the steps commonly taken for solvent-based lacquer applications.
First, the work area needs to be reasonably clean. I sweep the floor, use a shot of compressed air to make sure that any debris stuck under the baseboards won’t come flying out during spraying and stick in the finish, and carefully vacuum the area. I also remove unnecessary materials and equipment from the area to be sprayed. Tools and other items left lying around get in the way of the hoses and risk running into a wet finish.
Since the moldings and doors I install are typically of a higher-than-standard quality and are more or less ready to finish, I don’t have to do a lot of sanding before applying the sealer coat — just what’s needed to remove random scuffs or other obvious marks on the wood. I take the doors off the jambs and remove the hinges and other hardware, then stand them up accordion-style, tacked together with door cleats, on rosin paper. I mask the window glass but generally not much else, because the overspray is hitting only the primed drywall, which I finish-paint later, after masking the dry trim.
Gun setup. The spray setup I use includes a Binks pressure pot and a 2001 SS gun (ITW Industrial Finishing, 888/992-4657, www.binks.com) A cup gun (suction feed) or a gravity feed gun would also work, but I like the pressure pot. I have to fill it only once, and I find that the spray pattern is easier to fine-tune when I’m not borrowing air from the cap to suction the fluid.
The most important difference between a pressure pot and an airless rig is the ability to fine-tune the spray (see “Why I Use a Pressure Pot“). The lower viscosity of a waterborne lacquer makes runs and sags more likely than with a solvent-based lacquer, especially on vertical surfaces. A few runs are inevitable, regardless of the spraying method used. But as long as the finish hasn’t yet set up, it takes only a little solvent alcohol on a rag to wipe away a run or sag before respraying.
The ideal coverage is an even coat that just wets the surface. For painters not accustomed to spraying waterbornes, it may take a couple of practice attempts to determine the appropriate film thickness without getting runs.
Fluid prep. In the can, sanding sealer — I like Sher-Wood Kem Aqua Lacquer Sanding Sealer — looks something like dirty milk. It’s very important to stir it thoroughly before spraying, as waterborne lacquer has a relatively high solids content and all the goodies that you want to land on the trim can settle to the bottom of the bucket instead. I also routinely strain my finishes as I fill the pot; any lumps not reintegrated into the lacquer could be delivered to the gun and cause a nuisance clog. The paper filters are cheap — about 20 cents apiece — and generally prevent this kind of problem.
Why I Use a Pressure PotMost production painters rely heavily on an airless pump rig. Once in a while, you might run across someone who uses a turbine HVLP (high-volume low-pressure) outfit or who came from an automotive background and so knows how to use a cup sprayer. But an airless rig is for production, period. I prefer a pressure pot. With an airless sprayer, you have limited ability to adjust the pattern of what you’re spraying. You can adjust the pressure of the pump, which to some extent will affect your fan pattern, and you can change tips, which also affect the fan, but if you pick a #312 tip (3 = radius at 12 inches from surface; 12 = a .012-inch opening) for doors, you get a 6-inch fan. And you get it fast. Also, you can’t really do much tweaking. Spraying lacquer with an airless isn’t something for the slovenly. You have to move right along, practically fast-walking the house, while controlling the gun at the same time. Plus there’s the problem of viscosity: Lacquer is thick and sticky, while waterbornes are thin and runny, and will come flooding out of an airless rig. Suction-feed guns are common in auto-body work — these have a gun mounted directly on an underslung fluid reservoir (a similar gravity-feed system mounts the reservoir on top of the gun). Compressed air travels through the gun and exits the “air cap” through holes in a pair of protruding tabs. The center of the air cap is behind these holes and creates a vacuum whereby the fluid is drawn to the cap. Depending on the viscosity of the lacquer, you may be “borrowing” a considerable percentage of the input air to draw the fluid to the cap, which can adversely affect uniform flow. This in turn generates irregularities in the spray delivery and pattern. A pressure pot separates the fluid reservoir and the gun. Two hoses connect them, one for fluid and one for air. Usually, each line has a regulator that controls the delivery pressure independently; no more borrowing air to drive the fluid. The fluid is driven by direct air pressure while the cap does its job of atomizing the finish, just as with a suction or gravity setup. But because they’re delivered separately, both fluid and air pressure remain more constant. A conversion spray gun presents another option. Conversion spray guns are a newer breed that give you HVLP efficiency using a compressor rather than a turbine. But the amount of air required to drive a conversion rig surpasses the output of most portable compressors. And HVLP outfits use guns with mounted reservoirs that require frequent filling, which slows production. For me, the pressure pot and a conventional gun is just the ticket — a setup you can tune like a piano. |
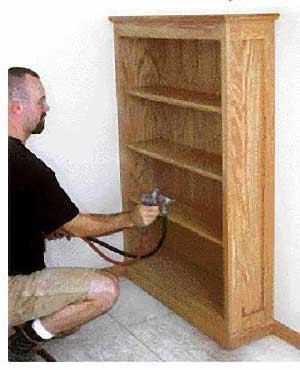
Spraying
Once the cleaning and prep-work are done, spraying is a relative breeze. I plug in the compressor, attach an in-line filter to catch any debris or moisture coming from the compressor, hook up the pot, and try to situate the equipment in the room so that there’s little need to move anything but the gun. I always work back toward the compressor, so that I can periodically retrieve the hose without any risk of dragging it against a wet surface. On the regulators, I typically set the air pressure at around 30 psi and the fluid pressure at around 7 psi. That seems to yield the best pattern and the best results on base trim.
When I’m done spraying all the narrower pieces, I simply increase the amount of fluid and widen the pattern at the gun for doors and built-ins. A dual regulator setup on the pot eliminates the need to mess with the settings on the compressor itself, which are far less accurate than those that come on a pressure pot.
Dry time. I don’t know how often I’ve heard or read the complaint that waterbornes take a prohibitive amount of time to dry. I don’t buy it. Like any other finish, waterbornes are affected by temperature and humidity, but the lacquer I use dries to the touch in about 10 minutes, on average. On a very humid, cool day, with the windows open, the longest I have waited is maybe a half-hour. Generally, by the time I’m done spraying and have the gun flushed for the top coat, things are dry enough to begin filling the nail holes.
Cleanup. With only water as the primary flushing agent for the gun and lines, cleanup is a complete snap. First, I rinse out the pot by hand; then I fill it with clean water and run that through the lines and gun into a bucket until I see the spray run clear. Next I run denatured alcohol through the lines after flushing, to remove residual water and dry them out. I learned the hard way not to slack off on this routine: If you don’t get all the lacquer out of the system, and the equipment then sits idle for a couple of months, the residue turns to an orange gunk that clogs the gun. I have spent probably a couple of hours with Q-tips, pipe cleaners, dental picks, and lots of methyl ethyl ketone cleaning the stuff out. But if you really flush the lines and gun thoroughly, water is all it takes.
Filler. Between the sealer-coat and top-coat stages, I fill nail holes. The sealer coat takes the trim close to its final shade for a better color match, and also helps prevent oil in the filler from bleeding out into the surrounding wood. I really like Color Putty filler (Color Putty Co., 608/325-6033, www.colorputty.com). I carry a little toolbox with just about every color made. To match the wood I’m spraying, I always mix the putty in my hand (Figure 8). Once I feel the color is good, I mix it with whiting — a powder available at almost any paint store — until it’s dry enough to almost crumble. The whiting dries out the putty and helps avoid oil spots on the trim. That’s one area where the waterborne is likely less forgiving than the solvent-borne — it doesn’t stick to oil — so getting the filler nice and dry alleviates that concern.
Sanding sealer is designed to be sanded, and it should be. Waterborne lacquer will raise the wood grain and leave little fibers standing up and waiting to be knocked down. In my experience, this effect is more pronounced on veneer pieces such as hollow-core doors and prefab jamb stock than on solid stock.
I judge how much sanding I need to do by feel, and use a fine sanding sponge on occasion, but the vast majority of the time I find that a lacquer pad — like a scotch-type pad but less abrasive — does a fine job. The sealer doesn’t need to be sanded for better bonding with the top coat, but simply to get the nubs off and remove any filler that’s left proud of the surface.
It’s important to eliminate any debris from the trim after sanding. Though the lacquer bonds quite well to previous coats, it will not remelt them as solvent-based lacquers do, so any white dust left on the base will be permanently embedded in the finish if you don’t remove it first. This is another good argument for using a lacquer pad, which seems to pick up about 99 percent of the dust.
Top Coats
Once you’re ready to spray the top coats, all of the prep and fuss is behind you. I increase the fluid pressure just a touch, trying to skirt the fine line between a nice thick coat and having curtains of lacquer draping down my doors. The top coat has a higher solids content than the sealer and allows a higher build — another difference, actually, between solvent-based and waterborne lacquers. The higher solids content in a waterborne lacquer allows the same total build using fewer coats. While a single top coat over the sealer generally looks good, two will give you a high-quality job. A light scuffing with a lacquer pad between coats helps ensure a smooth, professional finish.
Tinting
While waterborne lacquers typically provide a very clear, colorless film over the surface (unlike solvent lacquer’s inherent amber hue), one thing I’ve really come to appreciate about them is the ease with which they can be tinted. It’s fine to top-coat with a waterborne lacquer over a fully dried oil-based stain, but I prefer to use water- or alcohol-soluble dyes. The primary advantage here is that a dye finish dries fast, whereas an oil-based stain can have you waiting as long as two days before it’s cured enough to top-coat with a waterborne finish.
The TransTint Dyes (Homestead Finishing Products, 216/631-5309, www.homesteadfinishing.com) that I like are also useful for tinting the sealer coat, something I do when applying a natural finish over oak to help overcome some of the blander grain areas common to the species. For example, on natural oak I try to add just a touch of both reddish brown and honey amber to approximate the amber tinge that a solvent-based lacquer would impart.
I don’t really notice a visible difference in the finish over stained woods that have a moderate color to them, but both natural finishes and very dark colors tend to need some warming up. Walnut is a good example of a wood that can look frigid when finished natural without a little amber coloring added.
Should You Switch?
Overall, making the switch from solvent-based lacquer to waterborne is a step that some may find advantageous. I’ve enjoyed the benefits in adhesion, the low VOC content, and the fairly easy application process. I won’t argue that it’s for everyone: If I were running a completely production-driven paint crew, I might be hard-pressed to switch.
But if you are already considering making that change, whether because of regulatory increases or — as in my case — for personal reasons and to please customers, waterbornes are definitely worth looking into.
Randal Weberis a remodeling contractor in Lincoln, Neb.


