As a roofing contractor doing business in my hometown for more than 20 years, I consider it my obligation to give customers the best value for their money. When their asphalt shingle roof has reached the end of its life, most people assume their only option is to strip the roof to bare sheathing before a new roof can be applied. But unless the sheathing is extensively damaged or the structure can’t support the weight of another layer of roofing, a better solution is to apply a new layer of shingles right over the old one. Done correctly, a reroof job will look as good and last as long as a “new” roof, for a lot less money and a lot less hassle.
Advantages of Reroofing
Most building codes allow two layers of organic or fiberglass asphalt shingles on roofs with a 4/12 pitch or less, and three layers on steeper roofs. If the structure can support the added weight, a typical 20-square (2,000-square-foot) reroof will cost at least $1,000 less than a tear-off job. Labor savings go beyond demolition: Not having to lay down felt paper saves $10 a square; and site and weather protection, as well as cleanup, are all reduced if not eliminated. Disposal costs are lower, too, because we don’t have to rent a dumpster and we save the $65-per-ton dump fees. We also save by not having to separate the recyclables. Here in central New York, asphalt, cardboard, and wood all have to be tossed into different containers, and in some cases hauled to different transfer stations. The same is true of flashing, drip edge, tar buckets, vents, and other scrap metal.
Less liability.
As a contractor in a highly competitive business, I can’t claim that a reroof is a lot more profitable than a tear-off job, but I can say that it’s much less risky. There is no chance of a dumpster carving up the lawn or scarring the driveway; there is less risk of property damage from falling debris or from nails that find their way into homeowners’ car tires. And because bare sheathing is never exposed to the elements, there is much less chance of weather damage or of an employee being injured while scrambling around in the rain trying to get an exposed roof under cover.
Equal quality.
All shingle manufacturers honor the warranty, whether their products are used for a reroof or a new roof. If the job is done correctly, with the new layer of shingles laid flat over the existing shingles, the old roof cushions the new one and serves as a secondary barrier should wind or water ever break through the new shingles.
Evaluating the Job
Because my company does both tear-off and reroof work, I evaluate each job to determine which procedure is best. Whenever I’m called to give a roofing estimate, I always ask the callers to tell me why they think they need a new roof. Have they noticed leaks and stains, or is it simply because their neighbors are replacing their roofs? I also ask about the age and apparent condition of the roof. If the roof is, say, eight years old, it probably just needs a repair. If it’s 15 years old and they’ve noticed loose granules washing off the shingles or running out of the downspouts, it’s a reroof candidate. When they tell me what neighborhood they’re in, I can also make a good guess about how many layers of shingles are already on the roof. When I arrive to inspect the site, the first thing I look at is not the roof but the condition of the house and the quality of any recent work that might have been done to it. We do high quality work and we charge more than the average fly-by-nighter. If a house looks like no one cares, I want to find out what kind of work the owners are looking for before I invest a lot of my time. I always walk the roof. A contractor who only does tear-off work can figure a job standing on the ground with a tape measure and a pair of binoculars. Not me. I can’t be sure that reroofing will work until I’ve thoroughly inspected every inch of the roof. Sometimes it’s an easy decision: If I peel the shingles back from the rake edge and count three or more layers, and if most of the shingles are badly curled, the permanent step flashing is badly deteriorated, or the deck feels soft and spongy wherever I step, it needs a tear-off. Even if the structure can support the added weight, the new roof won’t last unless it’s laid flat over smooth shingles, intact flashing, and sound sheathing. Localized problems, like a few missing shingles or one or two soft spots in the sheathing — at the mouth of a valley, for example, or around pipes or at the bottom of the chimney — can be easily repaired, but beyond that it’s more efficient to do a complete tear-off. I also rule out reroofing if a careless prior reshingling has left the roof with a washboard surface. If reroofing is warranted, I measure the existing shingles to determine whether they’re standard (12×36 inches) or metric (13×39 inches). The new shingles must be the same size as the old ones or installation will be a nightmare. While I’m on the roof, I also measure the exposure of the existing shingle courses and eyeball their horizontal straightness. If the old roofing is extremely wavy or if the exposure varies more than 1/4 inch from the standard 5 inches (55/8 inches for metric shingles), I won’t be able to follow the existing lines, so I’ll have to allow more labor time for snapping chalk lines and using gauges to ensure a first-rate job.
Prep Work
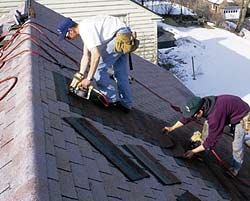
The best thing about beginning a reroof job is the sound sleep I get the night before, because I don’t have to worry about everything that could go wrong between tear-off and dry-in. Even if a freak thunderstorm should strike without warning, there’s no need to panic. We just calmly seek shelter until the storm passes, then get right back to work. Any rainwater that gets between the new surface and the old will evaporate. The average reroof requires at least two full pallets of shingles, which I have delivered a few days before the job starts. For a nominal additional charge, some of my suppliers will place the bundles on the roof and scatter them according to my instructions. When I can’t get rooftop delivery, I coordinate with the homeowners and give my supplier specific instructions about where to place the load. I don’t want the homeowner coming home from work to find 60 bundles of shingles blocking the garage. I like to use a five-man crew for reroof jobs: a crew chief, two roofing mechanics, one laborer, and one laborer-trainee. While the other guys are unloading, setting up ladders, and stocking the roof, the crew chief will walk the perimeter of the house looking for anything fragile that might need to be moved or protected. He’ll also be on the lookout for pre-existing damage that the homeowners might not have noticed. If he finds a loose railing or a cracked basement window, he’ll let them know about it so we don’t take the blame later on. Because we’re not doing major demolition, we don’t have to take the elaborate site-protection measures I insist on when we do tear-offs. We will, however, lay plywood over air conditioning units and over any flat stepping stones that might get scratched. We’ve also learned the hard way to always protect expensive plants with a plywood tent, and to lay sheets of cardboard under any of our vehicles parked in the driveway to catch oil leaks. After the roof is stocked, the laborers pry up several layers of cap shingles at a time and toss them into plastic trash bins (see Figure 1).
Figure 1. The roofing crew uses a Red Ripper roofing demolition tool to pry up cap shingles, which are collected in a plastic bin, along with old boot flanges and any loose shingle tabs. Sometimes they use a standard gardener’s “potato fork,” but the best tool for the job is a Red Ripper (Integrated Roofing Technologies, 2413 Stevenage Dr., Unit 11, Ottawa, Ontario K1G 3W1 800/352-6147). They also pry up and discard the old vent flanges, and start new boot flanges over the tops of the pipes. At this point, the prep crew also cuts out and replaces any bad sheathing, and fills in any missing shingles with scrap pieces to give the roof a sound, uniform surface. Finally, they’ll use a hook blade to cut back the bottom 2 inches from the third course of existing shingles (12 inches up from the drip edge). This will make starter course layout easier. After the messy work is done and the trash bins have been emptied into the back of the company pickup truck, the roof is swept clean, then drip edge is scattered along the perimeter of the roof and nailed in place. We use a special drip edge, called Overhang Drip (model DE6, Caliber Metals, 23500 John Gorsuch Dr., Clinton Township, MI 48036; 810/465-7650), which is made to fit over the old drip edge and shingles (Figure 2).
Figure 2. Depending on the type of job, the author uses several specialty drip edge profiles, including one with an extra-long leg designed to cover existing shingles and drip edge (at right in top photo). A single length of drip edge wraps roof corners, with the rake flashing overlapping the eaves for good drainage (bottom). |
|
We run the metal along the eaves first, then up the rake edges, always lapping a higher piece over a lower one for good drainage. While this is happening, one of the laborers separates the bundles of shingles into thirds and scatters them on the roof. This puts the shingles within easy reach of the shinglers, who won’t lose time hunting and reaching for fresh material. The other laborer makes all the precut shingles we’ll need later: inverts, one- and two-tab shingles, and caps. An invert is the 5-inch-wide top half of a full shingle; caps are one-tab shingles with the top corners tapered to ensure the exposed edges follow a straight line.


