Tube-formed concrete piers are standard for supporting decks. Often, the paper form gets left in place, and when it’s stripped it leaves a characteristic spiral imprint on the concrete. When the piers are tucked away under the structure, no one cares too much about their appearance. But what if you need to pour an “architectural” column — one that will be prominent in the finished work?
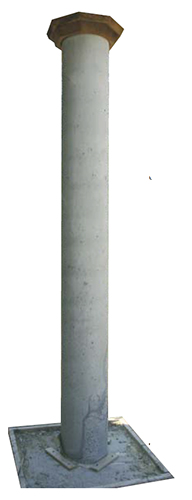
On a recent job, the architect called for the 10-foot-tall, 14-inch-diameter columns supporting the second-story decks to have a completely smooth finished surface. The local branch of concrete specialty supplier A.H. Harris & Sons (860/665-9494, www.whitecap.com) told me about Sonotube Finish-Free tubes, which I special-ordered. I was concerned about a cardboard form of this height buckling sideways under the weight of the wet concrete, but a technician at A.H. Harris assured me that we’d have to brace it only at the top and bottom. The cylindrical rebar cages I needed turned out to be standard stock items.
So that we could brace the top of the form and also be able to stand at the top while pumping the concrete, we cut a 14 1/2-inch-diameter hole in the middle of a sheet of 3/4-inch plywood; we supported the plywood on a lumber-framed scaffold just below the top of the form. This allowed us to drop the form through the hole and over the rebar cage onto the footing, then shift the plywood around on the frame to plumb the column before nailing it off. Wood blocks shot into the footing prevented the form’s bottom from walking.
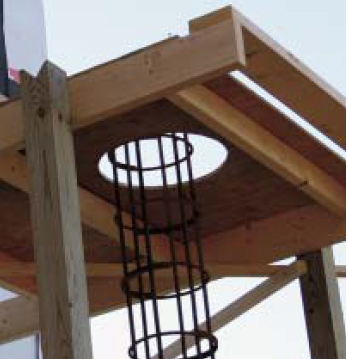
Temporary scaffolding provided a work platform from which to place the concrete, as well as a convenient support for the tube form.
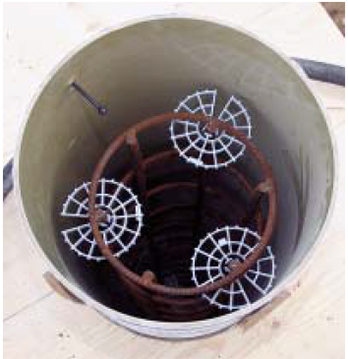
Plastic spacers centered the rebar in the tube; note the smooth, reflective surface of the form’s inner surface.
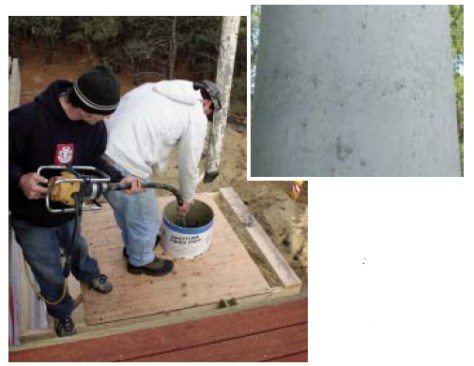
Periodic vibration during the pour helped the mix consolidate around the rebar and against the form’s surface. Even with vibration, the column’s surface had small pits and voids (inset); these can be easily grouted flush if the customer wants.
We used a 4,000-psi concrete mix; 3/8-inch aggregate helped it flow around the steel cage. We also vibrated the concrete to ensure full, even distribution. After the mix cured and we stripped the forms, we found only a few small pits and voids in the concrete surface. Curiously, the bottoms of the piers had some discoloration — probably from the mix water leaking out and causing a change in the hydration process. Luckily, these spots would be covered by backfill. Other than that, the piers looked good. Including labor, concrete, staging, rebar, pump truck, and forms, the final cost for the columns was about $1,800 each.


