One of the principal virtues of stucco is that it’s
maintenance-free — no painting, no staining, no “oil canning” as with aluminum siding. It won’t burn, rot, or rust. Correctly applied, it should last a long time, whether you live in Nome or New Mexico. But for stucco to survive application during the extremes of snow, ice, and desert sun, it must be mixed, applied, and cured to exacting standards. Here’s a roundup of “extreme stucco” rules that I’ve learned during the last 20 years.
Stucco Basics
Stucco is mostly sand and Portland cement. It is typically applied in three separate coats that add up, more or less, to 7/8 inch for one-hour fire-rated construction. The three layers include a 3/8- to 1/2-inch scratch coat, a 1/4- to 3/8-inch brown coat, and a 1/8-inch “color,” or finish, coat. The scratch coat is applied directly to a clean block wall or, on wood structures, over “D” or better paper and galvanized metal lath, preferably a self-furring variety. A metal rake is used to create “scratch” lines in the still-wet surface. The furrows create a rough surface into which the brown coat can key for a good bond. The brown coat is applied as a smooth coat, usually “rodded” with straightedges and wooden floats (see Figure 1).
Figure 1. The brown coat is smoothed with a straightedge in preparation for the finish coat. |
In the West, a steel trowel is used to produce an adobe look when the brown coat is the final coat. Once applied, the two coats should be allowed to cure, or rest, for at least a week, preferably two, before applying the finish coat. This allows the scratch and brown coats to strengthen, settle down, and do all the cracking they intend to do. After this curing period, the finish coat can be applied (Figure 2).
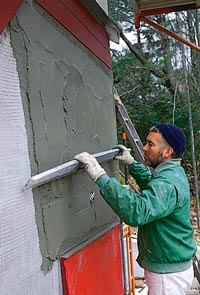
Figure 2. The 1/8-inch-thick finish coat is applied with a trowel. |


