Q: What’s the best way to detail the joint between a deck-mounted tub that lacks an integral tiling flange and the tiled tub surround so that it won’t leak?
A: Contributing editor Michael Byrne, a tile-setter and consultant in Los Olivos, Calif., responds: I use the same approach on plumbing fixtures without a tile lip as I use for plumbing fixtures with a lip.
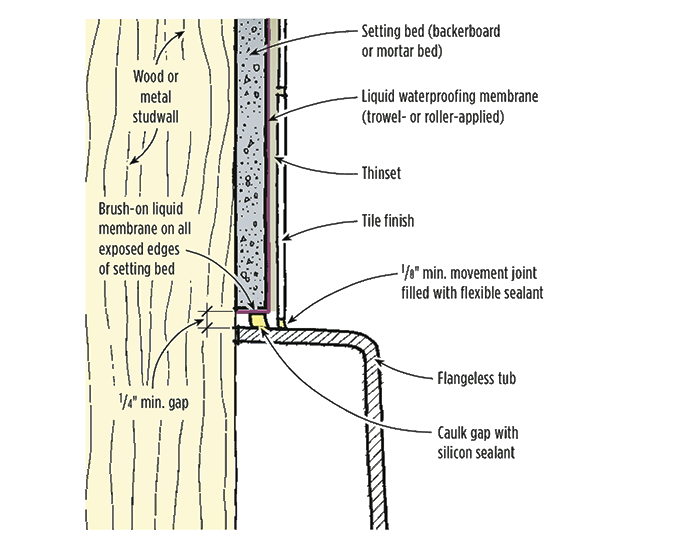
Liquid waterproofing membranes that meet ANSI 118.10 specifications can be applied to the surface of many tile substrates, including cement-based backerboard, plywood, and concrete. Waterproofing membrane should be applied to setting-bed edges, too, and around any plumbing that penetrates the substrate.
First, I install the setting bed (either a backerboard or mud-bed substrate) so that there is a gap of at least 1/4 inch between the lower edge of the setting bed and the top of the tub.
Next, I apply a liquid waterproofing membrane — such as Proflex Hydra-Seal— to the setting bed with either a trowel or a roller.
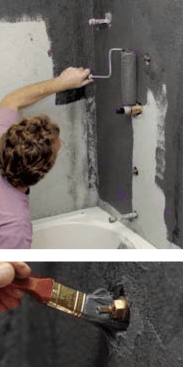
Around plumbing that penetrates the setting bed and along the bed’s exposed bottom edge (where it faces the top of the tub), I use a brush; the membrane helps prevent wicking in these areas (see photos, left).
Once the membrane on the completely waterproofed setting bed has cured, I carefully caulk the gap between the bed and the tub with a thick bead of 50-year silicone sealant (or a compatible sealant specified by the manufacturer of the membrane).
And finally, when I set the tile, I always leave a 1/8-inch (minimum) movement joint where the field of tiles meets the tub; I fill the joint with a sealant color-matched to the grout.
By the way, this is now the same approach I use when tiling a shower built with a mortar-bed floor and backerboard walls.
I install the backerboards so that their bottom edges are 1/4 inch to 1/2 inch above the top of the finished mortar-bed floor (before tiling), apply the membrane system to both walls and floor (with a break in the membrane at the gap), and fill the joint between the walls and floor with a bead of compatible sealant after the membrane has cured.


