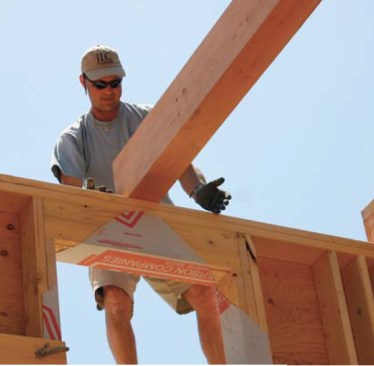
My crew and I just finished building a Cape-style addition to a faithfully restored 1776 house. The antique home couldn’t be properly heated, so the addition will serve as wintertime living space. Since the owners wanted the new stick-built structure to reflect the old building’s post-and-beam construction, the architect added exposed 6×10 posts and collar ties to the plans for the great room. I ordered #1 Douglas fir beams from the local lumberyard, then cleaned up the planer marks with a hand planer and belt sander. We applied Watco Danish oil and let it soak in; the oil penetrates and hardens in the wood, rather than on the surface, and provides a good sealer.
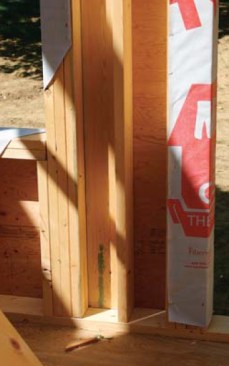

We balloon-framed the two-story walls with 18-foot-long 2x6s on 16-inch centers. Every 4 feet, we created snug-fitting post pocket, which we lined with 2-inch-thick EPS foam board to reduce thermal conductivity. We notched the posts top and bottom to fit around the plates, then stood them in the pockets. Pressed against the foam, the posts projected 5 3/4 inches proud of the studs — 5 inches after the 5/8-inch drywall and skim-coat plaster were installed. To pull the posts snugly against the foam, we first screwed them from outside, through the sheathing, with 4 1/2-inch TimberLok (800/518-3569, fastenmaster.com) screws, then nailed them through the studs on either side.
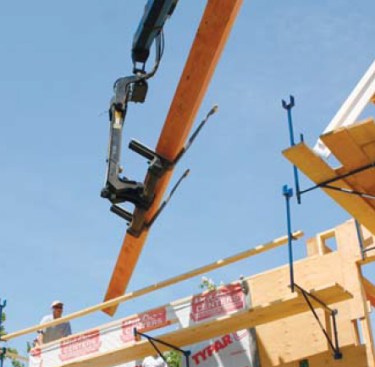
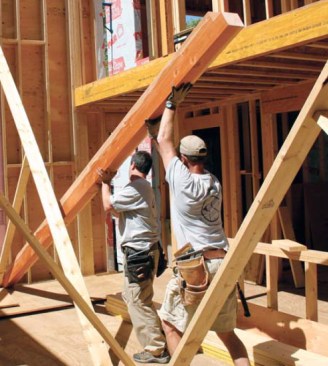
We brought in a boom truck from the lumberyard to hoist the collar ties onto the plates.. We fastened the ties to the plates with three 8-inch TimberLok screws, one angled in from each side and one angled through the end. I had made sure that the posts were a scant 1/16 inch taller than the plates so that the 24-foot collar ties would sit seamlessly on their tops.
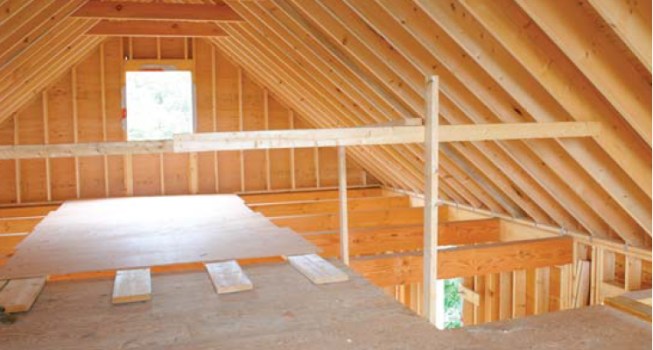
I cut the ties 3 inches shorter than the 24-foot span to allow for a 2×10 rim board across their ends. We filled in between the ties with 2-inch foam board, 1/2-inch plywood, and solid 2×10 blocking, then ran a double top plate across the top, ready for rafters.
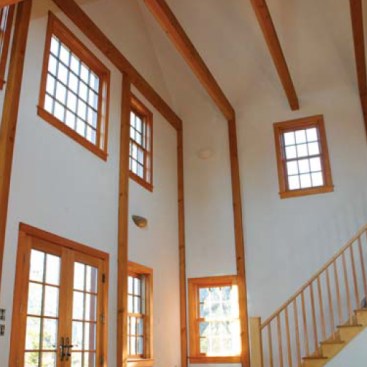
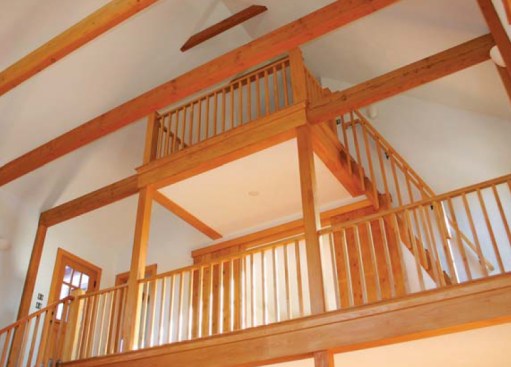
After framing the roof we added 3×8 Doug-fir collar ties on 4-foot centers, about 3 feet down from the ridge. We screwed them through the rafters with 4-inch TimberLoks. The plaster crew wrapped the posts and beams with protective paper as part of their work. The posts stand out strikingly against the rough-coat plaster and effectively evoke the look of the old house.


