In theory electric floor heat is not too hard to install, but we’ve found a number of ways to do it wrong. Here are some mistakes we’ve made, along with advice for doing the job right.
Read the Fantastic Manual
This is one task where the instruction manual is critical. One of our earliest failures was with an older type of system that required both ends of the wire to terminate in the control box. When the electricians showed up to install the control in the box, only one end of the wire was there, and we had already completed a beautiful, tiled bathroom with cabinets and fixtures sitting on the tile. That client chose a full refund of the cost of the floor heat rather than starting over with the floor.
Each system has its own particular installation details, and those details can change now and again too. It’s always worth a close look at the latest instructions. You can make the college intern do it if you don’t have the time!
Understand the proper coverage. Floor heat wires come in precut lengths that cover a certain amount of floor area. The actual square footage that needs to be warmed is smaller than the total floor area: manufacturers point out that there are areas that don’t need heat, such as within 8 inches of most walls and behind toilets and bathtubs. These are areas no one normally steps on. We can calculate the heated area without these spaces and order the next size up kit. The extra square feet of wire can be placed in these “optional” areas (shown in yellow in the illustration below).
Click to enlarge image below.

A persistent problem for us on remodeling jobs is ordering wire based on the square footage on the plans. Things change when we open up walls and floors, and the actual floor area may increase or shrink compared with what’s on the blueprints. For this reason we always measure the actual square footage of the room before ordering the heat kit.
We also have seen many problems with “mat”-type kits where the wires are pre-attached to a mesh. In theory, the mats are no more difficult to install, but in reality, people seem to frequently make basic errors like leaving cold gaps between sections or overlapping the wires where mats meet (a big no-no). I have seen lots of well-done mat installations, but running loose wire seems to result in fewer problems for us.
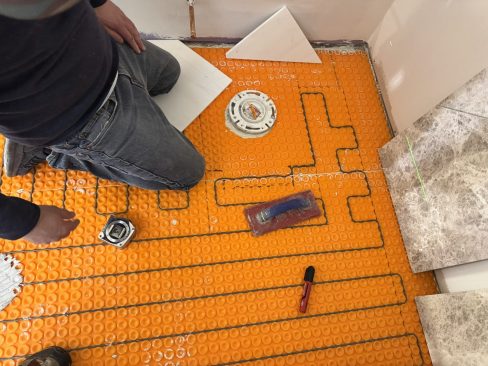
One of our biggest mistakes has been not adequately covering all the places where people actually put their feet. It turns out that people stand with their toes under the toekick space under a sink, almost touching the trim in front of the sink. We have found we need to mark out the exact toekick location and run wires as close to it as the manufacturer permits so there are no cold spots where people will stand.
Floor heating manufacturers don't want heating wire below built-ins, but they do need to go under the toe-kick of cabinets; otherwise, clients may complain.
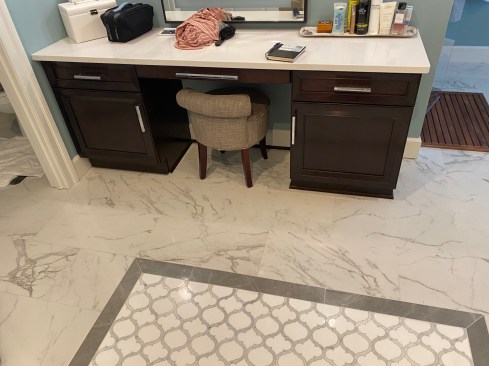
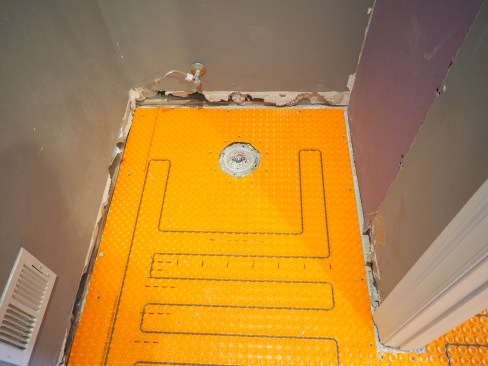
Doorways are another place where tile crews seem to want to omit the wire, creating a cold spot that clients notice later. Yet another is the “makeup desk” space in a cabinet run. The overhead plan view will show a straight line of countertop, and it’s easy to forget that below the desk area there is exposed floor that needs to be heated. We take extra time to lay out the cabinet location precisely and cover the whole exposed area to avoid complaints.
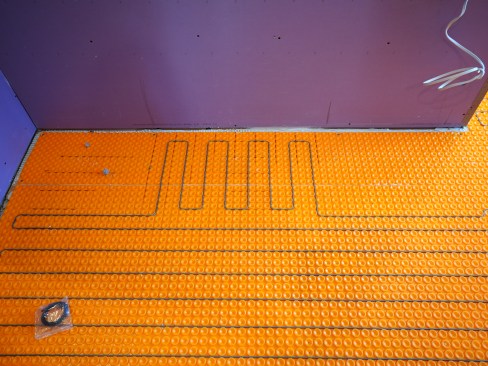
Layout markings on the orange mat show the exact cabinet footprint, so the tile crew was able to place wires close on all sides, including below the makeup desk.
Finally, keeping the wire close to bathtubs and the fronts of toilets takes some extra effort. We usually make a template we can place on the floor so the wires can be run close and the clients don’t end up with any cold spots. A heads up: The “cut sheets” we get for tubs and toilets often don’t show the exact size of the base; they just show the dimensions of the upper parts. So we try to ensure these fixtures are on site so we can get the actual base sizes.
Make Showers and Benches a Separate Zone
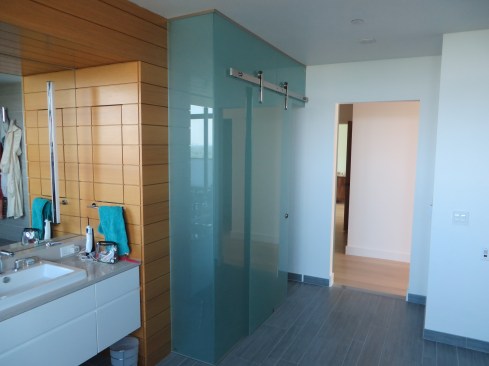
Wet areas need their own consideration. It’s certainly true that most people start a shower by running the hot water, so it doesn’t necessarily seem clear that the shower floor needs another heat source. But a warm floor will radiate onto the walls and glass and make the whole shower warmer and more comfortable, which is a noticeable improvement—especially in the very large showers people are choosing these days. Plus, heating the shower will help dry it out.
In recent years, our product reps have been suggesting we use a second, separate wire for the shower floor, since apparently the heating in this area experiences more problems and failures over time. Making this a separate zone means the shower floor heat could be abandoned down the road, if necessary, without affecting the heating in the rest of the bathroom. The reps have even suggested using a separate controller so it can be turned off most of the day and turned on when drying is desired (though sometimes I think they are getting paid by the number of thermostats they sell). Shower benches can be warmed too, and even the wall behind the bench, for the diehard heat lovers.
A couple of things to note: When crossing a curb, the wire needs to run right under the tile, rather than through a hole in the curb. It’s wise to meet the glass people ahead of time so this wire can be run somewhere they aren’t planning to drill for anchors. Also, the shower waterproofing has to go on top of the heat wire, so the wire goes in first. We usually use a single-layer-type waterproofing, rather than a bilevel drain with a thick mortar bed that takes a long time to heat up.
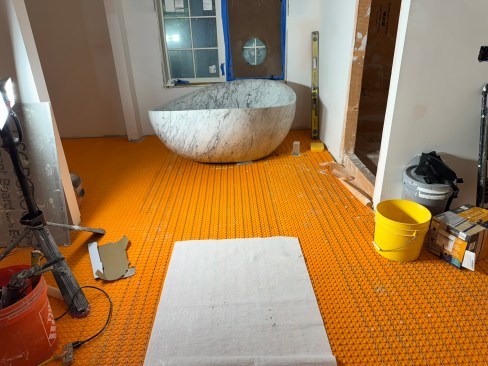
It’s best to have fixtures, such as this tub, on site when determining where to place heat wires. It can be difficult to determine the base size from the literature alone.
Heat wires should not be so close to a toilet drain that they me…
Correctly Locate Electrical Elements
Improperly placed controls, sensors, and connections can lead to customer frustration. Here are the main ones to pay attention to.
Thermostats typically mount close to eye level on a wall. In some designs, we try to hide them behind a door or in a closet, but remember that people do need to look at the display and press buttons, so don’t go crazy with concealing the location.
Sensors. All the systems we’ve used have hardwired temperature sensors that run from the floor up to the thermostat location. The sensor end needs to be buried halfway between two heat wires out in the floor, and this control wire can’t cross over any of the heat wires, so make sure you plan for this carefully. Some systems come with a second sensor that can be used in the future as a replacement: The sensors have a limited lifespan and replacing one that is buried in tile can be challenging (to say the least).
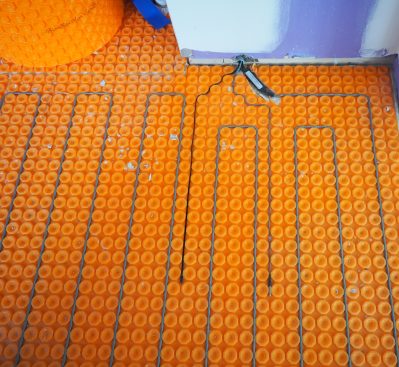
This photo shows how to arrange the black sensor wires between the heat wires, but the tips should have been centered between the heat wires. Note where the subfloor has been chiseled out (near wall where the wires enter the wall) to fit the cold lead.
We have created problems by putting sensors where air conditioning blows on them or in locations where thick rugs or bathmats go. Long story short, the wire layout should ensure that sensors are located so they won’t be compromised by other systems or customer behavior.
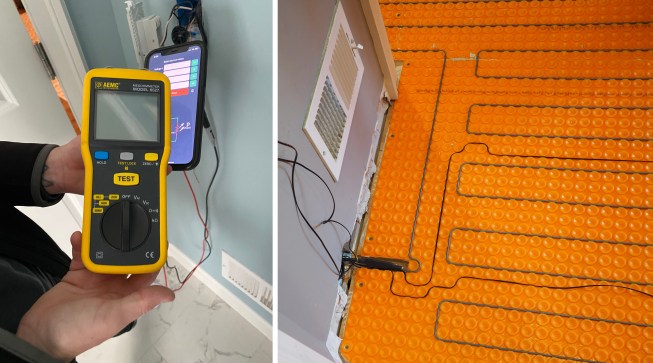
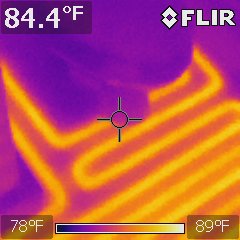
To diagnose temperature control problems, a Schluter rep tested the heat wire, sensors, and wire insulation with a megohmmeter. The problem turned out to be the air vent, which was warming the sensors all winter and cooling them all summer. This was fixed by changing the register to one that blows upwards.
Relays are needed when square footage gets large enough that one thermostat can’t handle the electrical power needed for the whole space. Typically, the thermostat is used to energize the relay, which then lets electricity flow into the wire (or wires) for the whole room. Although relays now come in relatively small and quiet versions, a regular relay is noisy and typically requires a large metal electrical enclosure, which we place in a nearby closet, basement, or utility space. A planning meeting with the tile and electrical contractors, and with someone who has read the manual (you, probably), will help sort it all out ahead of time.
Cold lead. Most heat wire is allowed to be run only under flooring, not under cabinets, fixtures, and so forth, and not within walls. There is a transition from the heat wire to the “cold lead”—an unheated wire section that runs up inside the wall to the thermostat or relay. The connection between the heat wire and the cold lead is usually a large, thick device and the subfloor has to be chiseled out to make room for it. It’s tempting to try to hide this device within the wall—we’ve had several tile guys try to do that—but the correct location is out under the floor.
Confirm the Tile Layout
We destroyed a floor once by trying to swap out a few pieces of limestone that the clients decided were the wrong shade. In the process of getting the limestone out the wire was cut in several places, and even the factory repair kit couldn’t fix it. Repairs void the warranty anyway. The takeaway—it’s best to have a 100% confirmed layout of the tile before setting it.
Prevent Random Drilling
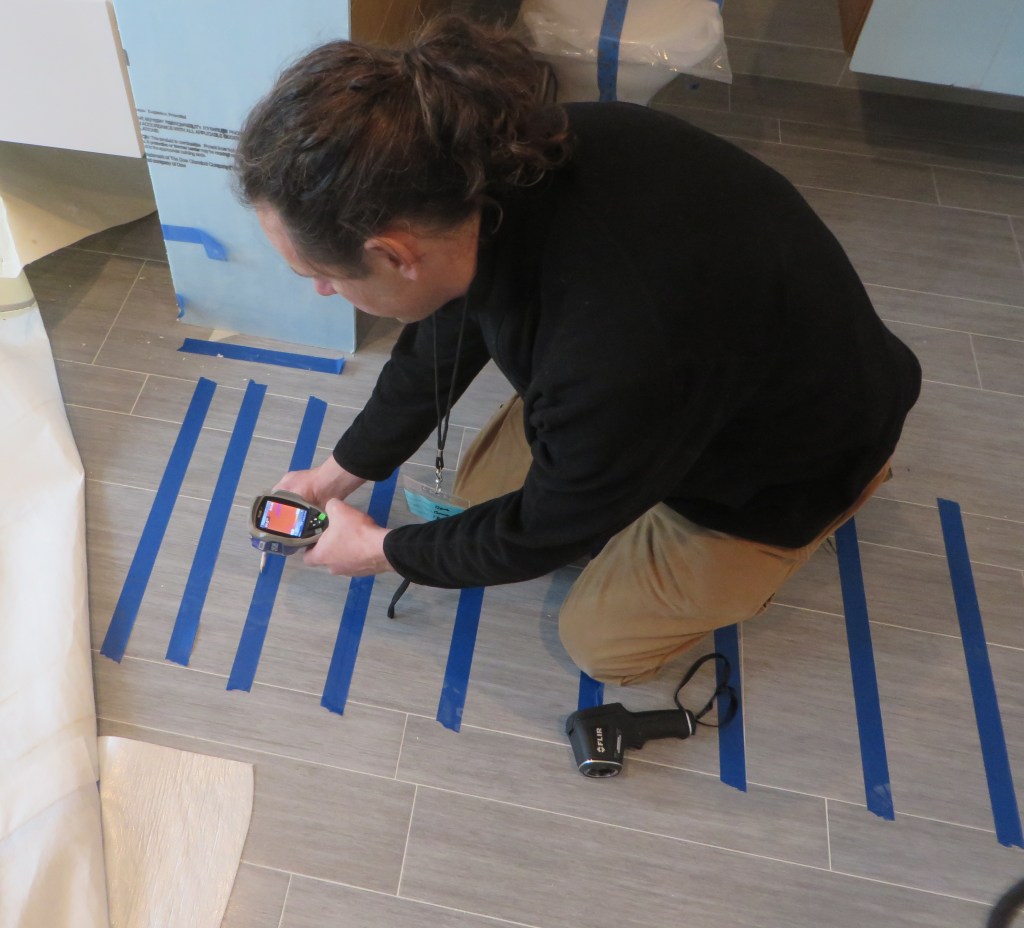
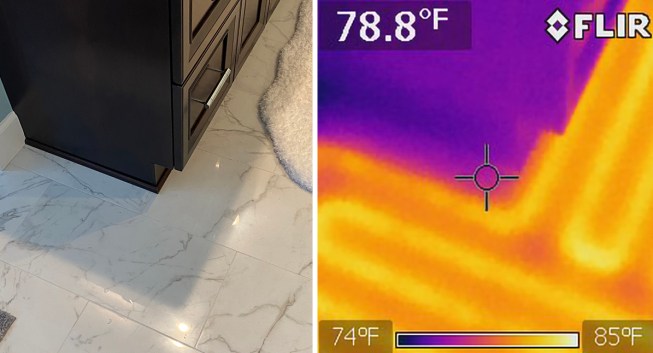
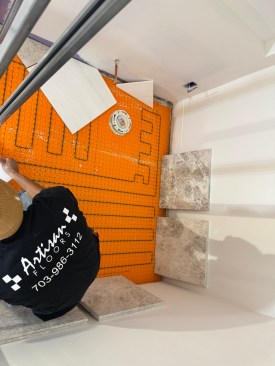
Over the years we’ve accidentally cut a number of wires while drilling for screws for shower glass or door bumpers. But since we bought an infrared camera, we now can very easily see where the wires run under the tile. We just have to let everyone know to not randomly drill into the heated floor. We started making signs that we post on heated floor projects, and at least one heat wire company now sends stickers with each kit that can be put on the door. I’m sure we haven’t seen the end of this problem, but we’ve gotten a lot better. If you can just keep the glass company from drilling without first checking the wire location, you’re probably good.
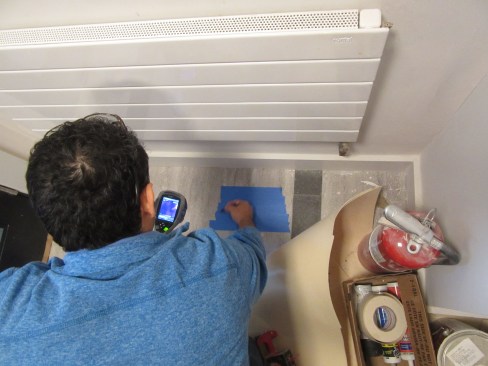
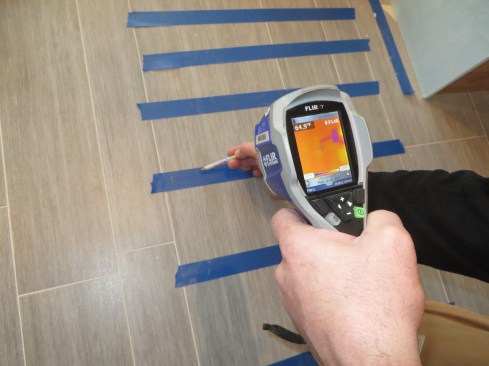
To locate a floor-mounted door stop, a crew member uses an infra…
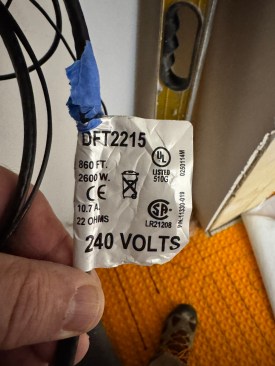
If any trouble comes up, having this label will help with diagnostic testing, finding support from the manufacturer, or checking for recalls.
Check for Wire Nicks
It’s a little too easy to nick the insulation on the heat wire, which can lead to ground-fault-circuit-breaker trips down the road. The best prevention is to test the wire with a megohmmeter before, during, and after the wire and tile installation. I also recommend testing the wire continuity and resistance to make sure no one snipped it off by accident and then hid it. (Ask me how I know.)
Some manufacturers make an alarm device that clamps to the wire end and goes off if serious damage occurs. The alarm can’t hurt, but such catastrophic damage is unusual, so manual testing is also recommended. Most wires also come with an info label that should be saved, ideally taped to the end of the wire in the thermostat junction box. It lists the manufacturer and key electrical info, including the resistance of the uncut wire, which is useful for future troubleshooting.


