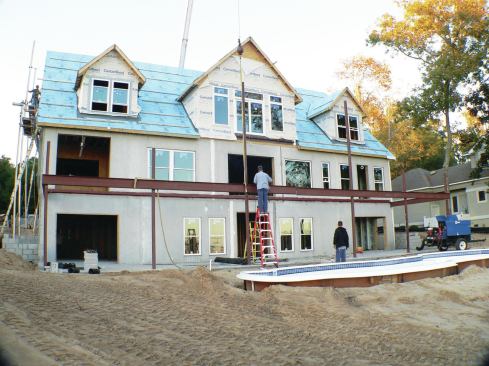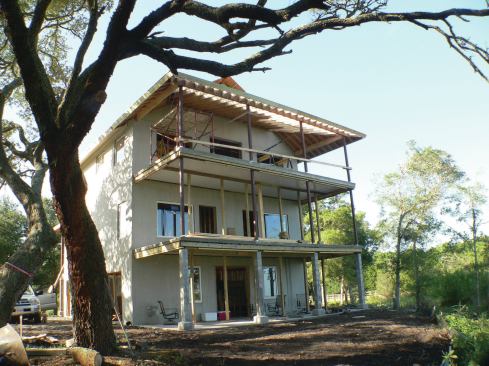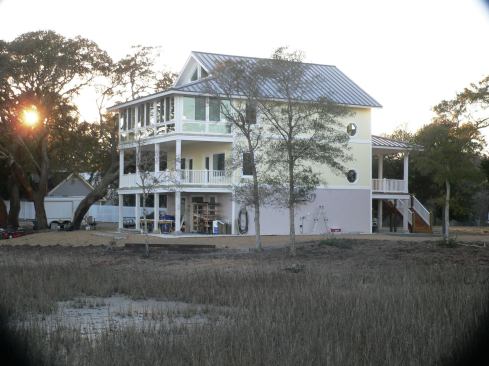
Several years ago, my company started building hurricane- and disaster-resistant homes in coastal North Carolina. We were already using Superior Walls precast insulated concrete panels instead of traditional wood framing for the exterior walls, but we also wanted to reduce the amount of wood used elsewhere on the exterior, if possible. For fully enjoying coastal living, however, large porches and decks—traditionally made of treated-wood components—are a must-have. Our challenge was to find an alternative porch and deck design that would be cost-competitive with wood without having wood’s drawbacks in our harsh coastal environment.
Because we were already building with concrete for our wall systems, it seemed logical to look for a concrete solution for our porches and decks. My research led to Versa-Dek, a steel pan system with a dovetail design that allows for clear spans of up to 20 feet or more. The pans are used to support a thin slab of poured-in-place concrete, allowing us to build decks that are inherently waterproof below, essentially maintenance free, readily adaptable to a variety of finish materials, immune to fire, and resistant to wind forces beyond a Category 3 hurricane (see Resisting the Elements, sidebar).
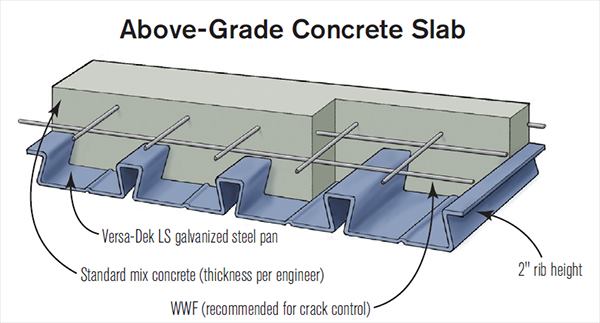
Versa-Dek Pan System
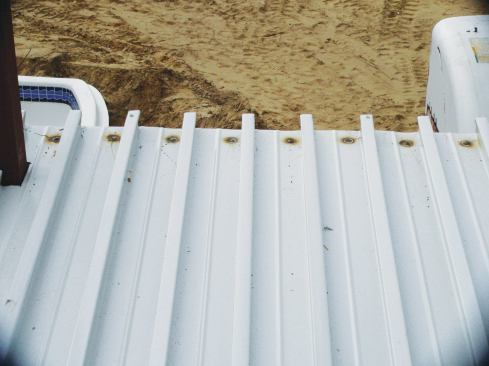
Versa-Dek is basically a commercial product designed for sport-stadium roofs and similar projects, though we’ve used its Composite S structural floor deck pans on several recent residential projects. The galvanized panels—which are about 24 inches wide and come in different steel gauges, or thicknesses (depending on expected loads)—are strengthened by their 2-inch-deep dovetail ribs; for this pan design to fail, the dovetails would need to fold in onto themselves. The cured concrete surrounding the dovetails helps to prevent this, thus adding to the strength of the slab (see illustration, right). I work closely with a Versa-Dek sales rep named Josh Sansbury, who is familiar with residential construction and helps with installation details and with specifying and ordering the panels.
The panels are supported by a steel frame. Most deck builders probably aren’t familiar with steel framing, but the design specs are easy to derive, and any engineer should be able to provide the necessary details. Because the supporting structure that we use is steel, an engineer’s letter is required in our jurisdiction anyway.
Steel Frame
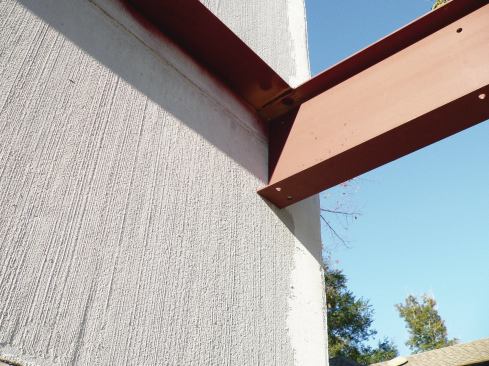
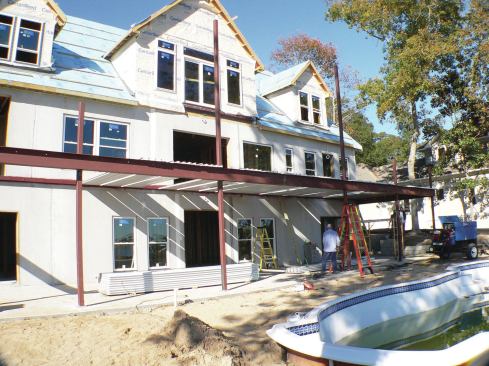
A porch that we recently built offers a good look at how the system works. We started with a simple rectangular steel frame, with I-beams along the open sides and angle steel along the building side. Along the house, we through-bolted 5-inch-by-5-inch-by-1/4-inch steel angle into our concrete walls with ½-inch-diameter galvanized bolts 2 feet on-center. We’ve also used the same approach with stick-framed walls, though we first install blocking behind the rim joists at the floor level.
We support the outside edges of the porch with steel framing specified by our engineer, typically W8x10 steel I-beams. The two ends are not fully load-bearing, so lighter beams could be used here, but for consistency in trimming out, we keep them the same size. Again, an engineer would need to provide the specs for your particular porch.
The outer I-beam is supported with 4-inch-by-4-inch-by-1/4-inch steel columns spaced evenly approximately 10 feet on-center. The column bases rest on shop-welded 12-by-12-inch plates that have four corner holes for anchoring either to a structurally-reinforced concrete slab or to footings.
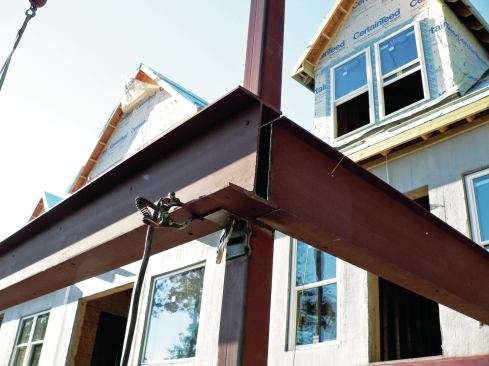
When the steel columns are tall and support multiple deck levels, we typically hire a small crane to stand them vertically while we install bracing and the beams. Often, though, the I-beams are fairly light and can be staged using simple block-and-tackle rigging, which allows us to site-weld angle clips to the columns. We have access to a welder who makes the connections for us on site for $200, though an engineered bolting attachment could also be used here in lieu of welding.
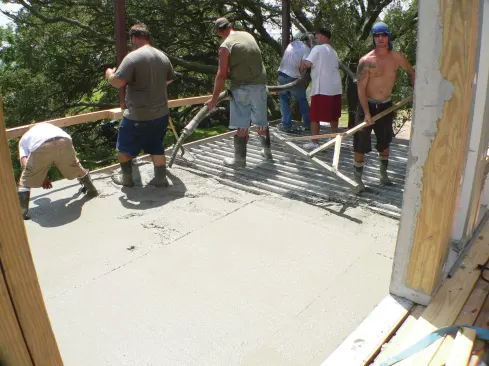
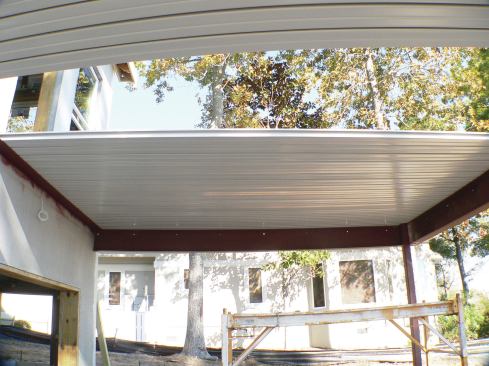
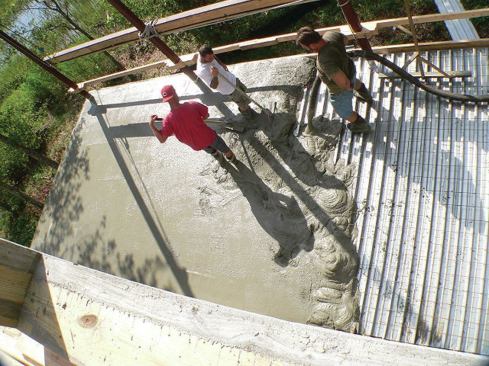
Once the steel outer frame is positioned and welded in place, we carefully lift the Versa-Dek panels up and place them on top of it. While one man can handle a 12-foot panel, it is much easier to avoid scratching or damaging the bottoms of the panels—which become a finished ceiling—with a two-man crew. The panels overlap each other along their edges much like metal roofing, so once all the panels are laid in place, we use sheet-metal screws to connect the panels to each other. Finally, we fasten the panels to the steel frame either by puddle-welding or with self-tapping metal screws.
Prior to pouring concrete, we place PVC electrical conduit on top of the panels where needed for any deck-light and porch-fan wiring. Usually this also means boring a hole through the 5×5 steel angle attached to the house, to provide a chase for the conduit.
Concrete
Around the deck’s perimeter, the open edges need to be formed up to the concrete thickness specified by the engineer—typically 4 inches for most of our projects. We nail or screw our concrete forms into wood packing that we’ve bolted through holes punched in the I-beam webs 2 feet on-center. The packing can be whatever material you choose, such as treated 2×8, and will ultimately also be used to fasten the trim to the deck (see illustration, above).
The forms can be simple strips of OSB or plywood. To provide a good exposed concrete edge for adding tile, we have placed a 2×4 spacer down from the top of the pour and then fastened our OSB to it as the pour stop. This leaves a 1 1/2-inch-wide concrete extension beyond the support girders for material wrapping the girder to nest up under.
Because the pans alone cannot support the weight of the uncured concrete, shoring is required prior to the concrete pour. We use 4×4 SYP treated posts spaced about 5 feet apart with at least one 2×6 or 2×8 SYP on edge fastened up against the bottom of the Versa-Dek floor pans as a temporary girder. If the deck pour is more than 4 inches thick or the posts are more than 9 feet tall, we add cross-bracing between the posts as stiffeners to prevent bowing and failure of the shoring.
It is imperative that the temporary girder be adequately fastened to the shoring posts in order to support the weight of the wet concrete as it’s pumped into place. This connection can be with bolts or nails, but for peace of mind we also nail full-height 2x4s to the posts—like jack studs—to help support the temporary girder. The ends of the girder can rest on the bottom flanges of the steel I-beams at each end of the porch. A shoring failure is not a pretty sight, so it’s critical to make sure the girder is adequately supported. After 21 to 28 days, the concrete should be cured sufficiently to remove the shoring.
Trim
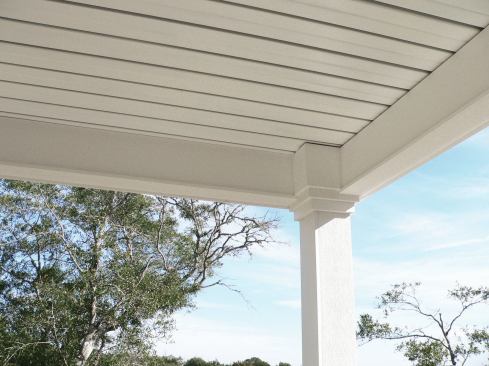
The panels come with a painted finish, which can be specified when you place your order. This gives the underside of the deck a beautiful 2×6 look, with no ledges for birds to build nests on.
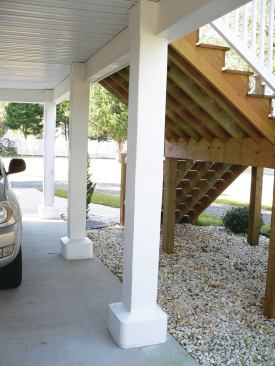
Wrapping columns and beams is a design choice. The house shown here is in a floodplain, so we chose 8-by-8-inch CMUs to wrap our lower-level columns, using a street-saw to cut them in half first, and then mortaring them around the columns. Afterward we applied a stucco finish coat. For the upper columns, we simply packed the steel with 2×4 blocking and nailed 1×8 PVC trim boards around each one. We wrapped the top I-beams supporting the porch edges using Miratec trim boards.
Even when our steel columns aren’t supporting a structure overhead, we still extend them through the slab so they can be finished with PVC column wraps and used as guard posts. For mid-span railing support, we use post kits (see “Guardrail Post Kits,” Sep/Oct 2014) with a base-plate that can be anchored directly to the slab with concrete screws.
Once installed, the concrete slab is ready for tile—the most durable and cost-effective deck surface, in my opinion—with minimal prep. Other slab finish options include paint (the least expensive choice) or a stamped or stained surface to imitate stone or virtually any other material, including wood decking (for more on coatings and stamped concrete, see “Getting Into Hardscaping“).