Doug Woodside
I saw my first acrylic patio cover at the Portland, Ore., JLC Live show in 2004, where I was on the lookout for add-on products for my outdoor-living business. There I spoke with representatives of American Patio Covers and gave their system a closer inspection. It seemed like a perfect fit: durable, low-maintenance, and aesthetically pleasing, as well as being something that my carpenters could easily install (with proper training). It also occupied a niche that had plenty of room for growth.
Once back home in the rainy Seattle area, I walked around pointing at home after home, saying to myself, “They need one, they need one, they need one … they just don’t know it yet.” Ten years later, I can say with confidence that installing patio covers has been a good business for me. While the margins work well, probably the greatest benefit is creating the new outdoor spaces for my clients; I can’t tell you how many times I’ve seen huge smiles on their faces when they experience life under the cover for the first time.
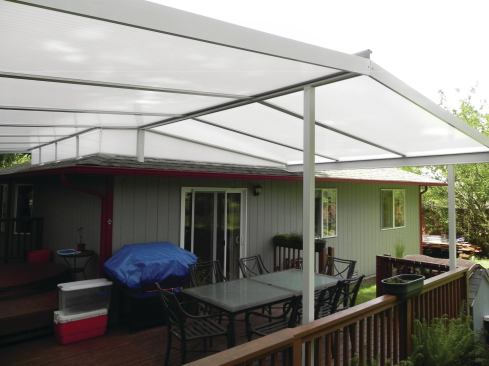
What are the benefits of a patio cover? No more harmful UV rays, no more being rained on when grilling a steak, and no more cleaning the patio furniture every time someone wants to sit down, to name just a few. A deck becomes a much more comfortable place to enjoy the day or evening. In this article, I’ll describe the design and installation of a patio cover that we built in 2014.
Design and Layout
Patio covers that have a simple shed-style roof are the easiest to design and install, but the system I use can easily be adapted to build gable-style roofs too; this project combined the two. I ordered the aluminum framing and acrylic panels from Acrylic Patio Covers Direct, the company that I order all of my kits from.
Information I supply on a typical order includes the cover’s width and projection (total length of the roof panels, including overhangs), the color of the framing, and the color of the impact-resistant acrylic glazing. In addition, I describe how the cover will attach to the house and note any unusual site conditions.
Patio covers are addressed in Appendix H of the 2012 IRC, and in many cases, a building permit isn’t required to build one. I consult an engineering guide when I’m specifying I-beam sizing and determining T-bar spacing for unusual projects or high wind- or snow-load conditions, but generally I leave the structural design up to my supplier’s online support team.
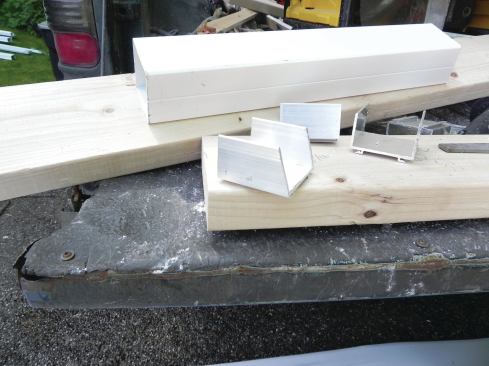
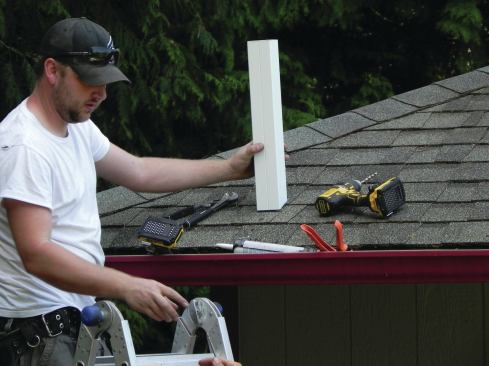
Most of the components are prefabricated at the manufacturer and shipped directly to the jobsite, including the I-beams, T-bars, and T-bar caps, which have all been cut to length. On the jobsite, we cut the posts, hanging rail, and side fascia to length, using a 12-inch chop saw with a non-ferrous metal blade. The acrylic panels also come cut to length, with the terminal bars and F-channels that are used to cap the panel ends already installed. If necessary, however, the end caps can be removed and reinstalled, and the panels can be trimmed on site.
Frame Installation
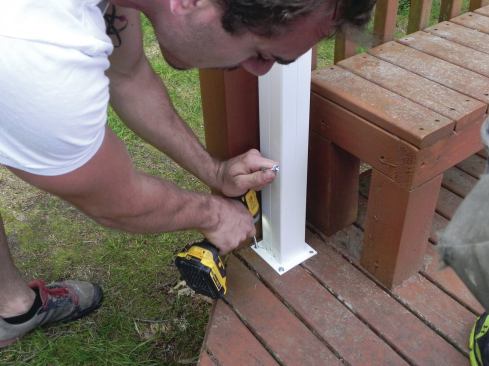
Each site has structural issues that need to be taken into account. For example, the 2 3/4-inch-by-2 3/4 -inch aluminum columns we used to support the I-beams at the outside perimeter of the deck can be fastened directly to the decking, provided that the framing below is adequate and reinforced with blocking as needed, for both structural support and solid hold-down attachment. In our area, which has no frost, the columns can be fastened directly to a slab on grade, too, though the manufacturer recommends a minimum slab thickness of 3 1/2 inches. In areas with higher design wind speeds, we fasten the post bases to the posts with three self-tapping Tek screws per side, rather than the standard two.
On this project, one of the deck’s corners was clipped at a 45-degree angle. This meant that one of the support columns needed to be located off the deck and supported by its own buried concrete footing. To counter uplift, we embedded the base of the aluminum column in concrete, installing a pair of stainless steel through-bolts at right angles through the bottom of the column before pouring the concrete into the hole.
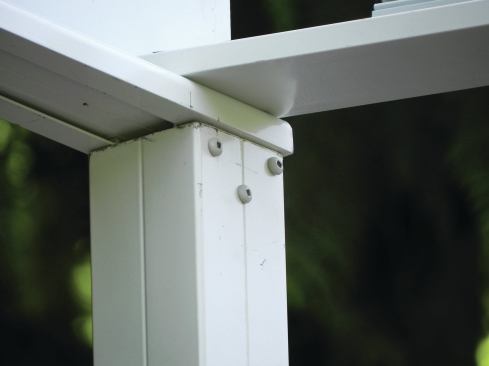
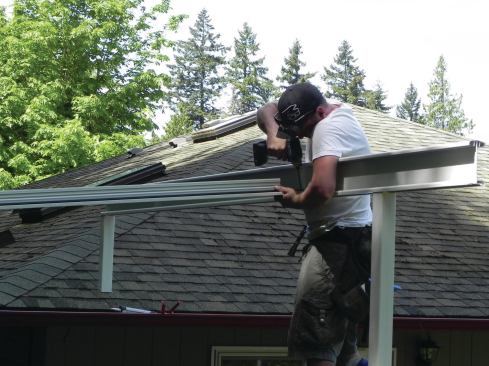
I-beams. To connect the columns to the beams, the column tops are fitted with post-top shoes. These have an H-shaped profile that fits around corresponding legs extruded into the bottom of the I-beam, so the shoes must be slid onto the beam in their approximate position before the beam is lifted into place.
At this point, the shoes are adjustable, and the beam is much lighter than comparable wood framing, so installation is a breeze. We simply place the beam so that the shoes drop into the columns, then adjust each column to plumb. The shoes aren’t screwed to either the columns or the beams yet, so we can make final adjustments before fastening the assembly together. We do this by driving Tek screws down through the bottom flange of the beam into each shoe. Finally, we screw the tops of the columns to the shoes, using pairs of Tek screws (again, three screws in high-wind zones) on each side of the columns. The beam is now locked in place.
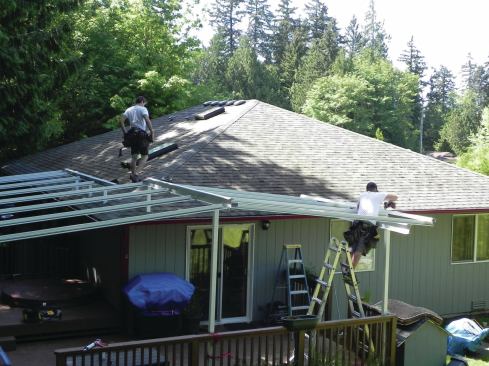
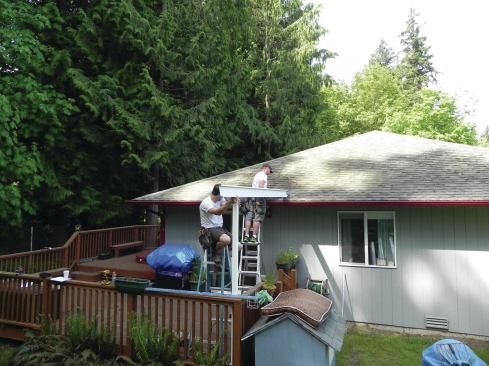
House attachment. A patio cover can be attached to the wall of a house or to a fascia, or it can even be freestanding. On this project, the cover needed to be attached to the roof in order to provide adequate headroom and enough slope for the acrylic panels to drain properly (they require at least ¼ inch per foot of pitch).
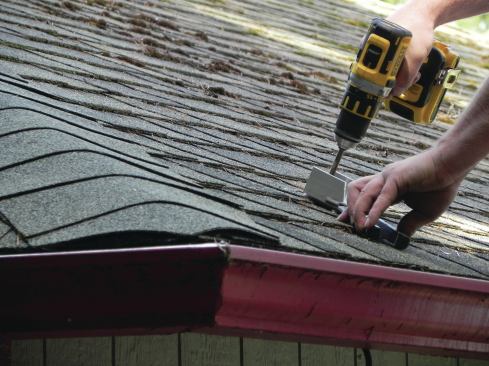
To hold up the gabled portion of the cover, we installed a center-ridge I-beam supported by a deck-mounted column at one end and by a roof-mounted post at the other. The ridge post was screwed to a shoe that we lag-bolted through the roofing into the framing. While not required on this project, the framing could also be supported by wood posts or by SkyLift roof-riser hardware that bears directly on a wall plate or other structural member inside the house when higher roof loads are anticipated.
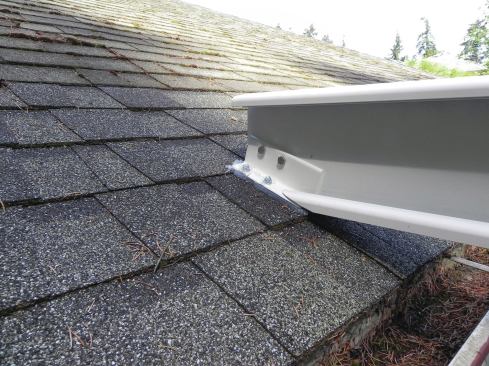
To support one of the lower sides of the gable roof, we installed an I-beam that bears directly on the roof (rather than on a roof-mounted post). First, we determined the exact roof pitch, then trimmed the bottom of one end of the beam to match the slope of the roof. We added an L-shaped mounting bracket to the beam that we then bolted directly to the roof framing, using plenty of sealant around the lag bolts. Because this roof had an open soffit, we could easily retrofit it with blocking as needed, though in other cases it may be necessary to make these attachments—which carry a point load—directly to framing.
T-bars. While we hung the gable-roof “rafters”—the T-bar roof framing channels that support the glazing—from the ridge beam, we attached the shed-roof T-bars to what is called a hanging rail, a versatile profile that we also use when attaching a cover directly to a wall or fascia. It’s not as strong as an I-beam, however, so we needed to support it with multiple roof posts.
Gutters and side fascia that are included in the kit and supplied by the manufacturer complete the framing.
Acrylic Panels
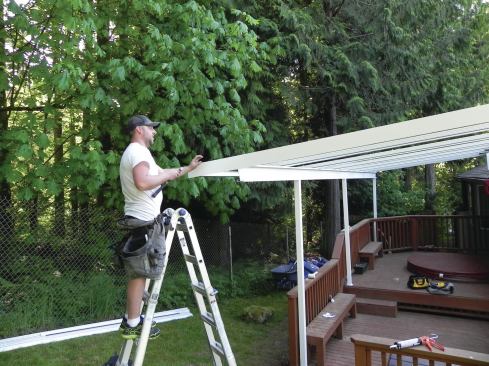
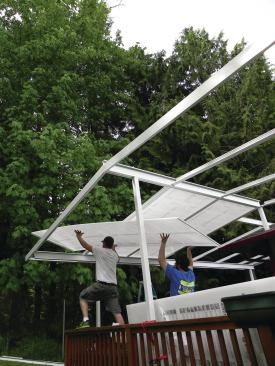
Originally designed for the greenhouse industry, the impact-resistant 16-mm (almost 5/8-inch-thick) double-wall acrylic panels are strong enough to walk on. They’re cut to length at the factory and shipped with a protective plastic sheeting on both sides, which we remove during installation. They can be scratched, so we’re careful when handling them—especially when they’re wet, because the “No-Drip” coating on the top side makes them very slick (the coating allows dirt to wash off easily in the rain). They’re available in lengths up to 24 feet; the longest we’ve ever installed is 16 feet. Even at that length, they’re light enough to be handled by one person, though two workers are better, especially in the wind.
Clear, bronze, and cool blue “heatstop” panels (for hot climates) are available, but the most popular tint with our customers is called solar cool white. These panels are comfortable on sunny days, while on cloudy days they capture available daylight like a diffuser, bringing soft, filtered light into the home even when it’s raining. In the evening, they reflect light back into the outdoor space, creating a very comfortable environment. They’re also effective at hiding dirt and pollen.
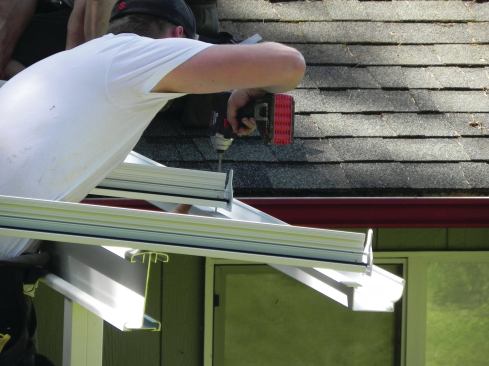
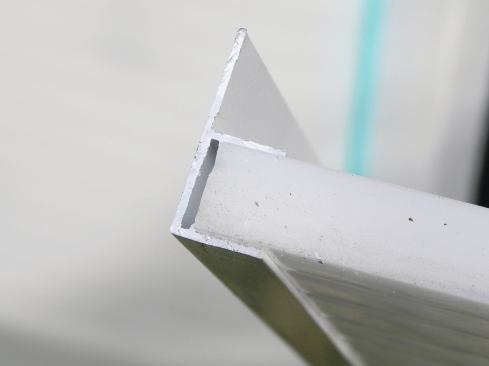
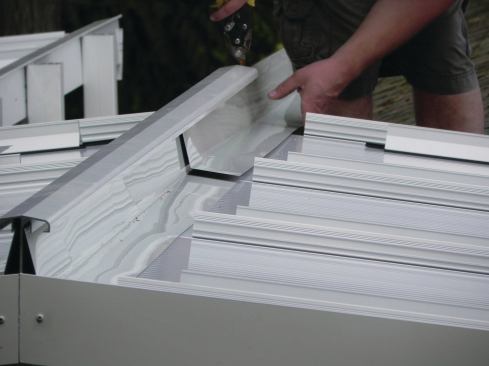
When installed, the panels lie against continuous gaskets in the T-bars and butt up against caps that are screwed to the ends of the T-bars. The F-channel that terminates the bottom of each panel diverts water into the gutters that hang off the lower ends of the T-bars.
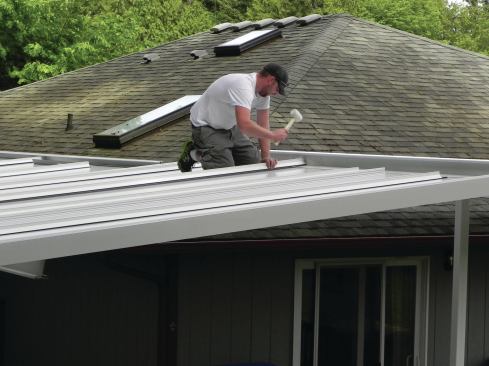
L-flashing covers the top edge of the panels and tucks up into slots that are part of the I-beam or hanging rail extrusions. Once we’ve installed the flashing, we install the pyramid-shaped T-bar caps. These have gaskets on both legs and snap down over the T-bars with a few blows from a rubber mallet.
Fill panels are needed for roof-mounted covers to prevent rain from bouncing off the roof and draining onto the deck. We hold the bottom of the fill panels about two inches above the roof surface to allow rain and melting snow to drain off the roof and into the gutters. If leaves or debris accumulate, the panels can be easily removed for cleaning.
Cost
The price of a basic 10-by-10-foot patio cover kit in a standard aluminum color is $1,700, which doesn’t include delivery. I’m currently charging my clients between $26 and $39 per square foot installed, depending on the options they choose and the design of the cover. Gable-style patio covers typically cost about 10% more than shed-style covers. The total cost for the project shown in this article was $12,200.
Doug Woodside is a general contractor who owns Decks and Patio Covers (decksandpatiocovers.com), in Kingston, Wash.


