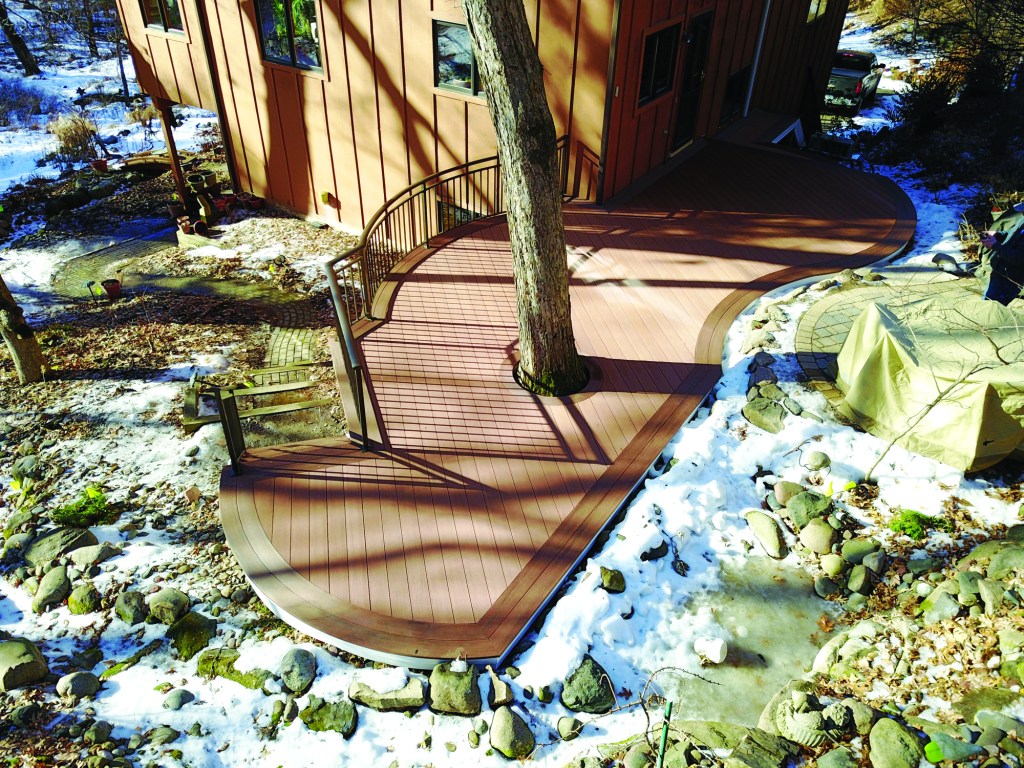
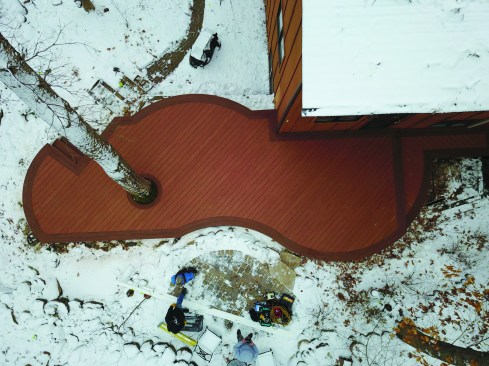
I often tag-team with a landscaper buddy of mine who called last year saying that he wanted to introduce me to his clients. They were an older couple who wanted to replace their old redwood deck with one that would require a lot less maintenance. Because they were flexible on the overall design of the deck, I was able to take advantage of the home’s unique setting as I figured out the sizing and placement of the deck and how it would relate to the layout of the hardscaping.
The home was located on a sloped site and surrounded by woods, with a prominent tree—that the homeowners wanted to preserve—right next to the house. The new hardscaping was designed to complement work that had already been done on the property and featured a lot of organic shapes. I wanted the deck design to work with that, so I designed the deck with curves rather than as a rectangular shape with sharp corners. And to help it feel like a part of the landscape, I wanted the deck to wrap around that tree.
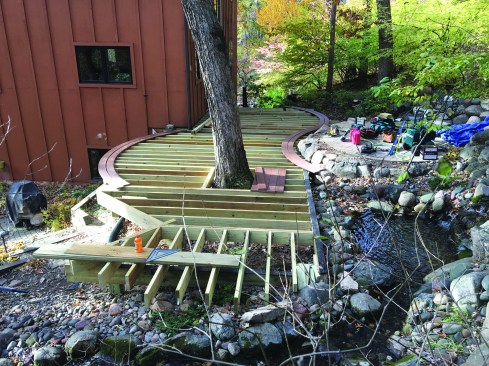
The author installed cantilevered joists over dropped beams, running the joists long.
Foundation and Framing
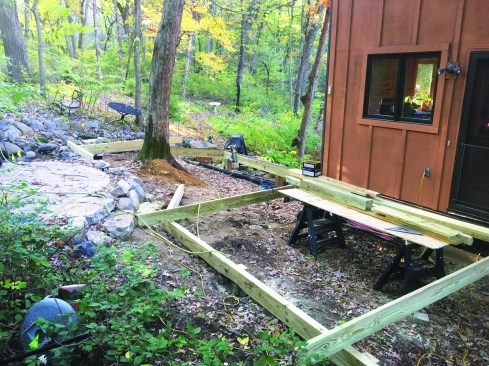
When we removed the old deck, we discovered that the existing ledger had a number of problems that had led to significant rot in the home’s sheathing and framing. Before we could start framing the new deck, we had to remove the old ledger and repair the damage. Fortunately, we found that the old deck footings were sound and could be reused. While we still had to pour a handful of new footings, this saved us quite a bit of time digging down into the site’s rocky soil, especially considering frost depth here is 42 inches.
The site slopes down toward the back of the house where the deck is located, so we needed to keep the framing close to the ground. At the same time, we needed to be able to cantilever the joists over dropped beams in order to create the curves. This resulted in a series of double 2×10 dropped beams to support 2×8 joists, which we installed 12 inches on-center.
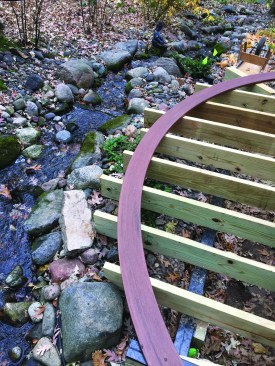
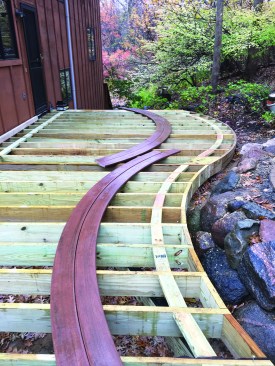
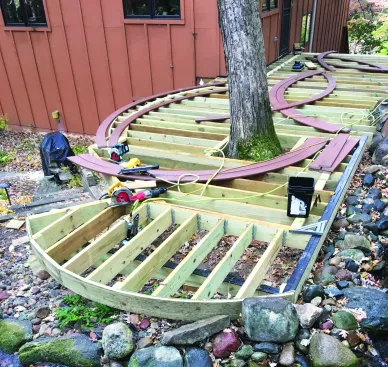
Then he layed his heat-formed borders over the joists to define the curves.
After the joists were marked and cut to length, workers installed blocking as needed.
Curved Details
Our usual approach when incorporating a curved detail into one of our decks is to first mathematically calculate the radius of the curve, then heat-form decking to that radius in our shop for a picture-frame border. We bring the curved lengths of decking to the jobsite to use as templates, laying them out across the cantilevered—but uncut—joists and tracing the curves right in place. Then we cut the joists to length, adjusting the cut line to account for the thickness of our rim joist and fascia and for the amount of overhang desired.
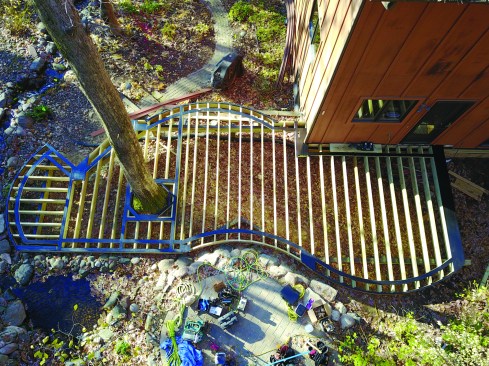
They framed the opening around the tree trunk.
Usually, we build up the rim joist out of three layers of 1/2-inch PT plywood ripped to the width of our framing. To strengthen the assembly, we use plenty of PL construction adhesive between layers, and staple the plies together as well as fastening them to the joists. This is the detail we used on most of the curved deck sections.
Part of this deck curves around a hardscape feature, however. There, we simply installed infill blocking between the joists to create the concave curved rim. Because the edge of the deck is actually in contact with the ground and the loose stone wall surrounding the patio, there was no need to finish this section of the deck with fascia.
We also needed to frame a square opening around the trunk of the tree, allowing plenty of clearance for growth. Then we filled in the corners to create an octagonal frame to support a circular deck detail planned for the opening.
After installing flat blocking around the perimeter of the deck to support the curving picture-frame detail, we covered the tops of the joists and blocking with G-Tape SAF tape. We’ve tried many different flashing tapes, but G-Tape performs well in our climate, with great adhesion even in cold weather.
Where the curved edge would receive fascia trim, the author built up the rim joist with three layers of 1/2-inch PT plywood ripped to width.
Decking Installation
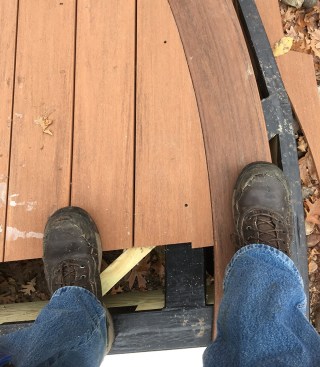
We installed the field decking on the diagonal using ConceaLoc hidden fastener clips. We ran the decking long so that it overlapped the area around the perimeter where we planned to install the picture-frame border.
The crew flashed the top surfaces of the framing.
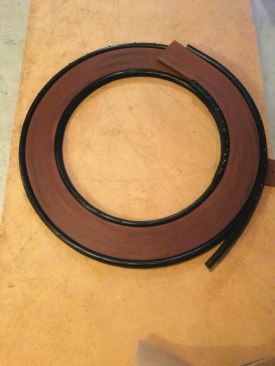
As I mentioned above, we had heat-formed the curved picture-frame decking in our shop prior to framing. To do this, we laid down several sheets of 3⁄4-inch MDF onto the shop floor and drew out the desired radius, which we had calculated based on the deck’s field-verified dimensions. Then, using fine-thread drywall screws, we fastened 3⁄4-inch-by-1-inch PVC strips to the MDF, following the curves that we’d laid out. We’ve found that this size of PVC ripping bends smoothly and easily to most of the radii that we work with. Because the picture-frame border consists of two rows of decking, we formed both the inner and outer rows in the same double-wide form.
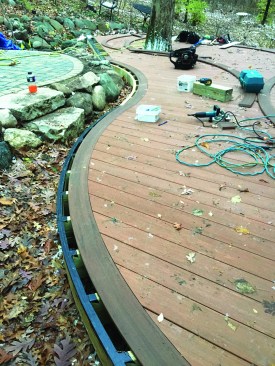
Then they installed the field decking with hidden fasteners, tracing the curved border onto the decking and cutting it in place.
The PVC decking that we used on this project—Azek Vintage (cyprus for the field color and mahogany for the perimeter)—is pretty easy to work with when forming curves once it has been heated to the right temperature with HeatCon heating blankets. And after the decking cools down and has been removed from the form, it retains its new shape.

A track saw was used to trim straight sections of decking.
Biscuit joinery came in handy where a little extra board width was required.
Forming the circular decking border to fit around the tree well was a little more challenging. Because of the circle’s 16-inch inner radius, we couldn’t use our PVC strips to create the form. Instead, we screwed down 1-inch black polyethylene irrigation pipe to form the inner and outer circumferences of the circle. The black plastic pipe had the right combination of flexibility and rigidity to conform to the circle without deflecting and creating flat spots, making it a simple matter to form a perfect 32-inch-diameter circle with the decking.

The author screwed black plastic pipe to MDF backing.
This made the form for the 16-inch-diameter trim ring around the tree well.
After the field decking was installed, we placed the curved sections of the border that we had formed at our shop over the decking and traced the outline. We used a straightedge to mark the straight sections of the border.
Cutting in the border. On the straight sections of the deck, we cut to the line with a track saw, and we used a cordless 6 1/2-inch circular saw with a Diablo blade to cut the curved sections. To keep from cutting through the flashing tape on the framing, we set the saw’s depth of cut so that it was about 1⁄16 inch shallower than the thickness of the decking, then broke away the cut end of the deck board and cleaned up as needed with a multi-tool.
Around the tree trunk, though, we had to use a router to cut the tight radius. As with the perimeter border, we had used the actual circular border formed in our shop to mark the decking. Then we made a plywood jig that wrapped around the outside edge of the cut, offset by the distance between the router base and the cutting edge of the bit. We made the cut in a couple of passes, again not cutting all the way through the decking to avoid damage to the membrane.
We used the Cortex screw-and-plug system to install the borders. At the mitered corners, we wanted to make sure the joints didn’t open up, so we reinforced the joints with PVC biscuits and glued the miters together with Azek’s proprietary fast-cure PVC adhesive.
Finishes
To finish up, we installed a custom-fabricated powder-coated-aluminum railing from Railcraft, a Canadian supplier. We like this particular railing because we can get the panels bent to our specified radius, and we can fit the assembly with a continuous top rail that has a graspable profile, which our building inspector likes. The railing is a surface-mount system, so we’re careful to install blocking wherever the rail posts are lag-bolted to the framing.
Photos by Mark King


